|
|
| Home | Marine Aquariums |
Freshwater Aquariums |
Planted Aquariums |
Brackish Systems |
Ponds,
lakes & fountains |
Turtles & Amphibians |
Aquatic Business |
Aquatic Science |
Ask the WWM Crew a Question |
| Please visit our Sponsors | ||||
For less than $75, this simple addition to your
cleaning routine will help remove more debris from your
aquarium. All 'good' aquarium
keepers know you need to clean your tank and perform partial water
changes on a regular basis. One of the more common methods is to
use a gravel vacuum to clean the gravel and remove some of the water.
This does a good job cleaning and helps with the water change.
But what do you do about areas you can't reach because of delicate
plant matter and how do you clean the finer medium that the plants like
to grow in without sucking it up? Another common method for periodic
cleaning that I learned from a local pet store is to attach a separate
aquarium filter on the side of the aquarium to filter any debris you
stir up from the bottom. I tried this method at home but found that the
hang-on filter just didn't do a very good job; I thought there must
be something better. An external canister filter seemed the most likely
device to work, but cost and awkwardness of use stopped me. These
are great filters as a permanent addition for a single aquarium but the
floppy hoses and potential for spills was a concern. Caution This filter is not intended to replace or extend
regular water changes. Its only purpose is to help with removing
debris from areas that are hard to reach with the gravel vacuum.
The idea As a homeowner with a well system for water, I am
very familiar with filtering water for home use. While changing
the cartridge on my whole house water filter, I wondered if one of
these filters could be adapted for aquarium cleaning. Since I had
recently upgraded my filter system on my well, I used the old one to
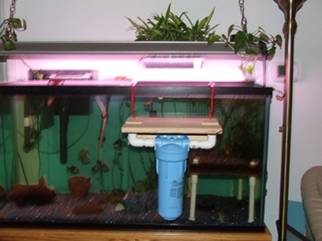
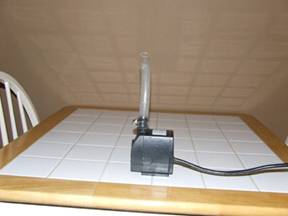
experiment. The filter After some experimentation, the setup has the
filter housing mounted on a board for stability and to aid in changing
the cartridge. Two vinyl coated hooks attached to the board allow
the whole setup to hang on the tank. To move the water through
the filter I use a small pond pump and PVC pipe. Local availability Everything needed to construct the device as well
as the filter cartridges can be found locally. The filter housing and
cartridges I used are listed below and are very common. You do
not need to use the exact brand or type that I use but make sure you
price out the filter cartridges before beginning. The cartridges
I use cost between $1 and $5. Some other types, like the quick
change filter that fits under the sink or a refrigerator, use
cartridges that cost up to $30 each. Version 1.0 My first design had just the filter housing with
the PVC pipes glued together and the pump attached to the input end of
the pipe. I quickly learned that the filter requires
support and effort to change and I didn't trust the PVC pipe to
hold the whole setup on the tank (sorry, no pictures of it).
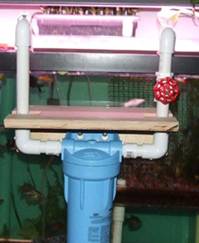
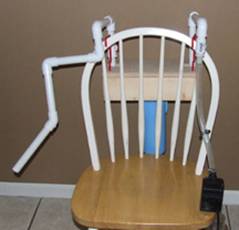
Version 1.1 On this version I mounted the filter on a board to
make changing the cartridge easy and added two vinyl coated hooks to
hang the whole setup on the rim of the tank. I ran the PCV through the
board to protect it and made the pump detachable. I also created
a little kit with various PVC connectors and lengths of pipe to be used
interchangeably on the output line. This allows me to change
depth, direction and length of the output.
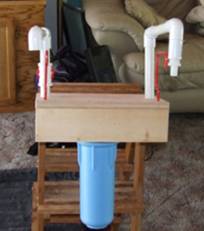
Version 1.2 I purchased a new filter housing and piping. I
kept the inlet and outlet above the aquarium's water level and use
parts from the accessory kit to set depth and direction of the input
and output. I added an inlet adapter to the accessory kit
so the depth of the pump can be set for various size
tanks. Parts list Omni whole house filter OB1 Series
A
$11.00 Adapters to convert outlets on filter to PVC glue
pipe 2 x
$.27
$.54 ¾' 90 degree
elbow
10
pack
$1.80 ¾' PVC
Valve
$3.00 ¾' PVC pipe
5
feet
$2.00 Large coated bicycle hooks (screw in
type)
2
pack
$3.00 Adapter to attach the threaded barb
$.50 3/4' to 5/8 nylon barb
(male)
$2.00 5/8' nylon
tubing
$2.00
(Barb and tubing should be sized for the specific pump you
use) 1/2 ' - 3/4" hose
clamp
$.75 Alpine Stream pump
(400gph)
$42.00 2'x4' (short piece) 3/4' plywood (small piece) wood screw (4 or 5) Tools Wrench large enough for the fittings on the
filter Pipe thread compound PVC primer and glue Drill Saw Filter assembly
1. Cut the 2'x4'
to 14' length
2. Cut a piece of
plywood to 8'x14'
3. Cut a slot in each end as
shown
4. Hold the tank against your
aquarium to find where the hooks should be placed. Drill and screw them
in place.
5. Hang the filter back on the
tank to measure and put the piping together (don't glue yet).
6. Remove the filter from the
tank and glue the pipes together.
a. Thread the fittings
into the filter. Make sure to use a lot of thread compound and
make them tight. If they leak after everything is assembled you
have to cut the pipe, tighten and add a coupler to glue them back
together.
b. Glue the rest of the pipes
together.
7. The last fitting on the
input side is a nylon barb to allow me to attach and remove the pump
easily. Filter Assembly
1. Attach a 6' piece
of Nylon tubing to the pump
a. This will allow it to
reach close to the bottom of a small tank. The accessory kit has
an adapter to reach deeper tanks.
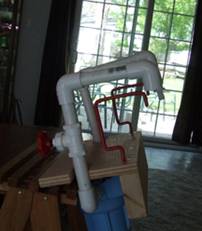
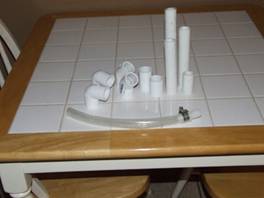
Accessory Kit The accessory kit allows you to change the
input and output for different aquariums.
1. 90 degree
elbows
2. 45 degree
elbows
3. Straight
couplings
4. Several different lengths of PVC (between 2 and
8')
5. 10' nylon tubing
attached to a nylon barb coupler
6. The filter several
attachments Tips for choosing a cartridge The first step is to choose a cartridge. There are
various options and I listed the ones I have used;
·
OMNI Filter RS1; 20 micron pleated media for
general purpose cleaning costs about $1 This is the cartridge I use most often.
It does a good job cleaning and doesn't clog easily.
·
OMNI FilterRS2 ; 5 micron wound filter for a
little finer cleaning costs about $3 I've used this size a few times but I
really haven't noticed the tank getting any cleaner and it clogs
pretty fast.
·
OMNI Filter T01 ; 5 micron carbon filter for
removing medicine or an algae bloom costs about $5 After any treatment I do a 20%-30% water
change and run this filter on the tank for an hour or two.
The filter also does a very good job cleaning the water after algae
blooms but remember, it does not cure the problem, it only cleans the
water. Tips for using the filter
· Do
not use this as a replacement for standard cleaning and water changes.
·
Tighten the filter only as tight as needed (usually by hand).
Home water systems have a constant 30-60psi water pressure and the
filter needs to be tightened with a wrench, this system has no pressure
and I found that tightening by hand was good enough to prevent
leaks.
· To
prevent a lot of air bubbles and water splashing, restrict the flow
with the valve and then open the valve and add the attachments to the
output side after water has begun flowing out.
· For a
freshwater fish-only tank you can stir up the gravel by grabbing a
handful and picking it up a few inches then letting it release between
your fingers. If it's too deep you can use something to reach
down and push the gravel around.
· For a
freshwater planted tank you only want to clean the debris on the
surface; it's important not to disturb the soil or the
plants. Create a current by holding your fingers together and
moving them back and forth to create a small current to stir up the
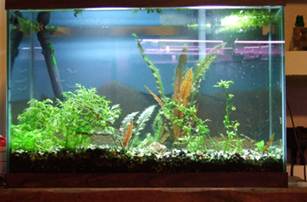
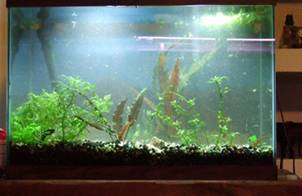
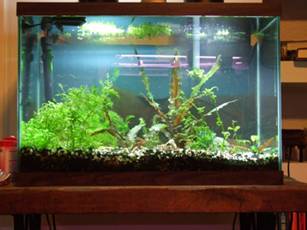
debris on the surface and around the plants. Example of using the filter on my planted
tank
1. Remove the ornaments and
the Hornwart that is wrapped around a rock
2. Clean the algae from the
glass.
3. Clean with a gravel vacuum
to clean the gravel and perform a water change.
4. Create little currents with
your hand to stir up the debris.
5. Hook up the filter and pump
and let it clean the water.
6. Put the hornwart and
ornaments back in and it's done! |
|

|
Features: |
|
| Featured Sponsors: |