|
The D.I.Y. Indoor Pond
Building large, economical displays for aquatic
life
by Anthony Calfo
 |
 |
|
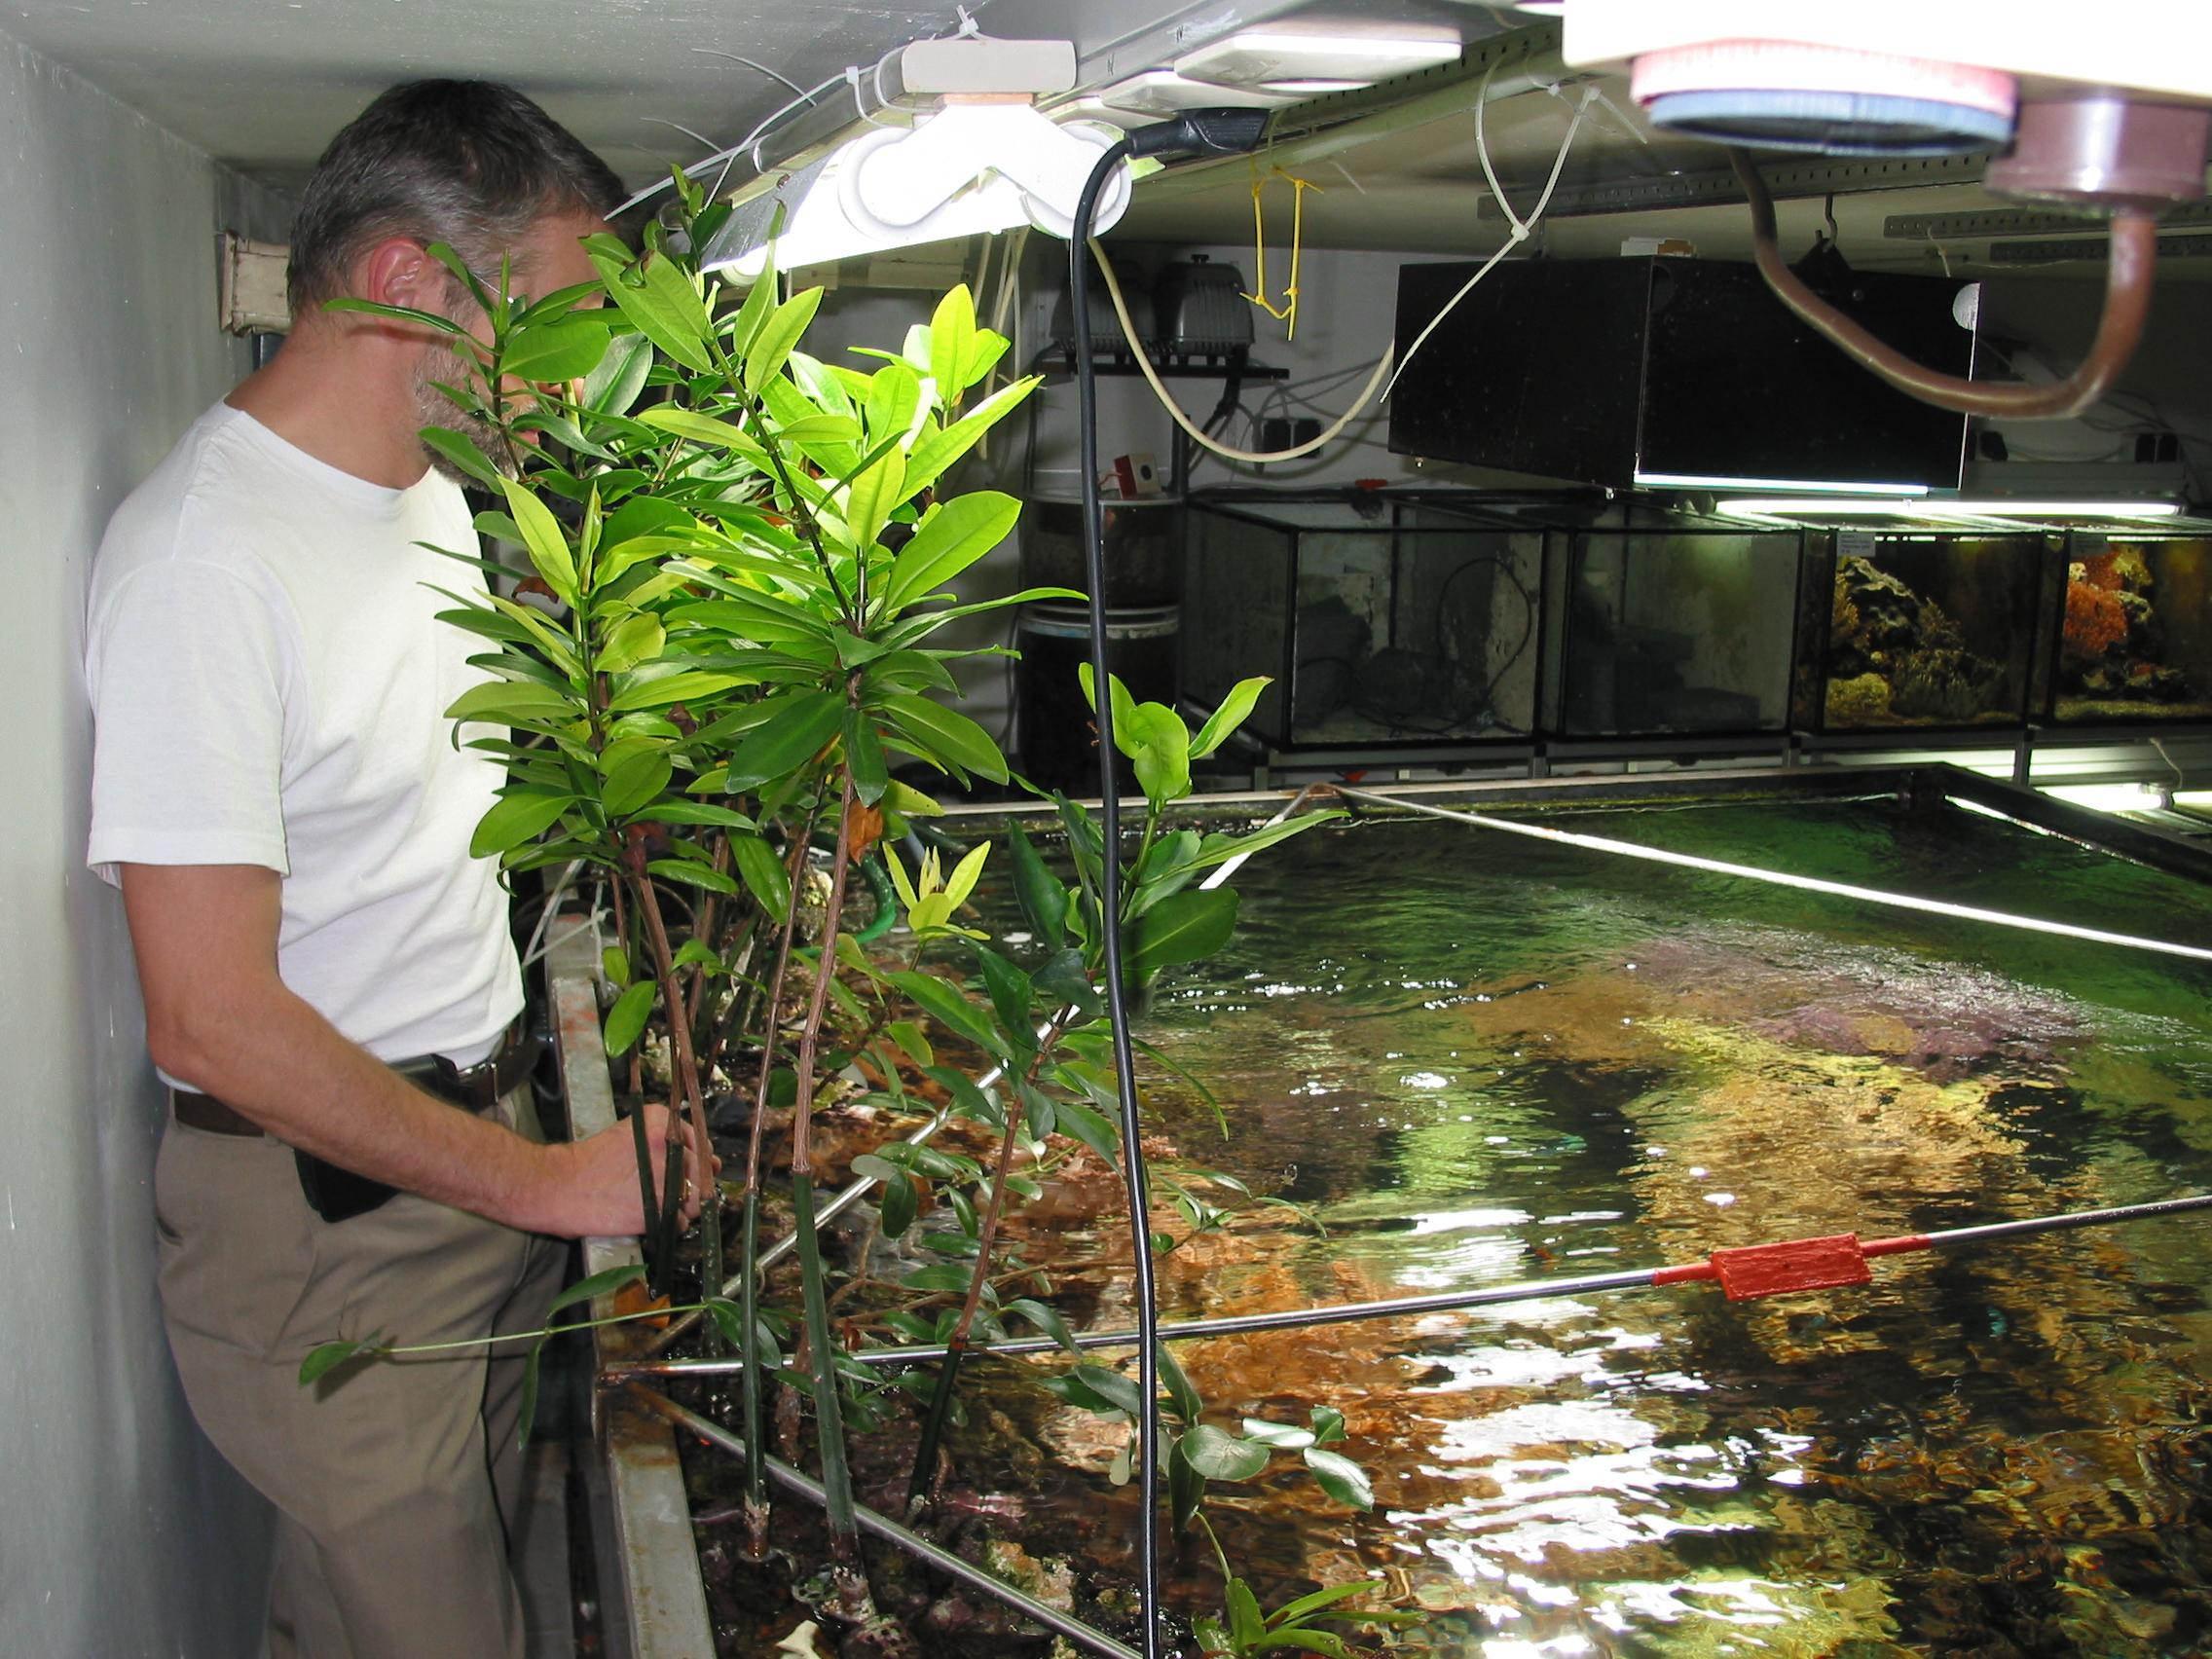
Large marine and
freshwater fishes can thrive and more readily reproduce in the spacious
housing of an indoor pond. |
If you
participate in the aquarium hobby long enough, you begin to wonder what it would
be like to have a really large aquarium. It seems only natural to want to see
the “(sea)apple of your eye” swimming in hundreds or even thousands of gallons
of water! Reality sets in quickly for most of us, though, and the daunting
expense of procuring the aquarium alone remits such dreams to the drawing board,
and likely never realized. The sheer cost of raw materials in glass or acrylic
to build an aquarium of great capacity will amount to a final cost of several
dollars per gallons to construct. And so, some folks begin to consider alternate
materials for constructing an aquarium when the notion of an indoor pond
inevitably comes to mind. For some displays, this is not even the slightest
compromise from a clear-walled aquarium. The aesthetic shift towards viewing the
submerged life from above opens numerous doors for constructs, living and
non-living, above the water level. Imagine the possibilities with an indoor pond
for species variety, if not an outright approach to more complete biotope
displays!
 |
 |
|
Messy feeding reptiles and
fishes alike can be kept more successfully in ponds with pond-sized
filtration. Technologies from outdoor garden pond husbandry are quite
useful here, for their experience with handling high bio-loads from
ornamental carp and considerable organic matter. |
Aquarists that like heavily
populated fish communities or large fishes can find an outlet to continue to
enjoy their growing charges with indoor pools. African cichlid enthusiasts can
enjoy multi-generation and multi-species colonies of fishes in the widest array
or colors, with the comfort of extra space for territories. Fans of big American
cichlids like Oscars, jaguars, blackbelts and Uaru can keep and even breed some
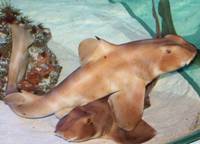
of these fishes at home finally with enough room. Show-sized marine fishes like
puffers, triggers or some small sharks might fairly be housed at last. With a
good design, non-piscine aquatics may enter the realm too like crabs,
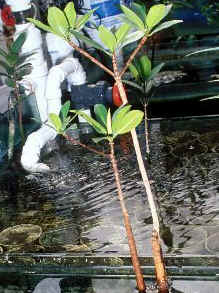
semi-aquatic turtles and other shore life. And let us not forget the options now
for horticulture (mangroves, ferns, orchids, etc.) and water features like
simulated water falls, dripping pseudo-stalactites, and functioning bogs (AKA
vegetable filters). It’s exciting to think that in not much more space than a
large home aquarium, we can have a multitude of unique life forms on display,
commonly overlooked by most everyone outside of zoological collections.
Aside from the creative
freedom and space that an indoor pond gives you, there is the practical benefit
that the cost per gallon to build such pools is a fraction of the cost of glass
or acrylic aquaria. The best materials for building an indoor pond depend to
some extent on the region you live in since shipping costs (freight) make up a
significant part of the final cost of any large, bulk consumer good. Resourceful
folks have reported on finding a surprising range of options for pond construct:
plastic feed troughs in agricultural areas, fiberglass vessels from molds (built
or commissioned) in industrial areas, and I’ve even heard aquatic use of the
composite-formed liners for (gulp!) coffin vaults! Any of the aforementioned
solutions is comparatively inexpensive if you live it the right part of the
country where commerce keeps the price of such products competitive. Writing
this article for aquarists of the world, though, I proffer a more universal
suggestion for building an indoor pond.
Regardless of where you live,
common (house-)building materials like milled lumber and flat roof materials
(rubber, sheet PVC, plastic, etc.) are likely available, and an affordable
option. The images used to illustrate this project depict a 1000 gallon pond
built for about $400 USD. At 40 cents per gallon, this is only 10-20% the cost
of purchasing the same vessel in glass or acrylic. The basic materials are a
good, stud grade of framing lumber, plywood, some old carpeting or sheet
Styrofoam for padding (thick layers of old newspaper would be fine instead), and
sheet rubber (for outdoor ponds or flat roofs). Assembly will require a few
sizes of deck screws, basic power tools (drill, circular saw, spirit level,
measuring tape). A sharp wood chisel or coarse sand paper will come in handy for
taking care of rough wood edges. Scissors or a knife will also be required for
trimming the liner to size, unless you can chew like a beaver. At length,
nothing employed for the construction of this pond is uncommon in a household
big enough to hold an indoor pond to begin with.
Where do we start? With
imagination! It is the single most important item that you will bring to the
project. Sit down in the space that you intend to place your pond and simply
visualize and spend some time contemplating the possibilities of the display,
both above and below the water. Some aquarists take a traditional route and keep
the pond very simple in both construct and plumbing with not much more to speak
of than a sound, plain walled pond upon completion. Others may wish to employ
through-wall bulkheads for drains, plumbing, electricity, or submerged lights.
Consideration of track lighting, power supplies, or even remote filtration
(placing the serviceable hardware in another space or room behind, beside or
below the pond) could also be issues worth exploring.
An address of such ideas and
possibilities for the ancillary features of an indoor pond would require volumes
of space to even begin to discuss adequately. I have worked for some years
professionally designing and installing ponds for private aquarists. My dear
friend and colleague/co-author Robert Fenner has done this work very well for
decades. His free-content website WetWebMedia.com details some of these
wonderful aspects of pond-keeping among a plethora of other topics of aquarium
hobby, science and business in actively archived articles, images and FAQs.
Please take the time to explore this website for ideas and inspiration, and feel
welcome to contact us and our crew with more specific questions about polishing
your dream pond. For now, however, let us focus on the simple construct with an
illustrated, step-by-step tutorial.
|
|
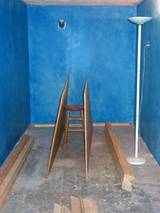
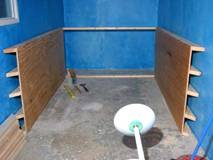
Step 1: Lay out all
necessary tools and materials within comfortable reach. You will build
the pond in place and not move it from remote.
|
|
|
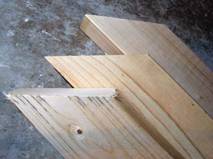
Step 2: "Measure
twice, but cut only once" as the saying goes. You should pre-cut as much
lumber as possible in preparation for assembly.
|
|
|
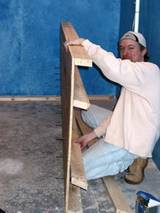
Step 3: A good friend
and helping hand is priceless, and makes passing the time more enjoyable
on the project.
|
|
|
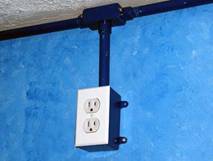
Step 4: Install all
new service features (water supply lines, electrical outlets, light
fixtures and switches, etc.) before the pond is built, or at least
before it is filled. It is easier and safer to do such work in and
around a dry pond. Note: be sure that all electrical lines are Ground
Fault protected (with proper GFI switches or breakers).
|
|
|
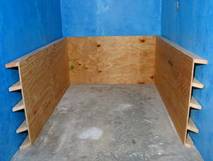
Step 5: Begin the pond
form with vertical side walls. Carefully measure and mark positions for
horizontal bracing. See the images below for the use of framing lumber
(studs) as stabilizing ribs to the pond structure. Take the time to
pre-drill pilot holes and screws for securing the bracing on the outside
of the pond.
|
|
|
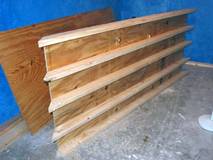
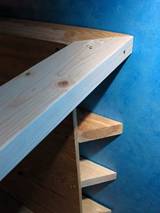
Step 6: Your first
finished vertical wall will be the simple sum of a pre-cut sheet of
thick plywood plus bracing studs/ribs cut with mitered ends. Be sure to
use veneer plywood (marine grade when available) and not particle board
(glued sawdust) or pressed wood (glued wood chips) for this project, for
durability and strength. Common, construction grade plywood of ½ - 3/4"
thickness will be fine for ponds less than 4' high or 8' long. Larger
vessels may require thicker sheet and bracing lumber, if not
the use of engineered bracing like a four-sided capture or some
such (welded metal banding as straps or a collar).
|
|
|
* Very tall or wide
ponds (over 3 - 4') may require additional bracing beyond the fixed
ribs. This picture depicts German aquarist Daniel Knop's magnificent
reef aquarium (well over 1000
US
gallons) from above with discreet reinforcing rods to prevent deflection
of the vertical walls. On ponds, aquarists can use a variety of
materials to accomplish this goal. Simple solutions run the gamut from
steel cable fished through plastic hose for protection, to triangular
caps on the corners. Skilled hands can instead weld steel (to be epoxy
coated later) or rivet anodized aluminum (use stainless steel rivets to
resist corrosion) in rods or straps tied into a collar at the top of the
vessel.
|
|
|
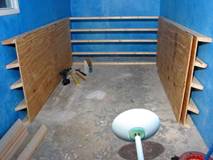
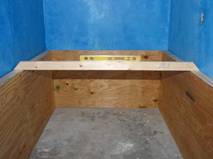
Step 7: With two
vertical walls assembled (bracing lumber screwed and glued [optional]
into place), the opposite side-wall bracing can be used tie three walls
together. It is here that you will really appreciate the time spent to
miter the corners of the bracing lumber.
|
|
|
* You can glue mitered
joints with aliphatic resin - AKA wood glue - or simply screw them
together with quality deck screws (fasteners made for outdoor
construction and weather resistance). Regardless, such joints are
stronger, easier to butt, and aesthetically more attractive
|
|
|
Step 8: Securely
install all matching ribs for the first opposite wall.
|
|
|
Step 9: Next, set and
screw that (interior placed) vertical plywood panel into position.
|
|
|
Step 10: Throughout
periodic stages of construction, be sure to check the plumb of your
work. You may want to strategically allow a very slight slope to one
side for future drainage and water pumping. In some situations, a false
floor to the pond is now built for an actual floor drain (seek such
bulkhead fitted drains with seals from a pond or swimming pool supplier)
or to house plumbing or filtration components. Other folks may plumb
features (lights, water, electricity, e.g.) through the pond to the next
floor of the house below. A (ply-)wood floor fastened to the side walls
lends considerable support to the structure and is encouraged. The pond
depicted here is in the basement/ground floor of a home and will be
taking advantage of the naturally cool, stable ground temperature
conducted through the concrete foundation without employing a wooden
floor.
|
|


|
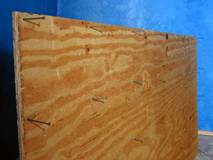
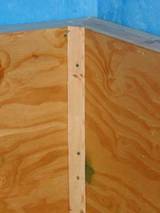
Step 11: Finish
securing the 4rth-panel ribs and plywood wall.
Important - it is necessary to countersink all screws (or center
punch nails) on interior surfaces that the liner or padding will come
into contact with. A sharp woodworker's chisel will level any burrs or
irregularities in the wood assembly.
|
|
|
* To fill the corners
of your pond's form, rip a square piece of milled lumber diagonally to
make a symmetrical triangle (a table saw works best for this). Split
here is a standard US 2" x 2" (5 cm x 5 cm) piece of blocking lumber.
|
|
|
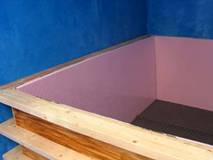
Step 12: Nearly
finished, you should pad all interior surfaces that your liner will
contact. Find something inexpensive or recycled for the purpose. Old
carpeting works well here; check with neighbors the day or night before
municipal waste pick up. Insulating Styrofoam sheet is affordable too
(pictured here in pink color). Aquarists have also used thick layers of
old newspaper for many years. Note: do not secure padding with any sort
of fasteners! Screws, tacks, nails or other like fastener may puncture
liner if enough pressure is applied from the inside (falling rock,
walking feet, pressure of water, etc). Simply cut and set padding in
tightly (snug fit) or glue lightly (contractor's caulk).
|
|
|
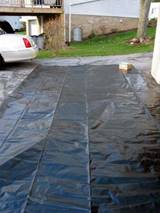
Step 13: When the pond
is framed and padded, you are ready to size up the liner. Lay it out on
a clean, flat surface.
The garage floor or driveway may be safe for this purpose. Avoid
walking on the liner at this time. Without padding or support behind the
liner, a stone or other hard foreign object poses the risk of puncture
under the weight of a man's foot. With the liner fully unfurled, you
will measure and cut it to size. The dimensions of the cut liner will be
the total continuous length of a side = 2 x height, plus length, plus 2
x width of cap plus a bit extra for folding and pleating. For example,
if a pond is going to be 6' square by 3' deep with a .5' wide ledge,
then the liner must be cut at least 13' x 13'. We arrive at the measure
of 13' per side by taking the length of the pond (6') plus enough liner
to run up either side (2 x 3' height) plus the overlapping liner that
caps the pond's edge (2 x .5'). But again, please cut the liner slightly
larger (10-20% minimum) to allow for comfortable folding and pleating in
the corners.
|
|
|
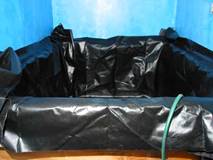
Step 14: Drop the
liner loosely into the frame, but
do not tack, nail or tie down
any part of it until you fill the pond! The liner will pull and shift
slightly as it fills and any fastener applied to the top edge will
likely tear away and damage the liner. In fact, one or more people will
need to be in or around the pond constantly as it's filling to make
certain that the liner lays flat and unwrinkled on the bottom, while
gently pulling and tugging the upright sides to make tidy, folded pleats
in the corners. Do not allow any air pockets to form underneath bunched
or wrinkled liner… especially on the bottom. These are vulnerable to
tear or puncture, as mentioned already.
|
Fill the pond to its highest
point. When the liner is laying flat all the way around with clean pleats and
folds, then trim excess liner away. Simply weigh down the top edge of the liner
(my preference) if you do not lightly tack it. Be sure to cap the top edge to
protect the liner from wear or damage in time. Some folks have access to the
relatively new "plastic" lumber which is intrinsically colored and requires no
painting or sealing like wood and is quite ideal for water's edge applications.
Stonework is also a natural and handsome finish for your pond's edge. Most
aquarists prefer to apply a cap that hangs over the edge enough so that the
liner is not apparent when the pond is full.
Finally: the finished pond is
now your blank canvas to adorn and personalize! The exposed bracing lumber and
panels might be painted. Some folks prefer to face the pond with a veneer (wood
or concrete composite) for decorative ceramic tile. Perhaps you can integrate a
theme for your pond into the facade, like nautical artifacts (fish net, curios,
sailing instruments), or natural rock of the simulated biotope (calcareous
tufa, fossilized coral, volcanic lava, etc.). Use your imagination.
I hope this introduction to
indoor DIY pond construction has offered some information of merit. Interested
aquarists are encouraged to visit local garden centers for advice, books and
pamphlets on outdoor pond construction and maintenance. Some guidance on filling
a pond (making pleats with liners) and installing filtration components
(bulkheads, drains, water features, etc.) is highly recommended as part of your
preparation and research before building a pond of any size. Be assured that
outdoor garden pond-keepers share many similar interests and challenges as
indoor pond-keepers. Take advantage of lessons learned by them and enjoy their
wisdom and fellowship.
|
General Parts List
|
|
Tools and materials to make indoor ponds
up to 1000 US gallons (3785 liters)
[costs are approximates and vary by region]
|
| 3 – 4
|
4'x8'x1/2" Plywood sheets…
$25 per [upgrade to 5/8" or 3/4"
thickness, and/or marine grade if desired] |
$75 - $100 |
| 15 – 20 |
2"x4"x8'
Framing lumber ("studs")… $2.50 per |
up to $50 |
| 2 - 4 |
2"x2"x8'
lumber… to be ripped diagonally for seams $2 per |
up to $ 8 |
| 5 lb. |
All-weather Deck Screws
[nails less expensive/weaker] |
$ 20 |
| Variable |
Styrofoam or cheap carpeting
to pad interior shell [used carpet/old newspaper free instead -
contractor's sheet Styrofoam quoted here ] |
$15 - $30
|
| Variable |
Liner: pond liner, roofing
rubber (aged, or rinsed new), PVC sheet (40 – 60 mil) [Highly variable
cost per region, material and size – here we have quoted a pond liner
purchased at a retail local pet store. Expect to pay less than $20 per
linear foot of rolled product up to 20' wide.] |
$200 |
|
Recommended
Tools:
Optional:
|
Anthony Calfo is an active writer living
in scenic
Western Pennsylvania
. He is an author for Reading Trees publications and WetWebMedia.com (aquarium
science). Please feel welcome to make contact at
readingtrees@yahoo.com
"Book of Coral Propagation", Volume 1(2001) by
Calfo
"Reef Invertebrates" – Natural Marine Aquarium
series volume 1 (2003) by Calfo and Fenner
Bibliography:
Dawes, John (1989): "Book of
Water
Gardens
", T.F.H.,
Neptune City
,
NJ
U.S.A.
|
|


;)
;)


