|
|
| Home | Marine Aquariums |
Freshwater Aquariums |
Planted Aquariums |
Brackish Systems |
Ponds,
lakes & fountains |
Turtles & Amphibians |
Aquatic Business |
Aquatic Science |
Ask the WWM Crew a Question |
| Please visit our Sponsors | ||||
Acrylic tank lifespan 3/30/17 Acrylic tank repairs
11/15/16
Questions about a used tank... Acrylic
12/10/14 Acrylic Tank Openings Modification (of top)
12/11/11 poor seam 6/5/2011 Removing Paint from an Acrylic Aquarium --
12/01/10 Did I Mess This Up, Lg. acrylic tank bowing
9/8/10 acrylic tank repair help, holes, crazing
5/25/10 hot tub acrylic repair... Uhhh 4/20/10 Acrylic tank pit repair -- 03/19/10 Large Acrylic Aquarium Stand Question Closing off
overflows and stand modification 2/20/2010
55 Gallon SeaClear Bowing 8/28/09 Repairing a 90G Acrylic Tank, w/ Epoxy
6/23/09 Re: Repairing a 90G Acrylic Tank -
6/23/09
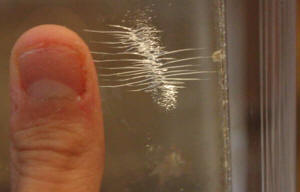
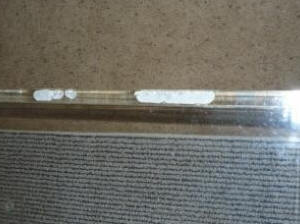
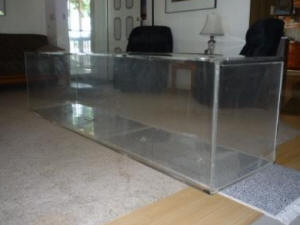
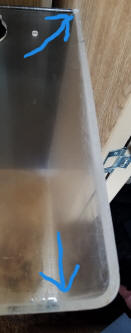
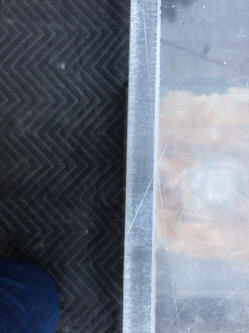
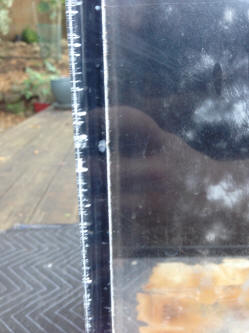
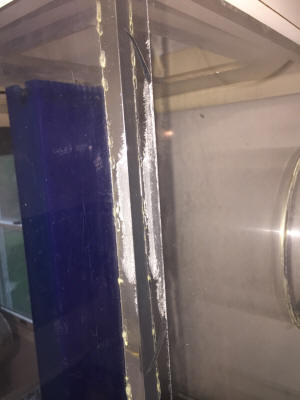
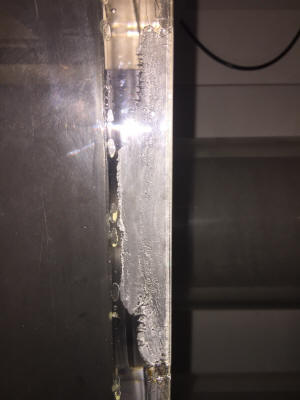
Acrylic fish tank chip 11/19/08 Hi Bob, I was reading all of the posts on http://www.wetwebmedia.com/ and didn't know how to post so I am emailing you my question. I just bought a used 450 gallon fish tank dimensions roughly 7ft x 29 in x 42 in We were unloading it off the truck and my friend on one corner couldn't hold the weight and dropped it. <Yikes! I hope they're okay> The bottom corner hit the cement hard enough to chip out a fairly large size piece out of the corner. I would say the chipped piece is about 3 - 4 inches tall. It appears that the chip did not penetrate into the tank. However the remaining acrylic appears to be about 1/8" thick on the bottom corner at the joining point where the bottom piece meets the two sides. Is there any way to fix this tank or should I scrap it? <Can likely be salvaged... if it were me/mine with a combo. of carefully solventing back into place the chipped out piece AND the addition of square doweling in all the inside seams... Do ask a good-sized acrylic outlet re... to match the quality of the material, make sure you have the good flush/flat sides of the doweling into the corners... some pieces are a bit concave...> My friend said I could put a large patch on the inside of the tank in that corner. I think that would be a leak waiting to happen. I would greatly appreciate any advice you could give me. Thanks, Ed Flanigan <Again... I would apply the doweling to all inside seams. Bob Fenner> Haze/drip on tank 11/13/08 My tank has developed a white haze on certain parts of the front panel that is driving me crazy. It is not on the entire front of the tank, but in certain areas, some of them large. It almost looks as if something has dripped down on the inside of my tank. We have tried to get it off with the magnet scraper, sponge, razor blade, et cetera. Nothing works. You cannot even feel this if you try, but it is so obvious that it makes me want to get another tank. Has anyone experienced this, and if so, can it be resolved. Thank you for your help, Jeffrey just a little <Mmm... is this an acrylic tank? There are cases where physical/chemical changes can/do occur that make some less clear... otherwise there are biological organisms that can obscure both acrylic and glass... these are best dealt with when the tank is empty, can be sponged (in an open, airy setting) with dilute acids mostly... though some circumstances are relieved with bleach use (never with acid mixed). Bob Fenner> 110 Tru-Vu...Plugging Holes 10/20/08 I searched the forums and other websites but could not find the answer. I am trying to plug six 1.5" holes in the bottom of my tank. The previous owner drilled the holes for his filtration and it started leaking. I found other people doing similar repairs but not on the bottom of the tank. Can I just use small patches or do I need to cover the whole bottom of the tank? <Small patches, the thickness of the bottom and a few inches larger than the hole can work.> I found a company here in Portland that sells Acrylic and they want to repair it with a piece that's the size of the bottom of the tank and from the outside....Not sure what to do here. <The patches can work. But I highly recommend just using PVC bulkheads with PVC plugs to accomplish this. You can smear all the sealing surfaces with silicone to make sure there are no leaks. This will leave the holes usable should the need arise in the future and keep up the resale value.> Brian <Scott V.> 110 Tru-Vu...Plugging Holes/Floor support 10/23/08 Scott V., Thanks for the information...... <Welcome.> I patched the tank form the inside and its filled! <Ahh, good.> Currently its in my garage but the plan is to move it in the house as soon as all my supplies show up. Should I have the underside of the house beefed up for the weight? <Where is it going, what is the floor/support composed of?> I had a 55 gallon in here before but this is twice that size so I am concerned. Brian <Do write back with the info requested above.> Crack In My Round Acrylic Tank'¦Can It Be Repaired? -- 10/15/08 I have a coffee table acrylic tank. There was a small crack by the upper lip since I have had it but it never affected the tank. <<Okay>> Recently we moved the tank and my 'help" decided to do the final move by themselves and extended the crack down about four inches into the tank. <<Uh-oh>> I can keep it half full (which is still pretty good) but I would like to use the whole tank. <<Indeed>> Is it repairable? <<It is'¦though you won't be able to 'hide' the repair>> I thought of maybe silicone and then a strap around the top so the crack could not spread but, I don't know. <<Absolutely not'¦ Silicone does not adhere well to acrylic'¦you would very likely end up with 'water on the floor'>> I s there a way to fix it or should I just cry and say goodbye to it? Lorraine <<There is a way to repair this tank, Lorraine'¦though the crack/repair will remain visible, but this does not seem to be an issue with you. The tank can be repaired/bonded using solvent cement that will 'recombine' the molecules making the repair as strong as the original unbroken Acrylic panel'¦if done correctly. Acrylic solvent cements come in different viscosities for different uses, what you need for this job is the 'water-thin' solvent used to bond Acrylic by 'capillary action.' You will also need a special needle-applicator to apply the solvent. You can find both of these on the NET'¦one source is here for the solvent (http://www.craftics.com/products.cfm?category=80), the 2oz bottle should suffice for your repair'¦and you can get a needle-applicator here (http://www.craftics.com/products.cfm?Category=2). To make the repair, draw the crack tightly closed (perhaps with the aforementioned strap) and apply the solvent with the applicator so that it is drawn completely in to the crack (you may need to do this from both sides). This takes a bit of finesse as applying too little too slow will seal the edges of the crack without getting thorough/complete coverage, and applying too much to fast will cause the solvent to run down the side of the tank and leave a 'permanent' mark (practice on some scrap beforehand if possible). After the solvent is applied, leave the strap on the tank until the repair has cured well (at least several hours). If the crack has pieces that have been broken away and it does not close and fit together tightly the water-thin solvent won't work, but there are 'thickened' solvent cements that can be used to make the repair (e.g. -- Craftics Cement #33). You can also use the thickened cement to fix your crack if you are not comfortable with the capillary method (apply to the break before drawing it together with the strap), but the repair won't be as 'clean' as with the capillary method. Do also query the NET for more detailed instructions on repairing cracks in Acrylic. This may all seem a bit overwhelming but if you take your time, research the methodology, and do a bit of practicing with the applicator you should be able to effect a reasonable repair. Regards, EricR>> Cracked Acrylic Tank- RMF please comment 6/9/08 I just picked up a used 500 gallon acrylic tank 8ft long 4ft deep 2ft tall. <Wow, that is a lot to pick up!> After getting it home I noticed the bottom panel has a few cracks. <Yikes!> The tank was made with 1/2in acrylic except for the bottom which for some reason I really don't understand is only 1/4in. <Cost likely, needless to say the bottom (and the sides) are not thick enough material for this size tank. You can see the results of this in what you have on your hands now. Think of the bottom having the same function as the top brace, ¼' would never be adequate for a tank this size. As for the sides, although many online resources and calculators say ½' is enough, I am not comfortable with any less than ¾' on a tank this size, even for the bottom. This tank in ½' will have a scary amount of bowing.><<RMF is in agreement... particularly re the bottom... worrisome if not totally supported flat>> With that being said is it possible to replace this with 1/2in or could I just place another panel under that one and patch the cracks on the inside also? <Considering the panel is too thin to begin with, I would simply replace it with thicker material, perhaps considering cutting the height of the tank down in the process to a more appropriate height for the material (20' or so, assuming there is sufficient cross bracing on the top).> Then there is always scraping the tank but my wife would most likely kill me. Any help would be great. <Do not scrap the tank, you have gobs of usable acrylic. If you are at all handy you can surely fabricate a more appropriate size using this material. Good luck, Scott V.> <<RMF is more inclined to go with the writer's suggestion here... and anneal/solvent another piece onto the existing too-thin bottom... IF this can be done practically... i.e., if the existing base is not too uneven/non-planar>> HOB Refugium Break 5/21/08 Hi, <Hello Tamara.> My son (12) recently purchased a reef set up off of someone who was moving. <Can be a good deal!> He's wanted to switch from fresh water to a reef for quite some time now and I finally caved. I had a reef years ago but the hobby has changed considerably since then so I'm a little lost. <Things change quickly.> The set up my son purchased came with an ecosystem 60 refugium on a 55 gallon tank w/ a UV filter (turbo twist run off of a Mag pump), Current Nova Extreme T5 light, and 2 Powersweeps. It also came with a Prizm protein skimmer <Not too great.> but the guy said that once he put the refugium on the tank he stopped using that. Anyway, while unloading the car I dropped the refugium tank(there goes my mother of the year award) So now I'm refugium shopping. <Yikes, happens to the best of us!> The tank is the only part of the system that broke. I still have the light, bio balls, pump (Rio 600), and tubing and of course the Miracle Mud he just purchased. So here is my list of questions. First off is the system he had (before I broke the refugium) a good set up? <The basics sound fine. I am personally pro protein skimmer (not the Prizm) and con UV (little benefit for a well setup/maintained system). The bioballs can go if you are planning a reef with live rock. Without the live rock the bioballs will be ok and needed.> Does he need any different/more equipment? <Really depends on what you want to keep and do with this system. My general answer is to seek a better skimmer. Personal favs are AquaC, EuroReef or ASM offerings.> And how is the best way to go about replacing the refugium? <Do consider a possible repair. If it is just cracked you will be able to repair it with an acrylic solvent such as Weld-On 3 or 4. The break will just need to be fitting together well (usually is with an acrylic crack). Simply 'clamp' the break together (making sure all is clean) with some electrical tape and apply the Weld-On to the seam. It will bond it into one piece. The following link and related articles/FAQ's will shed some more light on such repairs. http://wetwebmedia.com/acrylictkrepfaqs.htm > The lowest price I found on a replacement tank for the ecosystem is $320 (for just the tank). <!> I did find one on eBay that seems to be a no name clone of the large CPR Aquafuge2 PS unit (it's called a PS 24) for $110. <Sounds like the better, more reasonable deal.> Is the CPR the same as the ecosystem or is one better than the other? <Very little amongst this application. The protein skimmer on the CPR falls into the same category as the Prizm.> Any help you can give would be greatly appreciated. Thanks! Tamara <Welcome, Scott V.> Acrylic Tank Bottom not flat 4/16/08 Hello Crew, <Mark> I'm just putting the finishing touches on my new 90 gal setup and DIY cabinets. I purchased a new 90 gal reef ready acrylic tank and it's been sitting for a few months while I finished the stand/cabinets. After placing the new tank (no water added) on the cabinet I noticed that one end of the tank is not sitting flat. Most of the tank is in contact with the stand but on one end I have a slight gap (less than 1/16") from front to back over about the last 10" of the tank. I've checked my stand/cabinet with a straight edge and it is flat. When I placed the straight edge against the bottom of the tank it is not flat. The slight bow is in the bottom of the tank. I've called the LFS, who had the tank made for me and deals in nothing but saltwater and acrylic tanks. He's not overly concerned with this slight gap. He recommended against putting Styrofoam under the tank but didn't give a reason. If I push on the top of the tank I can flex the tank so that it makes contact with little effort. I'd like a second opinion here. Am I asking for trouble if I fill this thing or is it no big deal? I don't really want to put foam under the tank if I don't have to. The cabinet is made from ¾" oak veneer ply sides, top, and bottom with (3) 2x4's running the length of the tank spaced about 6" apart under the ¾" top. The 2x4's are screwed into the ¾" ply on the ends/top and a "T" made of 2x4's transfers the load on each end to the floor. Long story short...the cabinet is stout. Thanks for all your help....you have been a tremendous help with this project over the past 6 months with closed loop questions etc. It's almost finished! Mark Gustin <Our old company did acrylic tank fabrication, and our stores sold many such tanks... this slight "bulge" is nothing to worry about. It will indeed "flatten out" on being filled... The Styrofoam is no real use here. Cheers, Bob Fenner> Re: Acrylic Tank Bottom not flat 4/16/08 Thanks Bob! <Welcome Mark> I figured it wasn't much to worry about, but this is my first acrylic tank and I wanted to be certain. Better to ask the question before filling with water and making an expensive mistake! <Ah, yes. Very much agreed> Regards, Mark Gustin <And you, BobF> How level does a tank have to be ?/ Acrylic Repair Tank Leveling/Sump Repair 2/15/08 Dear Crew, <Eric.> You've helped me with my various setups in the past, including this one, and was hoping you can answer this. I am setting up a 65 gallon AGA RR tank. The tank sits on a heavy duty wood stand that was built by the original owner. The setup sits on a concrete basement floor ( no carpet, etc. ). The tank is level lengthwise, but the front is about ¼' lower than the back. <Not good.> If I am correct in assuming that that is a problem, what is the best way of leveling the tank? <Shimming, cutting long tapered pieces to give support over the entire weight bearing areas of the stand.> Should I shim it or run a length of ¼' wood under the front. <The latter, along with long shims down the side to distribute the load.> If shimming, do I place shims the whole length, and along the sides where they are now raised? <Yes, just combine this with the continuous piece in the front.> The shims will probably protrude from under the tank. Can I trim them? <Yes.> The setup also came with a DIY acrylic sump which has a leak. There are no visible cracks in the vicinity of the leak so I am assuming it is a bad seal. I've been told to use Weldon to repair it but can't find it locally. <This sounds like a leaky seam. WeldOn will fix this, do be sure to thoroughly clean the area of any salt or other residue first (just rinse with water).> I have found a hobby shop that carries a product called Tenax 7R, which the owner says he used to repair his acrylic skimmer. Would this be ok to use? <Yes, this will work fine.> Thanks, Eric <Welcome, good luck, Scott V.> Acrylic Tank Crack Repair/Drilling Acrylic -- 12/30/07 Hello, <<Greetings>> I am writing to ask a question regarding repair to the top panel of my 110 gallon acrylic tank. <<Okay>> I just got the tank really cheap and it is not filled yet. The tank is 60lx24hx18w and is made of 3/8' acrylic. <<Mmm'¦too thin for this 'height''¦you will have some bowing>> There are 2 access holes in the top, and there is a crack running from the right side of the hole on the left to the back side of the tank. <<Not good, as you are/should be aware'¦most acrylic tanks gain much of their structural integrity from the perimeter brace around the top>> My idea is using JB Weld on the crack, then covering it with 1/8' or ¼' acrylic I have cut to size, and gluing that to the top to completely cover the crack on both sides so it won't separate again. Please let me know if this is a good approach to this problem. <<A good plan'¦ And although pulling the crack together and 'fusing' with the solvent would likely be enough (the cracked piece would again become 'one' if done correctly)'¦I would suggest an oversize piece of 1/8' acrylic on both sides to 'sandwich' the crack for that extra measure of reassurance>> Also, the tank has a built in overflow which is cool, I plan to keep the skimmer and heater in the sump so they aren't in the display tank. <<Sounds good>> My problem with this is there is no access hole near the sides for wave-makers I have and would like to put at each end of the tank. I know acrylic can be drilled easily, but drilling how close to the ends is safe, and how big a hole should I drill for the cords? <<You mean the perimeter brace at the ends of the tank, yes? I would keep at least an inch from the tank sides'¦and make the hole just large enough to pass the equipment 'plug-in' through. Do use a 'bi-metal' hole-saw'¦and practice on a piece of scrap to get a 'feel for it''¦>> I am paranoid about weakening the top support for this tank after hearing the horror stories about how badly a tank this height made out of this thickness acrylic will bow when filled. <<3/8' acrylic on a 24' high tank is going to bow'¦period>> Thanks for your time, Chris <<Happy to assist. EricR>> Re: Acrylic Tank Crack Repair/Drilling Acrylic -- 12/31/07 Hello again, and thanks for your quick response. <<Hi Chris'¦and quite welcome>> To update, I called around today and had no luck at glass shops finding my solvent weld, <<I generally turn to the NET for such>> but one of them recommended I call a company here in Erie, Pa. called Polymer Marketing. <<I see>> So I called and spoke with a guy named Mark, not only did he wait around for me to stop by after work to pick up the Weld-On acrylic glue. <<Mmm'¦not a 'glue' but a solvent (Methylene chloride and methyl ethyl ketone [MEK], I believe)'¦it creates a solvent 'weld' (breaks down or 'dissolves' the acrylic which allows it to recombine molecules)>> He gave me a 15 minute or so demo of exactly how to use it, then didn't even charge me for the solvent or the applicator bottle with syringe- man, now that is customer service! <<Indeed!>> Anyways, we sketched out on paper my tank and the crack and he felt that this product along with the 1/8'' piece of acrylic will be fine. <<Excellent>> He also gave me a good tip to pass along- taking the applicator bottle and going over the back and bottom seams the aquarium has to reinforce and strengthen them, and fix any weak points. <<Agreed>> The way this stiff sucks itself into the smallest opening is amazing, pretty nifty product. <<Ah yes'¦. In its least-viscid form, the solvent requires the parts be fitted very closely to allow the solvent be drawn throughout the joint by capillary action. Heavier, more jell-like versions of varying degree (made so by the addition of acrylic resin) for other applications are also available and quite handy to the DIYer>> He also felt that with these precautions since the tank is used, that the 3/8 acrylic will be plenty strong enough for 110 gallons (I am crossing my fingers). <<Oh yes, quite 'strong enough' to hold this volume of water indeed'¦but not at 24-inches of depth without 'some' bowing>> So I will be setting up this week, I appreciate your help, thanks guys. Chris <<Happy to share'¦good luck with your project. Eric Russell>> Aquarium acrylic, bowing, question 9/13/07 <Greetings... Hope you don't mind if I cc this to crew@wetwebmedia.com but it's a good place to get this information to other people who may not know the people you do ;-)> Hey Jason- I'm having an issue with an aquarium that I set up recently, and I heard that you know a fair amount about such things. The aquarium is an acrylic 55 gallon by SeaClear that has two tall rectangular chambers (24h x 21.5w x 13d) joined by two tubes (4" length, 5" diam). We inherited this aquarium from my girlfriend's uncle who decided that it was too much work to maintain. We have it on the stand that he was using, which is built with 5/8" particle board with a hard shell (not sure what material). The aquarium stand is 48" wide by 13" deep, and we found that the floor is a little off level, with about 1/4" drop as it goes left to right, and also back to front. After having water in the tank for 8 days we introduced an initial group of 10 small fish (6 platy, 4 upside-down cats) to start cycling the tank, along with two packets of bacterial starter. We were away for a weekend two days after introducing the fish, and returned to find that a 3" crack had developed in the stand's front right-hand corner, and a small amount of water had dripped down into it. The water appears to be from splashing of the BioWheels and popping of bubbles. The tank was filled to about 1" from the top. We also noticed that the top off the aquarium had bowed by about 1/4", and both the front and back had bowed outwards in the middle by about 3/8". Additionally we found that while the back of the aquarium made contact with the stand for the full length, the front did not, with only 3" of both outside corners touching. The gap 3" in from each corner is 0.5mm, and the same for the inner corners. There is a section on the right side about 8" in from the corner that is a little under 2mm. We removed half the water to reduce pressure on the tank, and added a 2x4 inside the tank to reduce the likelihood of the stand compressing on that side.. We're going to check the other sections of our apartment to see if there is a more level section, and we're also considering having a professional come inspect our tank. How much bowing can an acrylic tank take generally? I'm not sure on the thickness of the walls, but it seems to be 3/8 to 1/2. -Chris <I wish I could say to an exact degree that your aquarium is or isn't bowing too much, but it must be said that acrylic tanks can bow a great deal more than one might expect. In fact, bowing is expected in acrylic tanks hence the extensive tops that are built into the tank (they stop the tank from cracking). Their flexibility is one of the things that makes acrylic tanks ideal for places where the earth shakes for instance, as they often prove more resilient than their glass brethren. It sounds to me as if the bowing you report is within a normal specifications, although your stand is definitely a cause for concern. More than anything, I'd make sure the stand is still sturdy (capable of holding the weight) and not splitting at the seams. Depending on the way it was built, it could be the split you see is merely cosmetic. Some stands have an internal structure that is the load- carrying part of the stand, so peeling veneers can be replaced or ignored. The alternative stand design relies on the four sides to complete a "box" type construction (the strength comes from the assembly as a whole), and if this includes you, then you're in for some real trouble when that split opens up more than it has already. If the stand made of particle board and it's starting to come apart, do not repair it - replace it. The price of the stand will greatly outweigh the price of wrecking your carpet - your downstairs neighbor's (if you have them) carpet, and so on... Trying to find a perfectly level floor is not always possible so sometimes you must shim the bottom of the stand. You can put a thin layer of Styrofoam between the tank and the stand which will take up the largest gaps as it is compressed by the tank's weight. I'd consider emptying everything but about an inch of water, and use this as a level as you shim the bottom edges of the stand to get the water as close to "level" as you can and then refill. Now for more mundane details... have we met? Where did you hear that I know about these things? I don't mind at all answering the question, but it comes as a bit of a mystery to me, just barely into my second cup of coffee this morning - that and I've not been publicly in the pet-fish-scene for over a year... just wondering how it is my name gets around, but all in all, no worries. Good luck with this... let me know if you have any more questions. Cheers, J --> Crazed Acrylic/Tank Cleaning 4/12/07 Hi Crew, <Hello Christine> I was wondering if there was any way to fix crazed acrylic in an aquarium? Is it just buffering it out, or do you have to just replace the acrylic (which would be hard considering I'm talking about a seamless tank)? I'm asking because I am considering buying a 100 gallon tank, but it is crazed in the center of it- almost 1 ft across and almost the entire height. I have no knowledge how it happened, <May not be crazed, but scratched from cleaning with abrasive material. Generally, this won't be quite as noticeable with water in the tank. My advice would be to buffer the acrylic with an acrylic cleaning kit such as Lifeguard's. This will remove scratches, but if it is crazing, it won't help much. Drs. Foster & Smith sells this product for around $20.00.> do you know any reasons why acrylic crazes? <Generally from stress and/or cheap acrylic which is more brittle than quality acrylic geared for aquarium use.> Thanks for your help, your website is terrific! <You're very welcome. James (Salty Dog)> Christine Glue and acrylic tank question(s) 3/31/07 Hello; I have an acrylic dispenser box that was originally used for storing soap at an "earth friendly" store. My spouse convinced me I should try it out for an aquarium (it was free). Originally I thought this was a bad idea but we set it up and tried running it with a few goldfish. They are thriving in the tank after six weeks. It's about 40 gallons in very tall, slim proportions. A couple of questions maybe you could help me with: First off, I apologize for using my goldfish as test subjects--I don't normally do such. 1) Is six weeks long enough to be able to say it's not leaching anything toxic into the water? <Yes> (I have many species of FW fish: cichlids, catfishes, loaches, ghost knife and I may creep over to the marine side eventually.....) 2) It has some permanent ugly lettering on the back. I'm thinking of 'gluing' sand to the inside of the back panel as a background. Would Weld-On work to make the acrylic tacky, allowing the sand to stick? <Mmm... I would not use this... for fear of weakening, ruining the panel... I would affix whatever you'd like on another thin sheet of acrylic and mount this, just place inside against the back...> Or do you know of something else I can use, like a spray paint or glue? I expect it will be permanently there. <Mmm... there are some epoxies that are non-toxic (once-cured) that you can use here... Check with the "Plastic Store" where you buy the scrap (hopefully from their bin of such... to save money)> Thank you very much for your time and expertise, best regards, Anna PS. I tried to register to WWM chat forum to ask my questions but was unable to. <Am going to cc Zo here re... We're all friends, associated in that way, but only he "administers" WWF. Bob Fenner> What eats acrylic? Dear Bob, A quick thank you for all you've done for us 'salts' out there. I reference WWM frequently and often and thank you and Lorenzo for all the time, effort, and sage advice you've devoted to people's better understanding of the life forms and biotopes they keep. <A pleasure and honor my friend> I have a question regarding what I believe to be radula marks etched into the surface of an acrylic tank. I recently helped a friend break down his 40 gal. tank (SeaClear or TruVu, I'm not sure which). He had (sadly) neglected any maintenance on the system since his last specimen died some two years ago, only adding top off water. Needless to say it was a huge mess, but somewhat of an interesting study from a scientific perspective. As I began to scrape of the thick filamentous algae covering all sides of the tank, I noticed a haze on the front panel. Upon closer inspection, this haze was a pattern of etchings in the acrylic surface! The pattern matches that which I have seen snails (esp. turbo) leave as they graze through a patch of Cyano. Is it possible for snail's radulas to be so hard as to etch into the acrylic? <Yes... for browsers, many gastropod mollusks have a rasping mechanism... a "tongue" called a radula (important in its characteristic make up for species identifications at times) that is constantly being regenerated in the back of the mouth, worked by a muscular device, the odontophore... that these various "snails" use to scrape away micro/macro algae et al. from hard surfaces as food... Some have modifications, additions of specialized salivas, bore into shells, melt rock...> I am wondering if you have ever encountered this, and if so, what species of snails you have associated it with. I am sure this info would be quite interesting to everyone out there with an acrylic reef tank. <I have seen this sort of marking... and simple "stress fracturing" that looks similar... in acrylic tanks. Don't know which specific species might be involved though. Bob Fenner> Sincere Thanks, Karl Is acrylic scratch remover safe for fish? Hello Mr. Fenner, I just got finished putting my new tank together. I have the powerheads, the heater, and the aragonite sand and water in. I have not yet put it the salt. I'm just testing the components and letting the sand dust settle. While inspecting my tank, I noticed in the light that there seems to be a very slight haze in a couple upper corners of the tank. I believe it might be from the TruVu SRK (scratch remover kit). <This may be so... or typical "stress fracturing" marks from heat-bending in those areas> I might of accidentally not rubbed off all of the scratch remover paste thingy. The water has a oil spill type look when viewed at a lower angle. Is this bad? Shall I take out the water and wash the tank again? Please help. Thank You. <Ahh, our businesses (retail and service) used to sell many TruVu/Aquaplex tanks... and I've spent many hours with the green and tan pastes you mention in their scratch removal kit. This material is not toxic. I would not take the tank down, or worry. Bob Fenner> Stan Taking out scratches from the inside Bob, do you know of any acrylic scratch removal kit that works underwater? <No... all require draining the system at least down to the level of the work. Bob Fenner> Thanks, Lee Re: Is acrylic scratch remover safe for fish? Thank you very much. That is what some people suggested on ReefCentral, but to hear it from an expert like you makes me feel so much better. Thank you again and have a Happy New Year. Stan <You as well my friend. Be chatting. Bob Fenner> DIY/Acrylic Weir 1/22/07 HI <Hello Andy> I'm interested in building an acrylic weir for my 4 by 2 by 2 marine tank and I have a few questions: The weir will be in the back left hand corner, going 6 inches along the back and 12 inches along the left hand side. I have decided on this size so I can drill holes through the acrylic and position powerheads through them, thus hiding them and making maintenance easier, while still having room for the inlet to the sump. 1) the tank is made from glass, will the bond between the acrylic and glass be strong enough? <Yes.> 2)Im in the UK and have only found acrylic for sale that's 5mm thick, would this be strong enough? (I know acrylic is stronger than glass but the tank is 12mm glass) <Will be strong enough.> I could make the weir from glass but acrylic is easier to drill, so that's why am interested in it. Any help you can give would be greatly appreciated. <Should have no problems. Do use an adhesive designed for aquariums. Some Silastics have mold inhibitors which can cause problems with your livestock.> Thanks <You're welcome. James (Salty Dog)> Andy Scratch-Proofing an Acrylic Tank...Not Practical Really - 01/21/07 I have a 90 gallon acrylic tank (marine) that I'm setting up which is starting out unscratched. I am planning to fill it with a lot of live rock, which I'd like to allow to lean against the back, and side walls of the tank, <<It's best to leave space between the rock and the tank walls for adequate water flow to preclude dead spot/buildup of detritus>> so I'd like to put a thin layer of something inside the tank to protect the acrylic from being scratched by the LR. <<Mmm...not very practical really>> Ideally it would be black. <<Then what why worry about it if you won't be viewing the tank through these panels? Since I can't roll up a sheet of glass to fit it through the access holes in the top of the tank, I'll need to use something that is flexible enough to roll up and get inside. <<Then you will have problems with the edges "curling" as gluing something in place will be difficult and will also "mar" the acrylic>> What can best meet these criteria (and please add any criteria that I should also consider): 1) non-toxic 2) not very expensive (less than $20 for a 2 x 4 foot piece?) 3) looks nice in the tank (not a lot of seams) <<Nothing that comes to my mind will fit these criteria for reasons I've already stated>> How should I affix the material to the back wall? If I use an adhesive, it must be removable later and not hurt the acrylic (or the fish). <<Again, not practical...pretty much anything that would hold will mark/etch the acrylic>> If I use silicone adhesive, will it discolor or damage the acrylic? <<I have seen this cloud/discolor acrylic>> Will it adhere well enough? <<As I see it, your only options to black-out the tank back/sides is to either paint the outside surfaces or affix painted panels to the outside surfaces...neither of which will prevent scratches to the inside of course>> If I just lean it in there, will I have problems with live stock or algae getting back there? <<Likely so, yes. Honestly mate, what you propose is just not practical in my opinion with the small openings limiting the use of "rigid" material and the adhesive "marking" issues. I think you'll just have to bite-the-bullet and accept the fact the back/sides will get scratched. As will the front, despite your best efforts...trust me I know [grin]. On a positive note, if you decide to sell or use this tank in a different configuration some day (e.g. viewed from two sides), the scratches can be removed and the tank polished to look like new...though not without a measure of "elbow grease">> (I'm considering making this an octopus tank) <<Be sure to read here ( http://www.wetwebmedia.com/cephalop.htm) and here (http://www.wetwebmedia.com/cephsysfaqs.htm) as well as among the associated links in blue at the top of the page. Regards, EricR>> Acrylics, leaks and silicone? 1/17/07 Hello<,> I have a question. <<Hello! We got answers!>> I have a<n> older large acrylic fish tank<.> <I>t has several leaks on the bottom where the seam is<.> <<Yeeow! Talk about a bummer. Older, meaning "out of warranty"? >> I tried to silicone the outside but it made the leak worst <worse.> <<Two things. One: You don't ever seal leaks from the outside. It just doesn't work that way. Two: Acrylic needs to be welded to make a seal, using solvents, not goops. A popular method of bolstering every seam in your acrylic tank is to use acrylic dowels (square) and bond them to every seam. This procedure and more available at: http://www.wetwebmedia.com/acrylictkrepfaqs.htm >> <H>ow does <do> I fix this<?> <T>hanks. William. <<You got it, W. -Graham T>>>
Leaking Acrylic Sump...Silicone Not the Answer - 12/12/06 Hi and thank you all for your support and knowledge. <<Hello...is our privilege to share>> I have had my reef tank for over a year now with good success. I am attempting to build a custom-size sump inside the stand of my 125 gallon running reef. I purchased the 3/8" acrylic and had it cut to size so the fit seems to be good. I used Weldon-3 in all of the seams. I then let it dry and used Weldon-16 to form a bead around the seams. <<Hmm, shouldn't be necessary if the pieces are bonded correctly with the Weldon-3, but won't hurt either. If you really want to "strengthen" the corners/seams, you could cement in triangular shaped corner braces (these are offered/can be found "pre-made" on the Net)>> I filled the sump with ½-inch of water and the water leaks out of the seams. <<Mmm, perhaps the "fit" was not as good as you perceived. For the Weldon-3 to work properly the joints must fit precisely to allow the cement to be drawn-in by capillary action>> I tried to put another heavy coat of Weld-on-16 and let it dry overnight. This also leaked. <<Hmm...just spreading it over the surface isn't likely to help as you've discovered, but if you can "force" this thicker bodied cement in to the joints you might be able to fill the gaps/leaks. If the leaks are many/large you will probably have to either cut the pieces apart and recondition the mating surfaces...or have new acrylic cut/prepped and start over>> The acrylic shop said I should use 100 percent silicone to fix the leaks because it stretches. <<A poor suggestion/option in my opinion...the silicone will not adhere well to the acrylic and though this may seem to work at first the silicon will eventually fail and leak...probably when you happen to be away for an extended period>> I read on your website that silicon is not the best answer. <<Correct>> Do you think this will work only for sealing the water and not for the structure of the sump? <<A poor solution for the former and disastrous for the latter>> I also noticed the Weldon-16 does evaporate so the seal does become much thinner when dry. <<Yes, the cement shrinks as it cures>> Thank you. Darrell <<I would try the thicker cement again, using a finger run along the joint to force it in (do make sure everything is "completely dry"). If you aren't able to seal the gaps this way then your best/safest option in my opinion is to remove this sump and rebuild/start anew. Regards, EricR>> <If this fails, RMF suggests securing a length of doweling (acrylic) cut to fit in the corners (I'd do all inside seams while you're at it)... With the Weld-On... Make sure and examine the doweling closely... it is often convex on two sides... you want the two flat sides against the current acrylic panels.> Acrylic Tank Wobbles on the Stand -- 10/02/06 Hello WWM Crew, <<Scott>> I was wondering if I could tap your experience to help with a potential problem. <<Okay>> I am currently assembling a new setup, which includes a new Tenecor 135 gallon acrylic tank (72"Wx18"Dx24"H) on a custom BRI cabinet. <<Neat! I too have a Tenecor tank, though somewhat larger. Very good craftsmanship>> In spite of the fact that the craftsmanship appears to be outstanding on both the tank and cabinet, the (empty) tank "rocks" back and forth about a quarter inch on the stand. <<Mmm, need to determined if the fault is with the stand or the tank>> <Or the floor... RMF> Needless to say, I want to stabilize the tank on the stand before proceeding and was hoping you folks might have some "tips" as to how to do this. My first thought is to shim the tank from below but I am concerned this may create stress points along the bottom that may cause problems down the road. <<I would not do this>> Another thought was to lay some kind of soft base under the tank that would form to the uneven contours along the bottom (the cabinet has a "lip" along the side of the top deck so about one inch of the bottom of the tank will be covered from view). Any thoughts/suggestions you can offer would be greatly appreciated. <<Firstly Scott, I would obtain a long straightedge and place this diagonally from all four corners of the tank stand to determine it is flat and level along it entire length/width. If not, this should be taken up with whoever crafted the cabinet and corrected. If the problem is with the tank bottom being slightly convex then I would contact Tenecor. Acrylic tanks do have 'some give', and there is a 'chance' all would be fine with the small gap you describe, but I would contact the tank manufacturer and describe/discuss with them just for peace of mind. After you get these things sorted out and are ready to proceed, get some 'fan-fold' insulation from Lowe's or HD and place under the tank. This thin (1/8') Styrofoam insulation will add just a bit of cushion and 'gap filling'>> Scott <<Regards, EricR>> -Cleaning Acrylic- 8/28/06 Hello, <Hola> Read articles and FAQs, but couldn't find the answer... Is there any safe cleaner I can use to clean adhesive from acrylic pieces for a DIY fuge? I peeled an adhesive plastic lining of off them and want to get any residue off and make them safe for my marine system water. Is this possible? Rubbing alcohol/bleach? Thanks, Michael <Rubbing alcohol works well, vinegar diluted in water works if the acrylic is soaked in it, soap and water if you wash out the acrylic well afterward, quite a few choices. I would not use bleach though, may leave a residue if not cleaned off well, and a bit too strong for a first use.> <Justin> Underwater Acrylic Scratch Repair - 06/29/06 Hello, <<Hi!>> I must have picked up a rock cleaning the acrylic and got several scratches on my boss's 90 gallon tank. <<Is easy to do>> I ordered the product above and would like your opinion on using it. <<Is fine for small repairs>> Can you really use this product under water with the fish in there? <<You can. The sanding action obviously will liberate fine acrylic particles in the tank, but these are not harmful to the tank inhabitants in my experience>> Do you know if it works well? <<That depends much upon you. Follow the directions closely taking your time, and don't "skip" grades of abrasive. Also, be sure to "feather" the repair to reduce the risk of creating a "lensing" effect. And if you find you need more/finer abrasive sheets you can get them here without buying another "kit": http://www.sisweb.com/micromesh/mmr_sheets.htm>> I understand it's time consuming but that is no problem. <<Indeed...not an easy task>> Also we would like to buy a clownfish but we're wondering which would be the less aggressive? <<Mmm, in my opinion Amphiprion percula is one of the more "gentle" clownfish species>> Thanks for your help! Nancy <<Happy to assist, EricR>> Acrylic Tank Scratch Repair - 06/07/06 Hello, <<Hello>> I found your site on Google and wonder if you can help. <<I'll try>> A friend of mine recently bought a used 300 gal. acrylic tank. <<Neat!>> The problem is it's scratched from head to toe. <<Common>> We said we would make it a project to restore it and have since bought a few of the Pentair restore kits, but this seems to be making the problem worse. Spoke to a representative from the pet store who informed me that it is impossible to fix that size tank with the repair kits, it would take forever. <<Indeed, these kits are meant for touch-up/spot repair>> I have however seen where you recommend Novus. <<A good product, yes>> Is it similar to the scratch removal kits in that you have to sand the acrylic, or is it just a rub on formula? <<Novus is a "liquid" with different grades of abrasives used in succession. Best/quickest results come from using in conjunction with a power buffer (electric or air), but can also be used "by hand"...with much elbow grease>> How many ounces would it take to complete a tank this size (8ft/3ft/2ft)? <<Difficult to say, depends much on the degree of damage...but likely cheaper in the long run than the Pentair kits>> Also, I don't know if I am pressing too hard on the sandpaper, but I can't seem to get out all the lines I have made. They are extremely fine but still visible at an angle, and hazy in some spots. <<Are you using the paper "wet"? Have you tried buffing with the liquid polish? These kits are pretty good for small touch ups on a tank that is "in operation" as you can use the abrasive sheets under water. But given the fact that your tank is "dry", I would proceed with the Novus product. You might also try posting your questions/challenges in the DIY forum on Reef Central. There are several acrylic tank manufacturers that frequently monitor the forums that could likely provide some useful tips>> Your assistance would be greatly appreciated. Much thanks, Issaco Mignott <<Good luck with your project, Eric Russell>> Acrylic aquarium: repair necessary RMF's go I just purchased a lightly used reef ready 110 gal tank 48L x 30"H x 18"D. When I filled it, I noticed that the front and back bow out by about 7/8" <A bunch... is this a stock tank... by whom?> without the salt added (don't want to pour $60 out the window!). It is well supported on the top with .5" acrylic but the sides are only about 3/8". <Should be structurally okay for a tank of this height, run... but half inch would have been better aesthetically> The front corners are rounded by about a 2" diameter. All the seams look good and solid but on the bottom right side, there are some light lines, they look like crazing but are mostly parallel and are invisible head-on. There was a mention of this sort of thing in Mr. Quattromani's Acrylic Repair article, but I'm not sure from the article of what to do beside trash it and buy another tank. I wish I read it before I bought! <Mmm...> The owner of the local pet store builds tanks for his personal use, when I asked him, he said that it would probably but not certainly be fine for quite some time, but that if I'm worried, I could greatly reinforce the seams by attaching a strip of acrylic to the tank along all of the seams. Agree? <I do> If it would likely be okay for a year or two as it is, that would be perfect as I'll be moving in that time and just buy a new tank at the new location and transfer the livestock. If not, would the patch be okay? Just to be clear, I understand you cannot make promises. <If the crazing is minimal as you state, even though it is bowing this much, this tank, set upon a good bottom should be fine. I would very likely use it and not worry. Bob Fenner> Thank you, -Rob A Poorly Engineered Acrylic Tank - 04/22/06 EricR's go I just purchased a lightly used reef ready 110 gal tank 48Lx30Hx18D. When I filled it, I noticed that the front and back bow out by about 7/8" without the salt added (don't want to pour $60 out the window!). <<Yikes! That is a lot of "bow">> It is well supported on the top with .5" acrylic but the sides are only about 3/8". <<Mmm, poor engineering in my opinion...the sides (and top!) should be twice this thickness (3/4") for the height of this tank>> The front corners are rounded by about a 2" diameter. All the seams look good and solid but on the bottom right side, there are some light lines, they look like crazing but are mostly parallel and are invisible head-on. <<Not uncommon>> There was a mention of this sort of thing in Mr. Quattromani's Acrylic Repair article, but I'm not sure from the article of what to do beside trash it and buy another tank. <<I would be more concerned with the amount of deflection you're experiencing>> I wish I read it before I bought! <<Indeed>> The owner of the local pet store builds tanks for his personal use, when I asked him, he said that it would probably but not certainly be fine for quite some time, but that if I'm worried, I could greatly reinforce the seams by attaching a strip of acrylic to the tank along all of the seams. Agree? <<I do...but then...it won't be sitting in "my" living room <grin>. There's a store here in town with some "plant" tanks that were made similar to yours...lots of bowing can be seen from the sides...and they have been fine for several years...thus far. But were this me...I would relegate your tank to sump/refugium duty where the water volume would/could be limited to about half the tank height>> If it would likely be okay for a year or two as it is, that would be perfect as I'll be moving in that time and just buy a new tank at the new location and transfer the livestock. If not, would the patch be okay? <<Is "likely" to be fine either way. Is up to you to decide if you want to take the gamble...I would not>> Just to be clear, I understand you cannot make promises. <<Indeed my friend...but I'm pretty sure you will never be "quite satisfied" with this tanks appearance, if for no other reason>> Thank you, -Rob <<Anytime, EricR>> Re: acrylic aquarium: repair necessary There is no manufacturer listed on the tank but judging by the way it's supported on the top and the overflows and such are done, it looks pretty professional. <Ah, good... and the fact that you state the corners are/were heat-bent is further proof> I am very nervous because I keep hearing different things. I've done a lot of asking around and I've heard everything from "Picture a grenade full of fish, pull the pin--what will happen?" through "enjoy the tank!" <Mmm, one thing you might do that might bring/grant you piece of mind is to fill the tank outside... in the garage perhaps, and leave it full there for a few weeks... It really should be fine. Bob Fenner> Right now, given such mixed answers, I'm leaning toward selling it cheap as a giant terrarium or breeding tank for a basement and buying a more modest 75gal glass as I live on the 6th floor and wouldn't want to flood the neighbors. -Rob Repairing acrylic leaker 3/7/06 Hello, We are searching for someone who can fix the leak in the seam of our large (8'W x 4'H x 2"D) acrylic salt water tank. <<Eeek!! A difficult challenge at the least!>> The owner has said that he sign a waiver that relieves the repair person of responsibility if the repair does not hold. <<While there are several ways that this can be repaired, no sane repair person will guarantee this work. The best looking and safest repair will require emptying the tank, cleaning out the defect and filling the void with a two part polymerizing adhesive. A cheap and aesthetically non-pleasing repair could be made by gluing an acrylic splint inside the defect with two-part or solvent adhesive after cleaning the area with sandpaper. >> The leak is small and is coming from the front left seam, about half way up the tank. The tank currently is filled to below this level and still has fish in it. Can you recommend anyone that could take this sort of job on? Regards, Jennifer Ferguson, Woodwork Creations <<I don't know of anyone to recommend. Beware that any repair does not address why this occurred in the first place... was the tank properly built to begin with? Is catastrophic failure imminent? Was the stand out of level? Personally, I would strongly consider replacing the tank with one built by a reputable builder. Best Regards. AdamC.>> Acrylic repair 3/4/06 Hello Bob, <Tony> I would like your advice on repair of acrylic tank. I have never owned an acrylic tank before. Just purchased an 180 gallon acrylic fish tank. The previous owner made 3 holes for pipes used in an overflow sump. ( mostly for salt water). I need to plug up the holes to house my Arowana. Any advise on how to plug up these holes.. Any suggestion would be helpful.. Thanks Tony <I would make these "temporary"... rather than affix the mentioned cover pieces with solvent (as the rest of the seams)... By using Silastic (100% Silicone Sealant) and "squares" of appropriately thick acrylic (look in the "used/scrap bin" of a plastics dealer/fabricator), over-lapping the holes by an inch or more, making a thin bead, smooshing the covers onto the inside of the tank, over the holes, taping in place for a day or so... Bob Fenner> Re: acrylic repair 03/07/06 thank you for your help <Oh, and I do hope/sense we will "meet again" (same bat-fish channel plus), when you "uncover" these through puts to make this tank part of a reef system. Cheers, BobF> What causes Acrylic crazing - 01/23/2006 Hello <Hi there> I have three questions that I hope you can answer. 1. What causes crazing in acrylic? Does it normally occur when the material is under tension or can it occur in raw sheets of acrylic also? <Mmm, some acrylic seems to craze much easier than others (one could say this is a "quality difference" I suppose). And some does this without actual construction, use, with time... particularly if/when exposed to sunlight, heat... But most crazing does occur in actual practice, in areas of higher torsional stress... corners, near upper front seams...> 2. I have heard about a two part acrylic cement that some acrylic aquarium manufacturers use, they say it produces stronger bonds compared to standard the standard one part" Weld on" cements. Can you tell me what this two part stuff is? <Nope, don't know re> I've never heard of it. It sounds like a type of epoxy but I don't know why one would want to use epoxy to join acrylic. <As far as I'm aware, Weld-On and similar solvents actually melt the acrylic together (not cement)... done "right" (square cuts, clean...) there is nothing stronger as far as I'm aware> 3. I'm planning a tank 120L X 24W x 30H using 1" cast acrylic for all surfaces. I'm trying to keep bowing to a bare minimum for a tank of this size, do you feel this height is safe for 1" thickness? <Oh yes> Have been reading your site for awhile and respect your suggestions, this site has been a great resource to many of us. Thanks again. Sean <Thank you for your kind words, acknowledgement. Bob Fenner> Acrylic gluing... plugging holes. 1/22/06 Howdy folks, <Paul> quick question about my tank. I have two bulkheads in my 90 gallon reef tank that I don't want to use anymore. They are on the back of the tank, one near the top and the other near the bottom. Can I remove the bulkheads, then get two small squares of acrylic and use Weld-On glue to cover up the holes? <Yes> Will they hold once the tank is full? <Hopefully, yes> How big should the squares be? <An inch or more beyond the hole diameters> On the outside back, there will be the openings where the holes used to be. Should I add something on that side in case? <Could, but not necessary> Is there another way to close up the holes? One bulkhead is 1" threaded, the other is 3/4 non-threaded. Is there some sort of plug that could be put in there. <Yes... a piece of pipe in the non-threaded one with either a threaded or not terminus with a cap... the threaded one with a threaded cap, Silastic for "pipe dope"> What if I just cut the pipes (the ones coming from each bulkhead) from the back and cement them up with a PVC cap. <Could be done> I could leave strainers on the inside of the tank. It would be kind of a dead spot in terms of water movement (only an inch or two deep though), but nothing would get in there. What do you think? What would you do. Thank you very much Paul <If I was very sure I'd never want to re-use these through-puts I'd solvent the covers over, if not, cap them... Bob Fenner> More Myths About Livestock Scratching Acrylic Tanks - 11/18/05 I recently bought a 220gal Tenecor tank (72X24X24) with the Simplicity Plus system with the intention of setting up a FOWLR system. I originally wanted to buy a shark, but after reading your site, I realized that this tank is simply too small for one. <<Yes, and shaped wrong too.>> I would like to put a couple of triggers in though, maybe a Blue Throat and a Picasso. <<Cool! I have a Blue Throat in my Tenecor 375.>> The guy at my LFS said that triggers sometimes scrape their teeth along the sides of the tank, and since this is an acrylic tank, I thought I'd better check. I've never read about this behavior, have you? <<Nope...probably falls in to the same category as the stories about the Ctenochaetus genus of tangs scratching acrylic tanks with their teeth...mostly wives tales. >> <<Did you bring this up with your wife? MH>> I think you need not worry...and believe me when I say...YOU will put far more scratches in the tank than any fish!>> Thanks! Robert in Texas <<Welcome, EricR in South Carolina>>>Mmm, do agree with the hobbyists causing more scratches... but have seen trigger-made scrapes in acrylic... and a Pleco-destroyed one recently. RMF< Acrylic crack repair, opportunistic/typical Moray behavior 11/11/05 I just bought a used 55 gal hexagon acrylic tank. I was moving it around trying to determine placement when I realized there is a crack in the top panel. No point in finding blame now, I just want to know if I can save it or take this as a loss. <Mmm, can likely effect a simple repair here> The crack, definitely not crazing since I can feel a separation, starts from a corner round of the large cutout and extends about 3 inch toward one of the six sides. One more inch and it is going to hit the side edge! I've been reading about using Weld-On and applying an acrylic panel to the crack. <Yes> Also is drilling a hole at the end of the crack going to stop it? <Not likely useful, necessary> Can I get Weld-On at Home Depot if I were to try this? <Best to seek out from a "Plastics" supply... look in your local Business Yellow Pages Directory re> Should I worry about this crack since it is only on the top panel? <Mmm, not much to worry about, but I would solvent it closed> The tank is a standard 55 gal hex 24x24x28. It's funny how things go wrong and just seem to spiral even more. I bought the tank intending to make it a new home for my white-mouth eel about 15in, who has managed to eaten two smaller fish. Well he attacked and ate my 6-7 inch lunare wrasse last night. I couldn't believe he was able to swallow the wrasse or even catch it. What a sight! Thanks <Welcome... an easy project/fix... Bob Fenner> Should I silicones seams on acrylic tank? 11/3/05 Hi, I recently purchased a used acrylic 125 gallon aquarium. It is in a very good shape. It does not leak. But just in case I am thinking about sealing seams with silicone anyway. Do you think it's a good idea? <Mmm, no> I'm wondering if silicone sealant might damage acrylic. Thanks for the great site! <Welcome. Silicone in acrylic seams/corners doesn't provide much strength (and in between surfaces not often enough)... Acrylic doweling can be fitted, solvented into corners if there is a need/desire. Bob Fenner> 100 Gal. Acrylic Tank Modifications - 10/25/05 Hi Bob, <<EricR here...>> I got your email address off of the web by searching for information on Acrylic tanks. <<Much info about many things "wet" here.>> I have a 100gal (60x18X20) TruVu that I have had now for maybe 6 months. I am getting into the final stages of this all set up and just about ready to fill it. <<Ah...anticipation!>> One small problem... I have two Emperor 400 power filters I am going to run on this. Standing on a ladder looking down at the tank, on the top in the back of the tank there are two cut out areas behind where the lights would sit. I was planning to put my filters here but I need 16 inches total across for the filters to fit. In order to do this I need to take less than 2 inches off each of the areas where the filters would hang. So I was thinking a 1/2-inch on each side of each cut out area to get the filters to fit. If I do this, will I be possibly taking away from the structural integrity of the tank? <<Maybe...though what you describe doesn't sound unreasonable if done with care.>> It's not allot I will be taking but what would be the max of that area that I could take? <<Hard to say...will depend on acrylic thickness, skirt width, other design features.>> Any advice would be greatly appreciated! <<I would recommend contacting TruVu, explain/describe what you want to do, and see what they say.>> Thank you <<Regards, EricR>> Re: 100 Gal Acrylic Tank Modifications - 10/27/05 Hi Eric, Thank you for your feedback, appreciate it. <<A pleasure>> I looked again yesterday and the amount of space I need on each side of the filter areas is less than a half inch each side. I plan on NOT touching the center support area at all so I think this should be okay. <<Likely so>> It appears that the thickness is approx 1/4 inch or more. <<Mmm...Hopefully more...>> So like you said I will have to do this with care.. :) <<Careful use of a Dremel-type tool and appropriate bit is a good method for removing this small amount of acrylic.>> Thanks again and I enjoy your web page and information I have been reading. <<Happy you find it useful. Regards, EricR>> 1" thick acrylic - Can we fix it? 9/27/05 Hello, I couldn't find a similar problem to mine except ...leak leak... leak. I have a very large 500+ gallon tank. It's 1" baked acrylic on all sides. I have saltwater in it and have had it for like 6 - 7 years. It's completely built in to a wall and is supported on a steel structure. We noticed some water damage on a piece of quarter round that was trimming it and when we removed the trim water started spurting from a pin hole leak. The trim was actually holding it in check some what. I don't want to try and remove the whole tank from it's location as it will cost major in carpentry. Will this acrylic cement (northcoastmarines) work for this type of leak? How does this type of thing happen after all these years? Kim <This tank can likely be repaired... in place. Do look into square "doweling" (this is sometimes only flush/ninety degrees on two of the four sides... You must make sure the flush sides are affixed to the corners. What needs to be done? Drain, clean the tank entirely, cut the doweling to size to fit in all corners (yes, including the sides), and solvent in... The extra bit of acrylic in the corners won't be obvious in time. Cheers, Bob Fenner> Re: 1" thick acrylic - Can we fix it? 9/30/05 Thanks so much but where does one find square acrylic (I assume not just plastic?) "doweling"? Kim <Should be available, as well as solvent/Weld-on and cleaner from a large/r plastics distributor in your town... or mail-order... Use your "Yellow Page" directory, the Net to find. Bob Fenner> Cracked acrylic tank 9/20/05 Well Bob, You were right, only give it time....I've got a new one for ya. My crew and I were installing a new 36" x 30" x 36" acrylic tank from AAT today. As the tank was being set down on the floor, one of them lost their grip for fear of getting their fingers pinched. The right front corner of the tank hit the bare concrete floor from about 2 inches up....that's when I heard that unquestionable cracking sound. I saw my profits disappear before my very eyes. However, upon inspection, it wasn't nearly as bad as I thought. The crack is actually in the bottom plate about 1/4" in just beneath where the front panel (front and sides are one piece with bent corners) is welded to the bottom panel, about 6 inches from the start of the right corner radius. This crack extends from the bottom surface upwards about 3/4" in an arching pattern, almost like a rainbow...but not nearly as pretty, and finishes back at the bottom surface. Its a pretty clean crack and does not go anywhere near where there would be water. I figured that because it directly underneath the front panel, that even if it extends further over time, it would eventually dead end into the front panel and because its almost dead center under the front panel, that there would be plenty of material to keep it from leaking. Your thoughts on this ???? Scott C. Wirtz >>>Greetings! Sorry it took so long to get back to you, things are crazy for many of us here on the "crew" and tons of queries coming in. Bottom line, it's impossible for any of us to say for sure about your tank. I had a similar thing happen though to a 300 gallon tank, and it was just fine. Good luck! Jim<<< <<RMF would still run a bit of Weld-On (of lower viscosity) into the cracked area>> Need advice on separating acrylic sheets... 8/27/05 Hi Bob, <Ed> My name is Ed Ruiz. I'm in SLC, Utah. Seeing your vast experience in the hobby and working with acrylic I hope I can get some advice from you. <I see> I recently acquired a lot of 1/8 and 1/4" acrylic sheets (24"x48") that had apparently been stored under less than ideal conditions. I find that the sheets are still with their paper masking on, but between each two sheets there is a yellow or blue textile material that is holding them together. My theory is that they were heavily stacked (too many sheets atop each other for a long period of time - <In the heat...> I got them for free) and the masking textile's adherent has bonded rather strongly. I have not insistently attempted to separate the sheets and would like your opinion, advice or suggestions. I will use the sheets to build aquariums for a hatchery project I am working on. Ed Ruiz <Very hard to separate... inserting long, thin metal strips between and prizing apart is likely your only option... though this will very likely scratch through the protective masking... Have you tried speaking with folks in the acrylic business? Manufacturers of such do have websites... I would get their input before proceeding. Bob Fenner> Re: need advice on separating acrylic sheets... 8/30/05 Thanks a lot Bob, your suggestion is exactly my wife's' and makes sense. <Ahh, good company> As to the acrylic manufacturer's or vendor's websites, they're more interested in selling me a product for taking the paper masking off. This tells me they did not pay much attention to my enquiry in the first place. I'll go with your advice. Ed <Please make it known how this goes... Years back I tried to do this... with piano wire and a strong friends co-help, jamming thin metal strips twixt the sheets... and getting the old masking off... what a lot of work besides! I would listen to the acrylic manufacturer's, distributor's advice re this. Bob Fenner> Links 08/08/2005 Hi, I am a reefkeeper and regularly scan your site for answers to questions. Very nice site, thank you. We recently launched a company called Everclear Transparency Refurbishing Inc (aka ETR-INC) at www.etr-inc.com We primarily sell acrylic scratch removal kits and products right now, but are quickly expanding our inventory to include other scratch removal accessories and maintenance products. We also plan to add lots of useful information and tips to help reefkeepers avoid scratches. Could you please post a link on your site for us? <Will gladly do so> At some point we may be interested in buying some ad space on your site but we're too poor right now. Thanks again! Regards, Scott Everclear Transparency Refurbishing Inc. www.etr-inc.com < http://www.etr-inc.com/> scott@etr-inc.com <mailto:scott@etr-inc.com> <Bob Fenner> |
|

|
Features: |
|
| Featured Sponsors: |

.jpeg)

.JPG)
.JPG)
.JPG)