 |
|
|
|
|
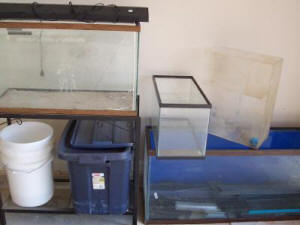
Welcome To the World of Versatility! By Joshua McMillen It seems to me that in this hobby there are few guarantees, and perhaps that is for the better. We will never be short on methods to improve or problems to solve. I believe that aside from the beauty of that which we keep, this is one of its greatest attractions. In this regard, we must be able to change, expand or adapt our systems to keep up lest our ideas be placed on a shelf until we can afford to implement them. I would not be surprised to find this as a leading cause in the lack of improvements being made with our home systems. As long as we brood on ideas, and we do brood, we can only hold onto so many before they are replaced by the constant influx of new ones. In this article I hope to make at least one aspect of system design a little easier to implement, as well as completely rearrange at our leisure. In system planning and setup, I feel there is but one major limiting factor toward this end: Plumbing. More specifically, sumps. Upgrading our sump related equipment, integrating refugia, and any other number of desired changes to them is limited by the much needed system of baffles we employ. Baffles, as we know, are the wall construction within the sump that moderate and direct the flow of water so as to force air bubbles to the surface, and form a pathway through the desired filtration on its way to the return pump. Once fixed in place, however, we must either make changes as their construction allows, or remove them completely and recreate them. Neither of these can be considered at our leisure. Traditionally, these baffles are siliconed in place, presenting two problems. First, we must match the materials being used (acrylic to acrylic, glass to glass, Etc.) and of course the obvious, once installed they cannot be moved. As an alternative, I propose a pressure locked/slip fit baffle system, which when properly installed is as effective as a fixed installation, while providing easy manipulation to incorporate a larger skimmer, refugium, pump, Etc. For ease of explanation here, I am going to use an old glass aquarium as the sump vessel. Though these can be installed in virtually any vessel that we use, it would change their construction slightly with the shape of each as you will soon understand.
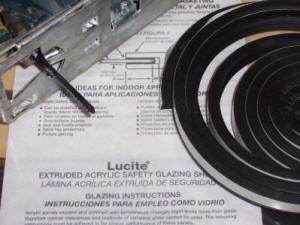
Materials and Tools Needed
Step 1: Measure
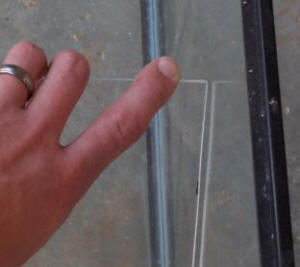
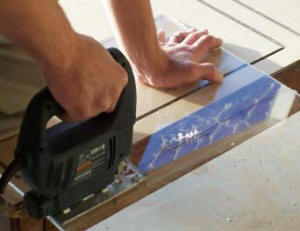
Step 2: Cut
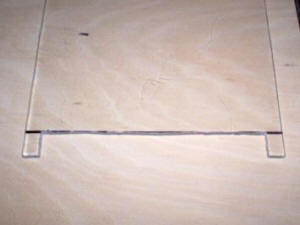
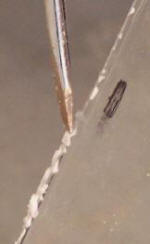
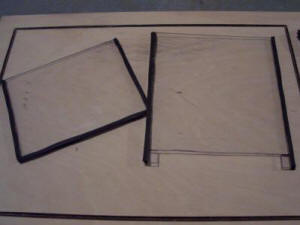
Cutting the Lucite will likely take some experimenting so be sure to take a few practice runs on a scrap section. Though the label states to use a fine tooth blade, I found it to be much easier with rough, wood cutting blades. This seemed to cut wide enough to prevent the edges from melting back together as the blade passed. The cutting of the baffles is fairly straight forward with one exception; the under flows. Once the initial rectangle has been cut, it will be necessary to cut an additional 1”x9” section (centered) out of the bottom edge. This opening serves two functions. It, of course, forces water to pass under the baffle, while the resultant “legs” on each side provide support. This ensures that directional flow is always maintained, since the baffle cannot inadvertently drop or be pressed into the bottom of the sump. Step 3: Apply EPDM
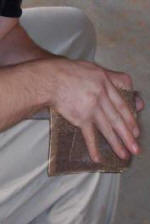
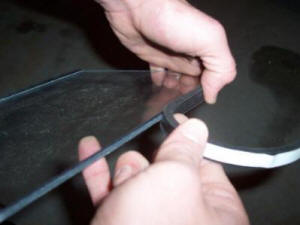
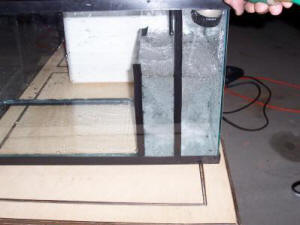
This is the final step in construction of the baffle itself. Simply put, it’s like using a sticker. For the over flow walls you will be covering three sides; left, right and bottom. The left and right sides should be covered from top to bottom and the excess cut flush at these edges. The bottom should be covered from left to right, extended beyond the baffle, and cut off flush with the outside edge of the side strips. This creates a full seal across the bottom eliminating any gaps at the corners. The under flow walls only need to be covered on the left and right sides, in the same manner. The EPDM strips will add a ¼” to each side of the baffle making them wider than the sump vessel. When installing the baffle, the compression against these will create the pressure lock. This will insure hold and create a water-tight seal for proper function. Step 4: Install and Test
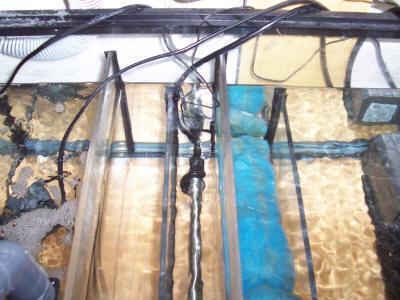
Now my friends, you are finished. What you are left with is a fully functional yet extremely versatile system of baffles. Make it what you will, removal and adjustment take only minutes. Wonder if a refugium might be useful? Try it! Want that bigger skimmer you’ve been drooling over? Buy it! It is now truly up to you!
|
|
|||||||||||||||||||||||||||||||||||||
|