|
|
| Home | Marine Aquariums |
Freshwater Aquariums |
Planted Aquariums |
Brackish Systems |
Ponds,
lakes & fountains |
Turtles & Amphibians |
Aquatic Business |
Aquatic Science |
Ask the WWM Crew a Question |
| Please visit our Sponsors | ||||
|
50 gallon Glass Tank... Plugging Hole 8/22/08 Hi I want to start out by saying that I love your site. I have been reading almost everything on your site, it has been very helpful. <Great! Thank you.> Ok now to my situation. I have a 50 gallon 36L x 18W x 17 1/2 H. The tank was purchased as a reptile habitat originally. It has a sliding screen lid and a plugged hole in the bottom of the tank. Now I know that on your site you have told others that a reptile habitat can't be used as an aquarium because they don't use thick enough glass, but we have checked this site http://www.garf.org/tank/BuildTank.asp and according to them a tank with the dimensions like mine should have 1/4" thick glass which mine does. <An enclosure built just for reptiles may not be suitable for holding water, if your tank is ¼', it is likely it was built for either.> So since the glass thickness is what it should be, this is what we planned to do but I wanted to get your opinion on it. We plan to replace the top black frame with one with a center brace (I have read your site about how to replace, and making sure all old silicone is gone). <For the trouble and cost, do consider the 'Euro Bracing', running the 2X36' strips along the top described on GARF instead. This will make a much stronger tank for about the same price and work. This tank will really be fine without either, but making it that much more bulletproof certainly does not hurt.> The next thing we plan to do is take 2 sheets of glass that will be larger than the hole in the bottom of the tank. We are going to silicone one sheet on the outside to the bottom of the tank and let that cure for 24-36 hours. Then we plan to turn the tank over, and fill the remaining hole with silicone, and silicone the other sheet of glass over that. We plan to let all of that cure for about a week before filling with water. When we are ready to fill with water we plan to do so in our bathtub incase there is trouble. <The entire tank perimeter will need to be supported doing this.> Do you think this would be a good idea, or do you have other suggestions? <This can work, but how big is the hole? Likely it will be the size of a commonly available bulkhead. If it is you have two better options. First, you can get the appropriate bulkhead and a PVC plug and just plug the hole. This will leave the hole usable should the need arise in the future. The second option is to use the hole as an overflow drain if you have any desire/need to run a sump filtration system. If the hole is larger than this your fix can work.> I appreciate your help in this situation and look forward to hearing from you. Thanks, Tonya <Welcome, Scott V.> Re: 50 gallon Glass Tank... Plugging Hole 8/22/08 Thank you so much for your fast reply. <Very welcome.> I have a few more questions if you don't mind. First I want to say that we took things a little further and went to PetSmart tonight and looked at the 50 gallon tanks that they had there, and my husband took a pen a paper and marked the exact thickness of the glass, and came home and used that to measure ours and it is the exact same thickness. In your previous reply you said the following (<The entire tank perimeter will need to be supported doing this.>) Can you please explain what you meant by that I am a little confused? <Just that filling it in the bathtub without the tank properly supported can break the tank.> Also my husband wants to stick with the 2 pieces of glass fix for the hole at the bottom, can you tell me if the 2 pieces of glass should be a certain thickness, or will it be ok if the when the 2 of them are put together they are at least 1/4" thick? <One piece on the inside will work fine, I would use ¼'. Even if you use two pieces, ¼' a piece it is.> Again thank you for your time in this situation. Tonya <Welcome, Scott V.> Plugging Hole 8/11/08 Hello, I am in a bit of stress due to a sump hole in my acrylic tank Are there any plugs that will plug it on the market? Or I also had the idea of taking to pieces of acrylic and gluing it on either side of the hole. Please help me any info is welcome searching on the internet has been a wild goose chase. Thank you very much. Ivo Fedak <This is just a matter of getting the appropriate sized bulkhead to fit the hole and then using a PVC plug that will fit the bulkhead. Using a threaded bulkhead and PVC fitting with silicone will leave the bulkhead usable in the future. Welcome, Scott V.>
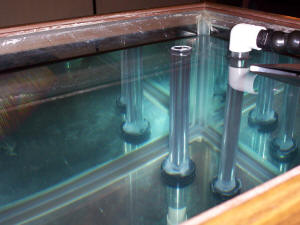
Drilling a 20 Long-Broken! 5/27/08 The other day I drilled a 3" hole in a 20L for a coral propagation tank. I had my bulkhead in the tank and I was working on the stand, which was being constructed of 2x4's, and a 9" piece of 2x4 fell on bottom of the tank opposite the hole but didn't break the glass. <Hearts stops for a moment!> One would think I would have learned my lesson and moved the tank farther away after this incident, but I didn't and a moment later an identical 2x4 fell on the side next to the bulkhead and cracked the glass. <Oops!> Now to my question: I realize it isn't advisable to drill such a small tank as the glass is thin, but if the hole is drilled without incident, can we then assume the bottom glass is strong enough to hold water? <No.> If not, how long would you let it sit with water in it before you could then assume it has the strength to hold the water? <I would not assume this at all with a crack in the bottom.> This troubles me because when the wood hit away from the bulkhead the glass was fine, but it cracked when hit next to the bulkhead. I had planned on testing the stand and the tank together overnight to make sure everything was structurally fine, but I worry that this may be too short a time period. <It very well will probably hold for a while with a smear of silicone, but this will eventually fail. You could perhaps repair it by siliconing in a pane of glass on top of the cracked pane, but this is likely not worth the time/effort/money compared to the price of a new tank. Drilling such thin glass is a bit trickier. The drilling very often goes fine, with breaks due to incidental events such as this or pressure on the plumbing. This can be done without any problems, but I would simply buy a new tank on this one.> Thanks, yall are always a lot of help. <Welcome, good luck, Scott V.> Need help with a tank stand--can't tighten bottom bulkheads due to wood center brace 6/20/07 Hi there, I'm hoping you can help me. I have a Perfecto 150-gallon glass aquarium whose dimensions are: 48" long, 24" wide and 30" tall. The tank has plastic center braces on the top and bottom. The stand for the tank is wood and supports it fully around all edges; the top is fully open but with a wood center brace running vertically through the center. Recently I had the tank sent out to an aquarium company to have the glass bottom drilled for two bulkheads along with an internal overflow box installed. I just got the tank back today, and they did a beautiful job. However, when the tank was set back on its stand, the wood center brace on the stand was too wide to allow me to fully tighten the bulkheads underneath. <Doh!> I asked the company who did the work what I could do to rectify this--they said I could notch a cutout in either side of the wood center brace to accommodate the bulkhead fittings. <Mmmm> However, I'm worried that this will compromise the integrity of the stand-- <Yes> I don't want it collapsing and spilling 150 gallons of water on the floor. Could you guys help me out as to what I should do--should I consult with an engineer first or is it okay to do this modification? Any advice would be greatly appreciated. Thank you. <Well... likely a "thinner" nut can be found... or the through-hull/bulkhead fitting reversed (with the throat up, perhaps shaved, cut down...) and an extra gasket found for both sides... and a smear of Silastic on both sides... that will do here... Perhaps with some shaving of the wood twixt the tank and stand to accommodate... If push comes to proverbial shove, you might need to consider adhering the (likely PVC) fitting directly onto the tanks glass... and dedicating yourself to never jarring it... Otherwise, the worst... giving up on the present holes, sealing over them (with glass panel/s and Silastic) and having the tank re-drilled. I agree with your NOT cutting through the manufactured stand support... UNLESS you feel comfortable (YOU!) with replacing this support (and losing the manufacturer's warrantee) with two new ones, placed on either side... Which is really what I'd do... Cheers, BobF> Re: Need help with a tank stand--can't tighten bottom bulkheads due to wood center brace 6/21/07 Wow! Thanks so much, Bob, for your kind reply!! I really loved your book, by the way; it really helped me get started with my tank! Plus I've learned so much by reading through all the articles and FAQ's from WetWeb Media; you guys are great! I think I've come up with a plan for my stand. I'd really rather not mess around with the bulkheads; I only really need to notch the wood 1/4" on either side, but leave the center brace in place, and I think I'll place two new boards on either side, like you advised. I really don't want to have the tank re-drilled: it took the company forever to get the work done; I'd consider getting a new stand before doing that. Anyway, thank you so much, Bob, you've really helped me out! <Ah, good! Cheers, BobF> A little freaked out ... drilled glass tank worries/worrier 7/26/06 Hello Crew, well to the point.... I'm literally days away from setting up my new 180, beautiful stand/canopy done, Lifereef sump/skimmer, 6 *80W T5 with 2 * 250 MH HQI retro, etc etc etc. I got great stuff and took my time buying and planning, reading and asked lots of questions (a few here).. Well I'm just about ready to go and I was on Reef Central tonight only to see a picture of a 180 show like mine that cracked on the bottom that was drilled!!! It has freaked me out a bit. My tank was built by a local guy with 1/2 inch glass, I got All-Glass to send me their braces for the top and bottom and siliconed in custom built acrylic overflows. The bottom pane has 8 holes in it. 2 in each overflow and 4 in the corners for Oceans Motions device. The tank I saw on RC cracked because his holes were in the middle from the weight of the rock. So I would like some reassurance or some pointers 1) Is this not safe? <Should be fine> 2) I plan on a 4" DSB with 200 lbs of live rock so you have idea of weight. 3) Can I support it better to be more strong along with the All-Glass brace? Maybe Styrofoam or something. <A good idea to assure the tank itself is on a support that is complete, strong, level and planar... Have you read here: http://wetwebmedia.com/aqstands.htm and the linked files above?> I can provide pics if needed, the stand is solid and custom designed buy a contractor experienced in aquatic design and is lipped so the bottom of the tank slides nice about 1" inside. Hopefully I am OK here and you calm me, but better safe then sorry. Thanks Jeff <Likely all will work out here. Bob Fenner>
Bulkhead Frustrations... Good morning crew. <Hi there! Scott F. here with you!> Thank you again Scott for your invaluable advice and by boy, do I need more now!! <I'm ready!> To re-cap. I am/was moving my 6x2x2 mainly fish and live rock display, evolving this to a fully blown reef tank and doing away with most things mechanical. Two sump/refugiums with Caulerpa racemosa in one and DSB in the other. <Ok- I'm up to speed here...> Well, today (make that 3 weeks ago. I wrote most of this then and today is an update. If you see what I mean?) was the moving day! Only had to move the tank eight feet! Anyway, after moving it across the room I started to fill the tank with fresh water for a practice run. And?......Drip, Drip, Drip, from the tank connectors on both sides of my bottom drilled tank. Each side is fitted with down pipes to help surface skimming. I don't like this setup but due to finances (or lack of them) I am stuck with it for the time being. <"Drip" is not a word that I like to hear...> The tank connectors have soft rubber seals on the top (the water side) of the glass and hard white plastic seals on the underneath side. (They are made by Aqua-Medic and to make matters worse they are metric, all my other pipe work is imperial) Is there anyway you know, that I can prevent these from leaking? Can I put a soft rubber seal on the top and the bottom? or is this not good practice? Should I use silicon? <I'm thinking that you'd want to use something like plumber's putty (on the outside, of course). You may need to experiment here (gulp...). I highly recommend that you consult a hardware store or a good "do it yourselfer" who has encountered this problem before. When you're talking about the potential for serious water damage, you cannot afford to take chances!> <<RMF would try first tightening (gingerly) the nuts to these fittings... with large Channel-lock pliers, a strap wrench... not much... with water in the tank... just cinch them up a skoshe>> Should I do them up from underneath or the top of the tank? I know these are supposed to be hand tight couplings but have now tried hand tight and also hand tight with a quarter turn with a tool, as you cannot grab hold of much of the top nut. Maybe a quarter of an inch it makes life difficult. (I have read of Bob's horror story of the helper who took a tool to a hand tightened seal) I have taken these apart twice now and cleaned them but somehow they both just continue to leak.) Just to make matters worse, I have around twelve not too small fish and all the live rock and corals plus BTA all in a 40gallon tank with just a small trickle filter (I am keeping feeds to a minimum) but the Majestic Angel is scratching! Even worse is I kept the seawater, in airtight containers, thinking this would all be done in a day or less, and is now getting on for three weeks! Should I still use this old seawater? <I don't see too much problem with the use of "older" water, as long as it's been aerated and kept free of external contamination> Perlease ! I need some advice on how to seal this tank connector. The underside of the connectors are also hard to reach, as the tank itself is on poly tiles, then a half inch thick mdf, then more poly tiles, then a pinewood board, so to get at the tank connector under the tank is still very difficult. Can't get a spanner on the two inch nut if I wanted to! I cannot take the tank off the stand as all the rigid pipe work is glued (solvent) in place and is very rigid indeed. <Grr...> I have now been trying for over three weeks to seal these without success. Have you guys any ideas on what I should do next? Hope some-one can offer some ideas as I am at a loss now as to what to do with this tank. Many, many thanks you guys. Simon. <Gosh, Simon- I'm sorry that I don't have any really great solution to this predicament...It's kind of tough to develop a plan of action without seeing these guys in person...My best advice is to enlist the hope of a qualified aquarium service technician in your area....Money really well spent, IMO! Good luck! Regards, Scott F.> Bulk Head Draining Noise 7/16/03 Hi Anthony, How are you doing? Wish you still had your store in Cheswick. <wow... good to hear from you my friend!> Love the new book by you and Mr. Fenner. Great job. <thanks kindly :)> Anyway, I read the questions and answers on the web site and am baffled on how to correct this problem. I just purchased a new 120 long for a reef setup (upgrading from a 55). The trickle filter is a 30 gallon sump filled with live rock and a Berlin Turbo Skimmer. <do consider replacing this skimmer or adding another/better one on the future. Mediocre at best IMO> The return pump is a mag drive 1,200 gph flow (4' height). There are 4 bulkhead drains drilled into the tank for drainage to the sump (according to my receipt, they are 1.75" bulkheads). <likely 1" bulkheads (which require a 1.75" hole)> The noise from the bulkheads is unbearable. <indeed... four 1" holes is borderline IMO for 12OO GPH. A siphon is being created. I have 5 holes on my 50 gallon mini-reef for the same sized pump> Sump noise is okay. The water draining at the tank level is the problem. I tried a couple of different drain setups and the T got rid of the sucking noise. I am now dealing with a raging flow that sounds like Niagara falls in my living room. The only thing that seems to quiet it down to a reasonable level is cutting the flow in half. This seems insufficient for a reef display. <absolutely> After reading all the postings, it seems like 4 drains should be plenty (which from a flow perspective, it is). How do I get rid of the noise? Should I have a couple more drain holes drilled to lower the flow per hole? <would be a good remedy... or even have just two drilled in the display wall to install the 1200 GPH pump on a closed loop. Then add a smaller pump for the sump return> The only other solution I can think of is to let the pump rip wide open all day when we are not home or are sleeping, and turn it down to half when we are there. Is this a bad idea? <hmmm... interesting. Not thrilled about it, but can't really argue well against it if it is a minority of the time. You can get solenoids and put them on timers to do this for you if you like (timed restriction during your eve/viewing hours)> I am concerned about stressing fish and corals by constantly varying the flow like that. <arguably it could be good for variety/feeding opportunities> Everything I read says that 1,200 gph should be good, and I think the setup should handle it, but I cannot stand it. <in terms of total flow it is on the low end of the good range. Most reef aquaria require 10-20X flow per hour> Ready to return everything and stay with the 55. <no worries... not that bad <G>> I have broken it down and set it up 4 times already and am pretty frustrated. If you are still located in Pittsburgh, do you do any in home consulting services? <I am still in the burgh... but at a loss for time on the consults. We have several good professionals in the area though. Our (WWM) old friend Steve Pro would be good to start with at Pro Aquatic Services: dspro@sgi.net > If I can't get this resolved soon, I am giving up (my wife will go crazy). Thank You, Andy <truly not that bad mate... easily resolved. Do consider the closed loop and/or chatting with Steve for a visit. Best of luck, my friend! Anthony> Taking The Plunge! (Cont'd.) I would rather go with the internal drilled overflow but am not sure if I'll be able to get the tank drilled. If I am unable to get my tank drilled will these 2 things reduce my risk of flooding the room? The LFS doesn't drill tanks here. I haven't checked with glass companies yet, but my thought is they won't guarantee it. <Well, the potential for failure is higher on the over-the-side overflows. If the siphon breaks, you can burn your pump out. And it is true- some LFS's and even glass places won't drill aquariums. Perhaps the dealer can return the tank to the manufacturer for drilling there?> 1. My sump is large enough to hold the amount of water that the overflow could siphon into it if the return pump fails. <Good. That takes away one major concern right there!> 2. Put a float switch in the sump so if the water level gets to a low point, which means the tank is getting really full, it shuts off the pump until the water level has returned to a 'safe point'. <Float switches are favored by some, but they are not foolproof, either. They can clog with debris or coralline over time, and can fail. Much better to rely on a well though-out plumbing scheme...> The only problem I could see happening then is the float switch failing. <Yep!> Then Again, I could set the return line at a level in the sump so if the water level went below it, air would just be pumped.... Not good on the pump, but would save me from a flood. <True...But could lead to a fire...! Sheesh- I'm painting a grim picture here, huh?> Am I missing any scenarios that could make me think I'm on Noah's Ark when I wake up in the middle of the night? <I think that you pretty much covered them!> Thanks. Bill <My pleasure. Regards, Scott F> -Plumbing... 12/19/03 hi, <Hi Pete, Adam at your service.> I have a 5' tank, about 100 gallons sump included, the return from the sump is from an Eheim 1060 so ~ 500 gph but prob much less after 4ft head height and several bends: <I agree you are probably getting much less than the rated flow.> the problem is that it takes ages for the level in the main tank to reach its proper level after the 1060 has been switched off and then back on again, e.g. after a water change. <you can calculate the actual output of your pump by calculating the gallons per inch of tank height and then timing how long it takes for the water level to rise and inch once you restart your pump. A little arithmetic, and you can calculate GPH or GPM.> It fills the tank until the sump is empty and the pump is taking in a water + air mixture and the bracing bars in the main tank are submerged, <Yikes!> then eventually a siphon begins and the water level falls to the level of the hole I drilled in the sump intake pipe in the main tank which breaks the siphon (with a big gargle), the level is now stable. <Whew! A relief it does not flood, but as you know this is still not right!> The pipe taking water from the tank to the sump has an internal diameter of 1 1/4'', I've read on this site that these pipes can take a flow rate of >600gph, presumably without emptying the sump first and siphoning to the point where the siphon break is. <I agree 1.25" pipe should easily handle the flow you are achieving.> The pipe going from the main tank to the sump comes through the side of the aquarium and bends 90 degrees down, it has a half inch diameter hole in the top of it on the part inside the tank before the 90 degree bend which I've blocked otherwise the siphon never occurs and the water level won't come down, neither does it when the hole is partially open. <You have essentially created a Carlson surge device. I am surprised that a hole above the desired water level does not cure the problem though. Try the following to see if any solves your problem: Turn the elbow inside the tank sideways or upwards so that it acts more like a stand pipe. If that doesn't work, try replacing the elbow outside the tank with a "T" to create a "chimney" on the top of your drain line (picturing the "T" fitting as the letter "T", it would be sideways). You may have to extend the "chimney" with a piece of pipe to ensure that the top is above the top of the aquarium.> The pipe taking water to the sump is currently slightly submerged in the sump to prevent noise, though having it above the sump water level makes no difference to the above problem. Though the many answers to the problems I have read on this sight have been informative I haven't found anybody else with this problem yet! <please do let us know which if any of these suggestions solves your problem.> many thanks, <my pleasure. Adam> Pete Bulkheads and return flow Hi guys have some questions regarding bulkheads and my return flow. I have 2 1.5" bulkheads drilled into the back of my 75 gallon tank. Can you possibly tell me how many gph I am getting thru each bulkhead? B/f I had it drilled I ran by WWM about 8 months ago and they said a 1" bulkhead can handle 300gph. <300 gph easily> Reason I am asking is b/c I have run into a little problem. I'm finishing upgrading my tank and have the 2 bulkheads going to a sump @25-30gallons. return flow is by way of a Velocity T4 (about 6' of head) BUT....when I fill tank and turn everything on, my 2 bulkheads are draining more than my pump can pump. <Um Bryan, how can your bulkheads be draining more water than they are being fed by the pump? This isn't possible, UNLESS the overflows/bulkheads are under water and siphoning? This would be very wrong! The overflows should be at the top of the desired water level (or just below it) so they only drain whatever the pump will pump. When the pump stops, they stop draining!!!> Each time I have to turn everything off and drain part of the water so my sump doesn't' overflow. This is my 3rd pump (I love how quiet the T4 is...had a little giant 1st) I may have to go with a dolphin Ampmaster pump (2100gph) and try to adjust the flow on the return w/ a gate valve. Thanks Bryan <This isn't your pump Bryan. The overflows are gravity fed and are to be AT water level when the pump is off. They should only be able to drain the capacity of the pump returning the water. When the pump is turned on, the bulkheads SHOULD be capable of carrying more water than the pump is returning OR the main will overflow and flood! The sump and main water level should be SET when the power is OFF and the water in the main is at the top of the overflows (it's lowest possible level) and the sump level is NOT overflowing but still at it's highest desirable level. Then, when you turn on the pump, it will pump water from the sump to the capacity of the pump and overflows and stay at a constant level. If it doesn't work this way, you have a siphon through the returns or overflows. Please let us know if this helps! Craig> Re: Bulkheads & Return Flow II Hi Craig, <Alright Bryan! The eagle has landed! Cool! Glad you found the problem! Yeah, the elbows will fix your siphon and draw water from the surface.> Again, thanks for all your help with my bulkhead problem. With all the reading and researching I have been doing about other aspects of this hobby, I seemed to have overlooked a very important detail...HOW to fill my tank correctly. My first FO tank had a CPR package wet/dry, siphon overflow and Rio. I just put it in the tank plugged her in and there we were going. But when I had the tank drilled for 2 1.5" bulkheads I didn't grasp the whole concept about fill levels. Like you said, each bulkhead is about 3" or so below the top off tank, so when I would try to fill the tank at the level I had my first with my setup, I kept flooding my sump ( I did know that I would have a problem in the event of a power outage)...i.e., my bulkheads were creating a continuous siphon. So, I am going to add a 90 degree elbow into the bulkheads so now they will act as an overflow and hopefully get everything worked out. I do have a question though. I have included s/t I believe Steven wrote me about a year or so ago regarding filling a tank, but at the time It didn't matter. Here it is: "When you first fill the tank up, only add enough water to get the return pump to operate. After it is working for a few minutes, shut everything off. This will allow the water to back siphon down (simulated power outage). Once water has stopped, fill the sump. Now turn the pump back on. When it has reached an equilibrium, mark that water level. That is now your maximum fill level." Then I talked to a rep at Dolphin pumps (very nice and informative) and he said to "Fill the tank till you start getting flow to the sump, once the water has filled the sump to the level you would like, turn on the pump, this is your fill level. This is a little different than Steven's. What do you thank Craig? IYO/IYE what seems to work the best? Again, thanks for everything Bryan <They both will get you to the same place, more or less. Steven's way is a little cautious (the consummate aquarium professional) has a built in test to see if the siphon actually breaks and stops in his "simulated power outage". You could do the same by filling according to the Dolphin guy and then unplugging the pump to make sure all is well in the event of a power outage. Six of one, half a dozen of the other. Now, go forth and have FUN! Craig> Bulkhead placement and noise 2/16/03 Hi guys real quick one. I have 2, 1.5" bulkheads drilled in the top back of my 75 gallon tank. I decided to add a glass overflow (like Anthony describes in his book) about 1" wide along the entire back of my tank. This has been siliconed and really looks good. So I filled my tank up (again) w/ tap water to test everything out. Well....I don't think the overflow works quit like I hoped. Don't get me wrong, it pulls a sheet a water directly from the surface, and works great w/ a simulated power outage, but the problem is the water going into the bulkheads. I don't know how I thought it would work, but here is my problem. As the surface water runs over the overflow there is about a 1-2" space at the top of overflow where there is no water and the bulkheads are sucking the water in, in fact the very top of the bulkhead is not in/under the water so I am getting a sucking noise. <if I understand correctly... the top of the bulkheads are actually slightly higher than the top of the overflow? If that's the case... no worries... drain the tank slightly and silicone an extender piece of glass to the overflow> I have been told b/f that this could be from a pump pushing more than the bulkheads can handle <almost certainly the case... not a problem even with your high placement of the bulkheads... that has nothing to do with creating a siphon> (pump is CSL velocity T4) but I have tried turning down the return w/ a gate valve and it doesn't help (turned the flow almost off even). <Doh! you fit the bill, bubs. A common problem where aquarists don't drill enough holes or put too large of a pump on. The ratings for bulkheads are a joke. What they can run under pressure (or creating a noisy siphon like you hear) and what will run safely and quietly (half filled pipes) are two very different things. The common 1" bulkhead is rated at 500-600 GPH per hole. But at that rate... it is noisy as all get out! 1" bulkheads really should only handle about 300 PGH each to be safe and quiet. Thus... to run a 1200GPH pump, you need 4 bulkheads! With your 1.5 inch holes... I'd guess you could only run about 1000PGH trough them quietly. If your pump is pushing more than that... you have your answer IMO> I always read that the best way to have tank is drilled for bulkheads, instead of built in overflows w/ bottom drains to pump. <not much difference in flow here... just noise (the floor holes/towers are much louder)> But it seems almost everyone has these and builds a Durso standpipe and everything is quiet. <this is just an engineering issue, my friend. Holes drilled on the back wall and sized correctly for the pump do not require a modification like the Durso. You just don't have large enough holes/bulkheads> I don't have this type of set up, my tank is drilled on the back w/ bulkheads and I can't hardly find anything about how to get flow from the tank/bulkhead to the sump and the quietest way to do it ( Nightly I read over WWM, reef aquarium guide, reef central and reefs.org) Please Help. I'm ready to get the tank going again but have been dealing w/ this issue for about a month or so. I might even rip the overflow off and try 90 degree elbows again and try to rig something else up. <will not solve the problem bud... cut that pump flow back to 1000GPH and you hear it quiet down> I even tried the elbows b/f, but again had a terrible sucking noise, and yes tried turning the pump down, still did not help. Any suggestions, I'm just feed up. Thanks Bryan <no worries bud... a miscalculation. Easily corrected. Best regards, Anthony> |
|

|
Features: |
|
| Featured Sponsors: |