 |
|
| Home | Marine Aquariums |
Freshwater Aquariums |
Planted Aquariums |
Brackish Systems |
Ponds,
lakes & fountains |
Turtles & Amphibians |
Aquatic Business |
Aquatic Science |
Ask the WWM Crew a Question |
| Please visit our Sponsors | ||||
|
Re: The best of times the worst of times; worthwhile input on
leaking bulkheads 3/1/17 Overflow flow rate
11/08/10 Acrylic Aquarium Crazing Repair (And
Bulkhead Installation) -- 06/10/10 Finishing touches on refugiums, pipefish, and holes oh my...3/7/09 Hello Bob, Scott, Eric, or whomever is there... <Scott V. with you this go round.> After probably reading this 100 times a day, I must also say you guys/gals are great!!!? <Happy the site has helped you!> A job well done and don't pay one bit of attention to my wife being jealous or disliking you...;]!? <Uh oh.> I can only begin to guess the time given by the whole crew for newbies like us!!!? After many countless hours of studying WWM am going to make my first purchase in two weeks....MY TANK...Yaaayy!!!? <Congrats.> I would like to ask a few specific questions if I may, so I can take the leap!? First off, Im purchasing a custom 72/75 gallon tank, I was going to have {2} 3" holes drilled for 2" bulkheads and a single 2 3/8" hole for a 1.5" bulkhead. The guy building the tank for me said that those sizes were for sch 40 and that they were junk. Instead he said I would need for them to be sch 80 or they would end up cracking or wearing out. Said every customer who had em...had problems. <There is no need for schedule 80 in aquarium applications, the pressures involved come nowhere near warranting this. I personally have thousands of customers out there using sch 40 with no issues...the fact that he has makes me wonder what is being done wrong.> He also said instead of 3/8" glass I need 1/4" for the size holes im having drilled. Do you feel I need the sch 80 bulkheads?? <Nope.> Would you agree with him on the glass as well?? <If I am reading this correctly, to go thinner? No, 3/8 minimum for this tank.> Reason I ask is im sure with those upgrades there's an extra buck in there somewhere for him. <Possibly.> I was thinking all the holes on back wall, the 2 inch bhs near the top by the corners and the 1.5 inch bh near the center at top. Would it be better to have these clustered together rather than spread apart like that?? <No real difference, put them where you want them.> The 1.5 will be for the closed loop, is it ok to be at the same level as the 2"s?? <I would place it lower to keep it from drawing in air/air bubbles near the top.> Speaking of closed loop...hehe...will my outputs {swiveling els/LocLine} need to be the same length to provide even circulation?? <Nope.> I'd planned on one or two being longer to reach middle tank level. <Will be fine.> Sorry for being so sporadic, I feel im so close to actually putting my plan in gear that I've gotten a little nervous...; [ ! I'm wondering how noisy 750-1000 gph will be coming through a 40-55 gallon sump?? Can you weigh in?? <This can easily be managed. You may have to play around with the baffling a bit, see: http://www.wetwebmedia.com/ca/volume_3/cav3i1/Baffles/bafflesart.htm, this technique works great.> When I hear about not maximizing flow capacity to save on noise etc, does that mean just having a smaller pump than what the overflow holes can actually handle?? <Part of it, ideally you will flow the overflows at 1/2 or less than what they can handle, this way you will have a backup should one fail.> Ok last two ?s... I'll be using flex pipe for my plumbing, I will need to put a valve on line going to the refugium to control flow. <OK, but if (just incase) you are drawing this off of an overflow line you will want to have a T before the valve leads to the refugium. This way when you choke the valve a bit the overflow line has a bleed off, still has its full flow capacity.> For that and connections to bulkheads and pumps, will I need to form some kind of hard pvc union for the flex to clamp on?? Does that make sense?? <Hmm, yes, plastic hose barbs. If you wish to use flexible material to plumb do also consider the flexible PVC, sold as SpaFlex in many hardware stores. This piping is forgiving, flexes, and can be solvent welded into PVC fittings just like regular PVC. You do need a PVC solvent rated for flexible PVC, but if you read the fine print on many solvents out there they are actually rated for flex.> Ok last one! For the refugium, I'll have to make it a display refugium or the wife will go crazy {she doesn't have the slightest interest in my "obsession"} so I plan on having a 55 gallon set up beside and below the display. I will going for a DSB for NNR, and LR with Chaeto for a good pod population. It would be awesome for a pipefish/seahorse or two to reside in there!? Given the refugium setup would that be ok for syngnathids?? <It could work, sure.> Also do you feel they will demolish the whole pod population?? <This is the concern with adding these, ideally a refugium provides the pods a place to grow without impediments like being eaten!> Whew. For some reason I feel a lot better now...hehe. By the way, can anyone tell me how I can get my CMA, RI and BOCP autographed ; ]? <We will see what Bob has to say here, but one way would be to meet him at a trade show/club meet sometime. They are worthwhile to attend for many reasons.> <<Agreed Scott... and rather than mailing books about... the much better way to meet us, other folks of similar interests. RMF>> Thanks again for the wealth of knowledge you so greatly pass out. By the way I kinda get bummed out when I have completed the entire section of whatever im studying at the time, I mean c'mon, you couldn't have made the refdesfaqs go to 20 instead of 13....totally just kidding!? <All the sections are constantly growing!> Thanks again, J J <Welcome, have fun.> Bulkhead depression, sel. 1/3/09 Well, being new at this I've been reading your site for 6 months now and still don't have a drop of H20 yet in the aquarium. <Heeee! Like many good things, experiences... savouring the anticipation is very worthwhile> So much research to do and all. All was going well until I finally filled up the overflow last night to test it out w/the new sump. Then the depression set in as the bulkhead was leaking. Today I tried tightening it to no avail. Finally I decided to just undo the return line completely and just redo it. I then noticed hairline cracks in the bulkhead. <Unusual...> Unfortunately, despite my several months of research I neglected drill hole size and ended up w/the standard ¾ hole size of 1 ½. The schedule 80 is 1 5/8. <Mmm, no need for Sch 80... replace it/this with a schedule 40 fitting... plenty strong enough> I thought I'd pass along my experience and recommend to everyone who's new at, this like me, to go with the heavier duty bulkhead. Do you know of any brands that are sturdier than the flimsy standard ones (marine depot) that will fit into a 1 ½ hole. I'm going to order a new one today. <Do contact Mike or Scott at Glass-Holes (.com)... There are differences of opinion re how many gaskets to use, in, and/or out, I like a smear of Silastic...> Thanks for any help! Sorry if I sound depressed as I'm sure this isn't too big a deal but setting this all up is a bit overwhelming for sure. :-) <Oh, no need to explain, apologize... I have indeed been here, done this... The good news, all is easily fixable at this point> Ps. If Bob happens to get this I'm the guy you meet at Reefapalooza in so-cal with my family sitting there with the classic �When is this going to be done� look on their faces'¦. <Heeeee! I do recall. Cheers, Bob Fenner> Re: Bulkhead depression - follow-up 1/3/09 Bob, thanks for the words of encouragement! I'd be lying if I said I didn't need it. <Glad to conspire with you John> Anyway, I bought another bulkhead last night at my LFS and I plumbed it up again, put a drop or so on the gasket and after playing with the lock nut tightness the best I could get was a drop an hour leak. I tried washer on both sides and just one side to no avail. My gut feel is that the gap between the bulkhead and the acrylic is just a little too big, therefore causing the washer to acrylic contact surface area being too small. I can't think of any other logical explanation as to why this is leaking. <Ahh... I do have a prescribed solution... as alluded to in our last email... see the end> My LFS stated that if I want to I can expand the hole easily with a Dremel and a round sandpaper bit. <Mmm, nah!> He seemed very confident as long as you go in a circular motion and don't rush it. This allows for a 1" bulkhead or the beefier 3/4". <Is this a discharge or an intake fitting? If a drain, go with the larger, largest diameter you can... if feeding into the system, no sense making the diameter larger than the size of the pumps discharge volute... which should be the same as the plumbing ID> I'd need to go from 1 1/2 to 1 5/8 hole which isn't much. He wasn't pushing the idea, just offering it as a possible solution. This idea is starting to grow on me as it seems like more of a once and for all type of solution. I'll will also contact Mike and/or Scott today. <I would... Much easier to SLOWLY insert a bit and drill through all at once...> On a separate note, I'm starting to look at lighting now. Background info: 65 gallon tall acrylic (the 'tall' is turning out to be a pain - another learning experience - can't fit a 4 footer though). 30X16X16 sump w/sock + refugium combo (Truvu) located behind the wall in another room. Vertex IN80 skimmer One 6 X 6 overflow in the corner. 1" with 3/4" return. Yep, I know. Not ideal. <... I would re-drill the overflow... actually make two lines here...> I'm planning the water level in the sump now for BOTH overflow block (pump all water back in) and power off conditions. <Good> I'd really like LED lighting but it's just too expensive still at this point. So I'm thinking about one of those all in one units with 2 Metal Halides, moon led, etc.. Something like this: http://www.marinedepot.com/ps_ViewItem~action~view~idProduct~CU01063~ idCategory~FILTFIMHMMMDMLM5~category~36in~vendor~.html <Fancy schmancy... see my comments below> Does something like this just lay on top of the acrylic tank? <It can in general... got to keep the MH away from the acrylic though... Better to have all on a "perch", can be made or purchased... Mount it at least four inches, six is better, away from the acrylic... Which has a surprisingly low flash point... yep, fire hazard> Seems like one metal halide might be enough, and cheaper... <Yes... and IMO unnecessary... I'd just stick with fluorescents here... VHO, PCs... are sufficient> I planning FOWLR, but I can tell I'm going to get into the reef stuff really quick as I'm already fascinated by the variety of life, just don't want to jump in too quickly; and getting it not to leak w/one clown would put me in an ecstatic state at this point. I like the concept of T5's for efficiency, but it seems like there's just a blanketing effect of white light. <Mmm, no... not with decent reflectors> Finally, is egg crate under the sugar sand for rock stability, a good idea? Any drawbacks to putting egg crate on the bottom of the tank. <Mostly just makes it harder to stir the sand... I would leave out the egg crate, just set the larger rock pieces directly on the bottom...> Thanks so much again for your time. Appreciate it. <Oh! And about the through hull leak... as stated before, I would make a thin smear of 100% Silicone Rubber on both sides of the gaskets (yes, one on either side of the tank if you have two... or just on the outside (gasket) if you only have one... including a thin smear of Silastic on the threads nearest the bulkhead to give a little lock to the nut... Bob Fenner> Re: Bulkhead depression - follow-up 1/3/09 Bob, thanks for the quick reply! <Welcome John> Bulkhead Leak: The fitting that's leaking is the 3/4 return line (1.5 in hole). The 1" drain line right next to it seems ok so far. A bit of digression here, but I'm wondering if I shouldn't have used silicon O ring lubricant? <Mmm, no... Silastic... a bit stickier... and it too does "give" if/when one want to un-do the work some time later> Anyway, a bit confused on your responses. On expanding the 1.5 in hole... "I would... Much easier to SLOWLY insert a bit and drill through all at once." I can't picture this. My Dremel sandpaper bits are fairly small, about .5 in diameter. Can you please clarify? <Easier for me to fit a bit against the current hole to drill out the extra eighth inch... Am hoping ScottV will explain better> On the technique: "I would make a thin smear of 100% Silicone Rubber on both sides of the gaskets (yes, one on either side of the tank if you have two... or just on the outside (gasket) if you only have one... including a thin smear of Silastic on the threads nearest the bulkhead to give a little lock to the nut". I looked up Silastic and it's made by Dow and there seems to be 3 types. Home depot and MDepot have no results for Silastic in their search boxes (web), which surprised me. Where do I get this? <All 100% ones are identical (does make sense eh?)... Some just say "For Aquarium Use"... but 100% is 100%> You also mention silicone rubber. Is this the same as aquarium silicone sealant? <It is> I did check the silicone faq on WWM and most of the ?'s are related to glass aquariums leaking, etc.... Lighting & Egg Crate: Got it! Thanks! I'm getting there with you support! I can't thank you enough for this advice, invaluable really. :) <Again, certainly welcome. BobF> Re: Bulkhead depression - final follow-up 1/22/09 Thought I'd pass along a follow up to my bulkhead leak situation. I was able to Dremel the holes to a slightly bigger size without too much difficulty and had a real snug fit on the bigger sch. 80 bulkheads. It's up and running now with no leaks at least for one hour, time will tell. <Good.> The water level does bounce up and down a bit in the overflow due to the Durso? I expanded the hole to 1/8" at the top and now it bounces about 1/4 near the inlet pipe. Is this about right? <This should be very constant barring the disturbance on the water's surface due to the flow. If the actual water level is fluctuating even a ¼' it is indicative a bit of siphoning, with a few possible causes. What size bulkhead did you end up with for this overflow and what flow are you running? Do you have any slurping or flushing sounds?> Now it's on to figuring out how to get the new vertex skimmer up and running. Then buying some rock. Is it ok to put a DSB into a separate container in my sump? <Sure.> I'm thinking if I ever do want to remove it or need to work on the sump for some reason, I can just pull it out the DSB in separate container sections. <A fine way to do it.> Thanks again for the help. I think my family had a bit of the 'light at the end of the tunnel' look today which was really encouraging. :) <Happy we have been of service, welcome, Scott V.>
Gluing bulkheads? 6/2/08 Hi Crew, <Nemol.> I'm setting up a 100g (clear for life) reef tank, can I glue the bulkhead with an aquarium sealant? <You could, although not usually necessary.> This is in the bottom of the tank by the way (overflow box). I'm planning of gluing them together on both sides (w/ the seal removed) and sandwich them together against the hole. I don't know what would be my consequences are , but if this is possible, what is the proper way of doing this, what type of glue? <Silicone, if any. I do encourage you to use the supplied gasket. They do work well.> The main purpose is for me not to worry about it leaking or replacing the seal every once in a while... I was thinking that it's (bulkhead) going to be there forever and permanently. <You need to keep them replaceable. Things happen, threads strip, and plumbing needs change in time. Do keep you system flexible with removable bulkheads.> Also, I've heard that 3/8" acrylic will have some "bow" to it? <It will bow some at this height.> Will this cause a leak after sometimes? - tank is Clear for Life, 100g, 60L x 18W x 24H. <It will be fine.> Also, I'm putting in Coral life lighting system(48" long) 2 150w HQI and 2 CF actinic, this will be sitting on top of the tank with a standard stand, this will be inside the canopy with the size of 10" high (measuring from the inside) and 12" high if measured outside...I will be putting in some fans for the heat, also planning on drilling holes (about 1" in diameter) right at the very top of the canopy...pls pls give me a comment on this as far as canopy size and drilling holes ( heat issues). <With some fans your heat issues will be as good as you are going to get with halides. Time will tell if you need a chiller or not, you may even without the halides! Be careful to keep the bulbs spaced between the cross braces. Halides placed directly above the acrylic can cause failures in time. http://wetwebmedia.com/acrylicaqrepair.htm.> Pls advise the soonest, as I'm terribly excited on setting this tank up, couldn't sleep at all, and believe it or not I took a week of my last remaining vacation for this! <Hee, sounds good!> Am I still normal? or just toooo fascinated and addicted to this hobby? <Perhaps normally addicted.> Thanks in advance / Nemo1 <Welcome, have fun, Scott V.> Hole In Bottom Of Tank'¦Missing Bulkhead -- 02/08/08 Eric - are ya there? Linda from GA here. <<Hey there Linda! Yes, I'm still here'¦>> It's been a while. <<Indeed it has>> I want to purchase a used 75-gal drilled tank from someone who bought the tank but is uncomfortable about it being drilled and has decided to go with a smaller tank for freshwater. (!?!?!) <<Hmm'¦ Although I prefer drilling the side panels when possible, many-many hobbyists have bottom-drilled tanks>> Anyhow... Underneath this particular 75-gal, there are two holes - one has a bulkhead that connects to the drain which flows into the wet/dry and the 2nd drilled hole has no bulkhead...just a hole. Doesn't there need to be a bulkhead for each hole? <<There does, yes'¦else you won't have a 'sealed' attachment point for the plumbing. The wide flange of the bulkhead also provides some strength to the hole>> I noticed this tank came with a lot of PVC, so I am not sure how the previous owner hooked it up. <<Most assuredly used a bulkhead fitting'¦>> How do you run PVC thru this return hole without it leaking without a bulkhead? <<You don't'¦you 'will' need to replace the bulkhead fitting. You can measure the diameter of the hole to determine the size bulkhead needed. Likely this will be either a 1' bulkhead (1.75'-hole), or a ¾' bulkhead (1.5'-hole)>> Thanks so much. Linda <<Always welcome. EricR>> Bulkhead question of day 10/23/07 Crew, <Scott V> Does the rubber O ring of a bulkhead go on the inside glass or does it go between the nut and the outside glass? Or does it even matter? Thanks!!! Ben <You are very welcome Ben. The gasket needs to go on the opposite side of the nut, regardless of whether you put the nut side of the bulkhead on the inside of the tank or the outside of the tank. Putting the gasket against the nut will still allow water to pass down the external threads of the bulkhead. Thank you and have fun with your set up Scott V> Plumbing/circulation, will this work? (Diameter) 2/18/07 Thank you humbly in advance, I'll take my fifty lashes happily if this has already been answered before somewhere else. <You asked for it...> I have searched WWM and its archives looking for a chart or something that is the definitive answer to probably the most popular question "How Much Will My Drain/Overflow Flow". If you have something like this then great but if not perhaps a chart with bulkhead sizes (1",1 1/4",etc.), how much they can drain (max), how much they will drain (real world est.), and how much they should drain( quietly). This would eliminate many boneheaded questions from people such as my self. please disregard this if you already have this up somewhere and I'm too dumb to find it. <We don't house a chart for this purpose here on WWM, because it can be found without much looking on the web. Here is where many answers will be found: http://www.wetwebmedia.com/pbholesftngs.htm , but I have seen and used: http://www.plumbingsupply.com/pluminfo.html and found it to be enough for me to go on, along with http://www.plumbingsupply.com/flow_charts_for_pipes.html . You may be more interested in the actual calculation though, and would find this useful: http://www.lmnoeng.com/ and one more at http://www.efunda.com/formulae/fluids/calc_pipe_friction.cfm though I think you'll find both of these to be a little more than necessary for your needs. Still, it doesn't hurt to have as close as possible to an accurate number for your system so as to provide for intentional over-engineering.> Now on to my question. I have a 75g. tank with a 20g.sump. The tank came with a 1 3/4" hole in the back for a 1" bulkhead. My return pump is an Iwaki md55rlt with about 1100gph+/-. Now you are saying to yourself that's not going to work and you're right, it didn't work. so <So> I take <took> the tank down to the LFS and have <had> the tank drilled for an additional 1 1/2" bulk head. Now here is the funny part, have you guys ever heard of doing this? the LFS suggested instead of a 1" bulk head in the 1 3/4" hole to use a sch40 1 1/4" male adapter with the bulkhead gasket inside the tank to a 1 1/4 female adapter outside with the threads siliconed. should <Should> work right?. this would give me 1 1/2 " and 1 1/4" overflows, and both would run through separate 1 1/2 pvc to the sump. <<This can be made to work... I would use two gaskets, one on the inside, one on the outside... and apply a liberal amount of Silastic to both/all... and synch the threads up... hand-tight. RMF>> <Are these fittings inside and overflow chamber? Are they just plumbed through the glass and allowed free-flow?> This will be a FOWLR tank with poss. some corals in the future. Will this work? Will this drain quietly? is <Is> the 1 1/4 pipe idea a bad one? the <The> way it will be piped exactly is a 1 1/2 st 90 into a 1 1/2 / 1 1/4 male adapter which has a flange on the threaded side as wide as the gasket. this goes through the tank wall to a 1 1/4 th. / 1 1/2 bushing into a 1 1/2 tee down to the sump and vented on top of the tee. I hope this isn't too confusing. <Can't picture this setup. First you mention the separate lines from each fitting, then you mentioned a "tee" to the sump. Does this mean each line has a tee with open air to quiet the siphon, or that each fitting tees and has two lines down? In either case, this depends greatly on how it is implemented; i.e.., behind a rampart in an overflow chamber or directly in the display-body. I would not be concerned of a lack of flow, but as to the noise, I can only speculate that your tees would quiet the whole thing down.> please tell me your thoughts on all this stuff. thank you much , John P <If the calculation links don't give you what you need, and the WWM reading isn't enough for you (Fat chance) then I welcome some follow-up q's, John. Good luck! -GrahamT> Re: Plumbing/circulation, will this work? (diameter) pt.2 2/18/07 Graham T, <'Allo again, John.> Thank you for responding to my questions. <Absolutely welcome.> There is no overflow box or rampart to speak of. Picture a 1 1/2" bulkhead on the top right side of the tank about 4" below the top. Going into the bulkhead is a 1 1/2 st. elbow, open end facing upwards acting as an overflow and setting the water level in the tank. Outside the tank is a tee on the vertical, top acting as a vent reduced to 1" going slightly above the tank. The bottom of the tee is 1 1/2" pvc piped down to the sump. Top left of the tank picture the same setup as the right with 1 1/2" elbow (setting tank level, same height as right side) reduced to a 1 1/4 male adapter fitted through the wall of the tank back (gasketed, siliconed) into a separate 1 1/2" tee on the vertical, vented on the top with 1" etc.. etc.. . Each overflow has its own 1 1/2 piping down into the sump. <Ok, was not sure with the last email, thanks for the clarification. Good clear description.> So basically I have a 1 1/2" overflow and a 1 1/4" overflow to drain 1100 GPH. Is this adequate to drain this volume quietly? <I think that the tee's will help immensely. You will still have some slurping/gurgling, what with the elbow being at the surface of the water like that. I service a few accounts in the field that use a similar setup, but where noise is not an issue; i.e.., restaurants, nursing homes, etc. Not the quietest setup, but - again - the tee's really do a lot to quiet everything down.> I am asking you this because I can't fill the tank right now (that would be too easy to check). I had the tank drilled last weekend and didn't have anyone to help bring it back into the house. Well it was about -5* outside and I thought it's just glass, silicone, and plastic - what could happen? <Exactly! What could happen...?> Well the plastic trim on the top and bottom cracked in about 5 places. <Could *THAT* happen? It could. Dang. [Sniff]> I ordered new trim pieces from AGA but hat will take 2 weeks, bummer. I'm just trying to get everything right the first time and get good advice from the right people who know. <Gotcha.> Also what are your thoughts on a return manifold for the top of the tank? <You mean style, location or fittings? I love loc-line all the way! I suppose with the drilling being done and all, you probably have only one option: over the lip. I'd utilize 1" I.D. for the return double-elbowed over the lip with the obligatory hole at or above the water-line to mitigate power-outage-related flooding. I suppose if you have a sufficiently rated pump, you could run a return manifold at the lip with multiple nozzles... but, it is a bit of work, and you need to have a good pump... not to mention it helps to have the basic "over the lip" setup first to gauge flow-rates, et all. I wish you luck, John. Plumbing is fun for me, as I like building the system almost as much as running it! -GrahamT> Thank you so much for your time and your advice, john P <Welcome.> Overflow Drain Placement - 03/27/06 Hey guys, good afternoon/evening/morning. <<Gals here too...Good Morning>> One more question about my sump setup. I've got two returns (on each side) and two (soon to be three) drains plumbed very near the top (center) of my tank, utilizing strainers attached directly to the bulkheads, and no overflow box. <<Mmm, much like mine...>> My problem is because of the location of the drains (about 1" from the top), one of them creates an almost constant and irritably loud "sucking" noise as air funnels into it. <<Yes...know what you mean.>> Ironically enough, this process seems to be the one thing allowing my drains to keep up with my oversized pump because the water flow through the drain seems to be much greater when this is happening. I am going to add a third drain, hoping that this will alleviate the need for the other drain(s) to suck in air, and still keep up with the water flow desired. <<It can't hurt to add the extra drain, but I would like to suggest you replace the bulkhead strainers with PVC 'elbows' (you may need to cut/shorten/modify these to suit). These can be positioned (angled) to pull water from the surface...this will allow some air to enter and let you "adjust" the water height in the tank, as well as "skimming" the surface film from the water.>> My pump is teed off with a valve, so I can adjust the flow (right now the valve is fully open). Is the water level in the main tank always going to level off at the point of intake? <<Usually, though "overdriving" the drains can keep it elevated slightly as you seem to be doing...a dangerous balancing act. Best to employ something similar to what I have suggested.>> I am aware that it possibly was foolish to plumb my tank like this because of the weak water flow through the drains (due to lack of pressure at the top?), I just got the impression in my research that it was alright. <<Is "alright" in my opinion. Much better than "bottom" drains in the event a bulkhead begins to leak...won't drain the whole tank. If these are 1" drains, it's my opinion that it is unrealistic to try to push more than 300-350 gph per drain...no matter where they are located.>> Have you heard of any tanks plumbed like this (with the drains at the top of the tank, and no overflow box)? <<Yep...mine!>> On a side note, my AquaC Remora stopped producing skimmate when I placed it in the sump - any common reasons for this? <<Yes...the fact you are pulling water from below the surface (bulkhead strainers) in the tank, coupled with the water turbulence in the sump, reduces the "concentration" of material the skimmer picks up, thus reducing skimmate. Placing the skimmer in a skimmer "chamber" within the sump that receives raw surface water from the tank can help with this.>> The intake for the skimmer is very near the top of the sump water level, and there is a lot of water movement in the sump. Thanks again guys for all your help. Regards, Chris Stevens <<Cheers, EricR>> Overflow Drain Placement II - 03/27/06 Eric - thanks for the reply. <<Quite welcome Chris>> Glad to hear someone else runs their tank in a similar fashion. <<Yep...Probably more prevalent than you realize.>> Do you know a good source for BLACK PVC elbows (1" and 3/4", at least one end male) - ordered one from marine depot, but it's white. <<Mmm, nope...haven't ever found black PVC fittings, though I hear they exist. I've used black ABS fittings before, but I don't think you can get anything smaller than 1.5" (can be bushed down)...but then I always buy local (HD, Lowe's), you might find something smaller on the internet. Likely your best option will be the gray schedule-80 PVC fittings. You should be able to find these locally at a home center/hardware/plumbing store...and at a better price than from a fish shop etailer. The fitting you describe with the one male end is called a '90-degree street ell'.>> Thanks again. <<Regards, EricR>> Equipment/Overflows/Operation 4/12/06 Thanks for all the help you folks provide. <You're welcome.> I'd probably drop this hobby if I didn't have your site to research. I am setting up a 140G tank and had a few questions. 1) My tank is acrylic with two cut-outs. The internal overflow box is very noisy since I have a 30" high tank. (I know it wasn't a smart move but I purchased it for the volume before reading your site and discovering it's quite a bit more work to maintain.) Anyway, I don't want to put in a Durso tube but I was wondering if there was any problem with putting a 15-20" PVC tube onto the overflow so that the water level in the overflow is raised and the subsequent drop is less noisy. Do I have a higher chance of clogging with the tube than without? <Geez, most come with a standpipe. I would cut slits near the top of the PVC, will reduce noise some.> 2) Would I adversely affect my tank by using a piece of Plexiglas to cover my overflow box? <No.> All the noise generated by my setup is from the drop in the overflow box. I have a Megaflow 4 sump and it is pretty quiet. 3) When curing live rock, would it help using a poly filter and/or carbon? <Yes, but a protein skimmer would serve much better.> Thanks again for all the help. <You're welcome. James (Salty Dog)> Mike Sump/Refugium (Overflow?) Confusion - 04/08/06 Hey folks me again. <<Hello "me">> I have a Perfecto 125 gal reef ready with two corner flows. I called the company and they said each overflow is rated at 700gph. <<Mmm, yes..."rated" indeed...but expect only about half that before incurring problems (excessive noise, surge, air entrainment issues, etc.).>> This gives me about 1400gph to use. <<A lot of water to try to push through a sump...hope it's not in your living room.>> I would like to use a Mag 18 for my return and according to spec it will give me a little less than 1400gph with the head length. <<As I've intimated, I think this will be too much flow for your overflows/sump. Go ahead and give it a try...just be prepared to make adjustments/downsize the pump if things don't turn out as you expect.>> I will use a "T" and a gate valve on the return. <<wise>> My question is this. First question I have is can I run a "T" off one of the drains, put a gate vale on it and let it drain into a refuge chamber in a sump. <<You can>> The water would then flow over a baffle to the second chamber. This is where I will be doing the skimming. <<I would design the sump/refugium to skim water 'before' the 'fuge to keep from trapping/removing beneficial plankton/epiphytic matter on its way to your fish's/coral's mouths.>> Then I will pump the water back into the display with the Mag18. If this sounds ok what size should I have for the refuge. <<As large as physically possible.>> I want the main purpose for nitrate reduction. If macroalgae is suggested then what type could I use and feed the extra to the fish. <<My personal fave is Chaetomorpha (is what I use), it provides an excellent, dense matrix for pod/plankton production. But if your looking to feed your fish with the algae, Gracilaria is probably a better choice. Though excellent nutrient export mechanisms, I tend to keep away from Caulerpa species due to their inherent risks (toxicity, sexual events, et al).>> Would it be a problem with the raw water going directly into the refuge portion? <<Nope. I have separate vessels for my sump and refugium...the 'fuge receives raw water from the display which then flows to the pump chamber in my sump.>> The last and biggest question is, I have been looking all over the internet and can not find a sump/refuge that will do the above. Any suggestions. <<Have a look here and among the indices in blue: http://www.wetwebmedia.com/sumpusefaq10.htm >> I don't know if a DIY project would be appropriate with my skills. <<Not all that difficult...really.>> If you have other suggestions for the sump/refuge let me know as I am confused on how to do it right. I know 'right' is a matter of opinion but I trust your opinions. <<Indeed my friend...for a combined unit, my "opinion" is to have raw water flow in to the skimmer chamber (first chamber), then overflow to the refugium, which then overflows to the pump chamber. Baffles to help eliminate excessive bubbles can be installed between the skimmer chamber and refugium chamber.>> Thanks a bunch and I am still reading your site. <<Excellent...lots of material/help abounds.>> With all this knowledge I am starting to look like I am on steroids (hehe). <<Heee! EricR>> Inlet for closed loop manifold - 04/05/2006 Good afternoon WWM crew. <Trevor> I am currently in the planning stages of engineering a closed loop manifold for my 180 gallon AGA. Through your extensive FAQ, which is truly priceless, I believe I can successfully generate the manifold component and also appropriately "size" the pump for the desired flow rate in the display tank relative to head, horizontal run, elbows, tees nozzles. <Yay!> What I have not been able to clearly extract out of this wealth of information is the appropriate inlet size relative to desired flow rates in the display tank. I have come across information on drain rates through bulkheads: ~ 300 gph, 750 gph, 1000 gph for 1", 1.5", 2" bulkheads respectively. Do these aforementioned numbers remain the same if one is "attempting" to aggressively pull water through the inlet with a pump or are they based on a flow rate due to gravity's "pull" alone (my instincts tell me that if most inputs and outputs on external pumps are 1" that a 1"inlet in the display tank should be able to handle whatever the pump is rated ... but I have been wrong before and I am sure I will be again)? <Can't address the last adequately (is a great question/statement), but you are correct in questioning the intake sizes as stated if there is any restriction/vacuum consideration... that is to state, these diameters are idealized for no such restriction, including intake screening> If I have a 2" inlet in my display plumbed directly to the input of a pump of infinite flow rate what would be the maximum flow rate that could be produce, for simplicity, at the output of the pump (I am assuming at some point the 2" inlet has to limit the pumps ability to intake water at a greater flow rate .... <Let's stop here: about 800-1000 gph...> or am I wrong and my flow rate is actually infinite gph)? <Ah, no. There are practical limitations, induced drag, sp3 hybridization, Brownian effects, affinities of water to contend with> I want to maximize the flow rate of my closed loop manifold using a 2" inlet from the display plumbed directly to an external pump, but I do not know what I can expect to maximally pull through the 2" intake. <The above values are about it in practical terms... one can (of course) pull/push more through a two inch diameter line, but there are other considerations, principally screening issues, that need to be addressed> Thank you in advance for the sharing of your knowledge and experience, again, it is truly appreciated. Trevor <Is this clear? You want to avoid "sucking up livestock", cavitation, drawing in air... Bob Fenner> One pump or two? 5/15/06 Hi Crew < Hello Adlai! > I am trying to plumb my new 120 gallon and wanted some advice before going down this path. Taking your advice I swore that my next tank would be reef ready - no more dinking saltwater for me via J tubes. < I cant say I blame you a bit! > The tank has 2 overflows rated at 600 gph each so I expect 1200 gph approx into my sump. In ADDITION to sending water through the 2 returns which come with tank setup I also plan to draw water from the sump via a SCWD using a ViaAqua 2600 rated at 740 gph. This means I will have 4 returns (2 with the overflows and 2 with the SCWD) using the sump water. So I figured I needed approx a 1200 gph submersible to make allowances for head loss pressure etc. Since the drains are only rated at 1200 gph that is the maximum amount of water that will be coming in to the sump which is 12X24X14. The 2 returns can be powered by either 1 pump (any recommendations) or 2 separate pumps ( I have an Eheim 1260 and a ViaAqua 2600). In addition, another ViaAqua 2600 which is also in my sump, will be shooting water through a SCWD and 2 separate returns. In regards to the SCWD return, my thinking is that since the ViaAqua is rated at 740 gph, I expect about 50% of water flow because of the SCWD and the returns i.e. approx 370-400 gph of flow. < You are correct, the SCWD reduce the gph significantly. You may want to employ a larger pump to enjoy the benefits of the SCWD. 400-500 gph will be almost unnoticeable. Think about running the SCWD on a closed loop, with a pump rated for 1000-1200 gph. This can be done without drilling any more holes in the tank. When plumbing the SCWD, consider installing true union ball valves. This will allow you to shut off the water completely, and service the SCWD without losing too much water. Some people will have a secondary SCWD to switch out, while cleaning the first. > In regards to the regular returns , the Eheim I currently have is rated at 635 gph will give me about 50% water flow at a 5 foot head approx 320-400 gph. The other ViaAqua 2600 will give me about 350 gph at 5 ft head So when I add all 3 pumps in the sump I will be getting approx the 1200 gph which the returns are rated at. Are there any flaws to this logic? < Three pumps in the sump may generate too much heat! > Am I not considering any potential challenges. Should I just use 1 submersible pump to send water back the 2 tank returns so that I will only have 2 pumps in the sump. < Think about running one pump for the return, rated at or near 800- 1000 gph. With the build-up of detritus and biological waste over time, the maximum water handling of the overflows will be reduced. It is better to be slightly underpowered in that regard. Also, if contact time is crucial in the effectiveness of the filtration methods employed in the sump, slower is better. Think of it this way... Let's say your job is to steal hubcaps. Would you be more successful on the freeway, or in a parking lot? > I hope this makes sense. < Makes sense to me! It is good to see planning and consideration! > Thanks in advance < You are very welcome. RichardB > Re: New 90 Gallon Setup... closed loop issues 6/13/06 Hello Bob, <Scott> Thanks for your reply. <Welcome> Based on the expert advice I have been getting (including yours), I decided to increase the size of my new system to 135 gallon. This will afford enough space for external pumps, and hopefully provide more options for (healthy and happy) fish stocking. <Great> Also, I believe this size should provide adequate space for my Centropyge aurantius (currently in quarantine and eating habits continuing to improve). Would you concur or should I consider finding another home for this beauty? <In the wild this is one of the Centropyge species with a large "territory"... like many cichlids, it can be crowded a bit...> In discussing the new tank configuration with a LFS, they suggested an enhancement which I would be very appreciative to hear your thoughts about (I did not find it addressed in the Circulation FAQ's in WWM and apologize if it has been addressed before). Anyway, here goes - The current setup would use 2 overflows to feed an Ecosystem 3612 (roughly 1200 GPH per the manufacturer) and back to the display. The balance circulation (say another 1200 gph) would be provided by powerheads. My LFS representative suggests doing away with the powerheads and plumbing a separate loop taking water from the back of the tank (about half way up the tank) behind the overflow boxes (the boxes would be equipped with Durso standpipes so that a water column would remain in them). The lines would be joined together to feed a parallel external pump and back to the display via 2-3 additional bulkheads located at the lower portion of the tank. <Sounds like a plan> I like the idea because it eliminates the "issues" with powerheads such as heat generation, exposed intakes, etc., but am wondering if we are drilling too many holes in the back of the tank. Would you have any thoughts to share on this? <More holes can lead to more potential problems... if it were me/mine, I would not cut these through-puts quite so low... "just in case"... But near/closer toward the upper surface... not too close though, to prevent loss of water during change-outs> Thanks again for your help on this project. Scott <Glad
Using Old Rock/Drilling Bulkheads - 08/27/06 Hey guys, <<Hello (but don't forget the very capable ladies here as well)>> Thanks again for your time and dedication to our hobby! <<Is an honor/pleasure to help>> I have 2 issues I need help with: <<Alrighty>> First, I have read thru the LR section in depth and could not find an exact match to my problem. I recently purchased a used, and neglected 120 gallon that housed a single clown grouper with several large pieces of rock (it was a FO with rock??). <<Indeed...that would be a FOWLR (Fish Only With Live Rock)>> I have kept the rock wet for a few days and can see a few small life forms on it (actual moving little white/clear bug things). <<Amphipods...probably>> The rock looks terrible as the tank was neglected and the rock is all dark brown and black. I will be setting this tank up as a FOWLR and I am thinking that I would like to start over with the rock. Letting it dry and cleaning it somehow and then letting it cure in the tank for a month or two before adding new fish (pending testing results). <<Mmm...letting the rock "dry out" will negate its benefits...why not simply keep the rock as it is? If the color is an issue, it will likely change with improved water quality/lighting>> Can I get the rock to look better? <<Depends on what you consider is "better">> Is it worth losing whatever life it has on it? <<Not in my opinion>> It was not really a traditional live rock, <<...???>> it has life but it looks very bad. They are great sized pieces. The substrate is crushed coral, I would like to reuse it. It also has black and brown staining on it. <<This is most likely forms of algae, and will "change" with changes to the environment, as stated>> Can this also be cleaned? If so how? <<Swirling/rinsing with clean saltwater will do the least damage, though you will still loose some biota>> I don't mind starting over on the rock but will my cleaning methods effect any future fish or possible changes to inverts/coral down the road if I go that direction? <<Indeed it will...you could give the rock a rinse and a "light" brushing with a soft-bristle brush, or replace it (entirely or in portions) with fresh live rock>> Second, the tank is a traditional (non RR) tank. It came with a sump/wet-dry and a HOT overflow. I am weary of the overflow as I hear that they will eventually fail. <<Is a good chance, yes...but this risk can be lessened a great deal by employing a redundant system (two siphon overflow boxes) with the first>> I have once again read on WWM about tank drilling and am thoroughly confused by all the different opinions and issues. <<Let's see if I can help un-confuse you>> I would like to drill the rear for 2 sump supplies and 2 sump returns. Where exactly (how far down and over/apart) do you recommend? <<Well, if you've established the back glass in non-tempered, I recommend you place the throughputs the width of the hole-to-be-drilled from the edges of the tank, and no closer re to any other throughputs...clear as mud? For example...a heavy duty 1.5" bulkhead requires a 2.6" hole...the edge of the hole should be no closer than 2.6" from any edge of the tank, or from any edge of another bulkhead hole. Adjustment of water height in the tank can be accomplished with elbows to raise the level of the pipe outside the tank, or used as adjustable "overflows" within the tank>> Also what size is best for this size tank if I use a strainer for the supplies down and a directional elbow for the return up? <<Two 1.5" bulkheads for the drains, and one or two .75" or 1" bulkheads for the returns...or you can simply plumb the returns over the back/ends of the tank>> Should both the supply and the return have a T installed before the sump? <<For what purpose?...in what configuration?>> Also, are there and tips for drilling? <<Indeed, yes...have a read here: http://www.wetwebmedia.com/pbholesfaqs.htm >> I have seen a tank drilled before and they used cooking oil for the lubricant while cutting? Is this OK? <<I've always just used water for lubricating the drill bit...works well and is easy to clean up>> I plan on ordering the needed bits online, any recommended sources? <<Several choices about...I bought my last bit here: http://www.diamond-drill-bit-and-tool.com/Diamond-Drill/MAIN.htm >> Any tips? <<Heat is your enemy...follow the recommended rotation speed for the size core drill bit used. The manufacturer states these bits can be used "dry", but use of a lubricant (water) will keep heat down, greatly extend the life of the bit, and speed the drilling process...I use simple 'Play-Dough' to create a "damn" around the area to be drilled and fill/refill with water as needed while drilling. Also, when possible, use of a drill-press or drill-jig to keep the bit vertical to the glass surface will lessen the chance of damage/fracture of the panel>> Thanks once again for your help and contribution to our obsession!!! Randy <<Quite welcome. Regards, EricR>> Tank perimeter trim and back wall over flow vents 8/30/06 Hey crew! <Jean-T> I made a sump out of an old 55 gal tank. I added silicone over the existing silicone <Not a good practice... doesn't adhere well. Should be cut out, replaced...> just to be safe. (I know this is somewhat useless since its the film between the glass that does the job.. <Oh! Yes> but I feel better still) I noticed that the plastic perimeter trim on the top and bottom of the tank was cracked in all corners. <Mmm, this is more for assembly, looks than structural...> I am having a hard time finding replacements at local pet shops and have no credit cards to order them via internet. <Make a deal with someone who does... send them a check in advance...> Do I really need this trim ? <Mmm, very likely not> I have 4 baffles in the sump so this may compensate as reinforcement?? <To some extent yes... I wouldn't worry re... you probably won't have this filled very high...> Also I have 4 drains across the top of my back wall (1 inch bulk head) and my pump will be pushing 1200 gph. Do I need to pipe vents into the overflows so they can draw air? <Mmm, likely a very good idea to have "tees" at the down junctions... may well have to aspirate these to cut the "gurgling" noise... See WWM...> I once herd that if no vent is present it can greatly lessen flow? is his true? <Mmm, in some cases these small diameter lines can/do operate as siphons... but this is not a good idea all the way around... if the size, number of drains is insufficient and one or more should become occluded...> Do you think my drains will handle 1200 gph? <No... all this is gone over and over...> my return to the tank is via 4 3/4 inch returns ? does this sound right for 1200 gph in a 90 gal tank? <Depends on the pumping mechanism, but no... not real 1,200 gallons per hour> tanks so ever very much for your precious time! thanks!!!!!!!!!! Tristan!!! <Please read here: http://wetwebmedia.com/marsetupindex2.htm Scroll down to the areas on plumbing, overflows, bulkheads, noise... and read... Better to re-drill, fit large-enough through-puts now. Bob Fenner> Check valves and Overflow - 10/15/06 Hi there, <Hi.> I found your site after doing an exhaustive search for alternatives to Check-valves. I have a 250 gallon tank with a classic wet-dry sump design with overflow boxes on each corner. The problem is my return lines. I have two ½" returns on the very bottom of the tank so there are no stand pipes to break the siphon. <You should consider building some. This is a very weak point in your setup. Try to visualize 250g of water on your floor.> Additionally, I have a ½" return that has a standpipe that runs up the left overflow box and then goes back down to 2 bulkheads that return the water to the tank, this one has a small tube that is supposed to break the siphon. The same thing exists on the right side except it does not go back down to the bulk-heads through the return box its just a single ½" pipe that has t connectors to the two bulkheads and just ends at the top so there is no anti-siphon pipe at the top. My question is: Is there an alternative to completely changing the way water is returned to the tank or using un-dependable swing check-valves. <If there is, I'm not sure what it would be... check valves are about as reliable as they need to be but need to be inspected/tested at regular intervals.> I guess I could do check valves but will have to clean them every month and there is still the possibility they won't work. <If you clean them at this interval, then they will work for years. I use the dual-union style so that they are easy to take out of service for maintenance.> Any thoughts would be welcomed. Thanks, Jason B. <Cheers, J -- > Acrylic aquarium 11/6/06 Hi, I'm entirely new to this hobby, (lifestyle). I've been reading and reading and reading. <Good> I'm interested in getting an acrylic tank, 48x18x20. I'm not going to get it reef ready, but I will be drilling the back of the tank for a Calfo overflow. I'm getting different opinions on whether I can attach an acrylic interior overflow box to the back of my tank. <Mmm, you can... but if you're at all unsure of your skills at such a fashioning, attachment, I encourage you to secure this to the inside> If so what do you recommend as a good solvent to do so. <Weldon... number... 40> Will I have to worry about any bowing that would break the integrity of the attachment. <Mmm, no... not if the structure/weir is cut to be flush/parallel with the wall... and solvented all the way around... perhaps a practice go outside the tank...> Thanks for all your help. You have the best and most informative site that I've found. Joe <Thank you Joe, and welcome to our ever-wonderful hobby. Bob Fenner> Safety overflows 11/10/06 I have a 90-gallon reef tank with a 29-gallon sump/refugium mounted in the stand below. The tank has a utility room behind it where I house the lighting ballasts, Tunze electronics, and RODI auto-top-off system. <Nice> The top-off system consists of 20-gallon Rubbermaid Brute that is filled by a wall mounted Spectra-Pure RODI filter. The RODI filter is hard-plumbed, and controlled by a float valve in the reservoir. Then, I have a JBJ ATO monitor with a small powerhead in the reservoir that pumps RODI water into the sump when the water level in the sump drops. <Sounds good thus far> In case the float valve on the RODI reservoir fails, I've installed an emergency overflow tube (mounted to a floor drain) 1" below the top rim of the RODI reservoir. I'd like to do the same with the sump/refugium, in case the ATO monitor ever fails. I want to drill a hole about 1" below the top rim of the sump/refugium, but this is a glass tank, and I would probably have to empty it to do so. <Yes... though could mount/Silicone in a electro-magnetic switch sensor to the area above the water line with water present likely> I'm looking for alternative methods to install a safety overflow here. Any suggestions? Or is there a way to drill a glass sump without emptying it? <The latter? Not practically... But as stated, a mounting bracket for such a switching mechanism could be adhered... Bob Fenner> Thank you, Steve Drilling Bulkheads - 08/06/05 Dear WWM Crew, I have decided to get my 30 gallon pre-reef tank drilled and just skip messing with siphon overflows. (Thanks to reading about all the lovely problems) <<Excellent! You'll be much happier for it mate.>> But I had a few questions. <<ok>> First I gathered that tempered glass cannot be drilled but I don't know if my tank is tempered or not. It is an All-Glass 30 gallon long model (36x12x16) as far as I can gather from the previous owner it was bought new in the mid 90s. Would you think that this tanks back wall would be tempered? <<My experience with All-Glass has been that if any, only the bottom pane was/is tempered. But it's easy enough to contact the company and ask them about this one re the date of manufacture. I've drilled a few of their tanks (through the sides), both recent and unknown manufacture with no problems (if it is tempered you'll know in a hurry when it "blows out" and scares the bejesus outta ya <G>). Tanks of recent manufacture should/will be marked if tempered...but then that doesn't help you...>> If not, I am planning on having (2) 1 3/4" holes drilled to accommodate (2) 1" bulkheads. I want to have one to each side of the tank and have one drain tee off to a plenum and then connect to the other to feed the sump. I believe that they should be a minimum of 3" from the top of the tank and 3" from each side. Is this correct? <<I just did this very thing for one of my club members...when drilling bulkheads near the edge I recommend placing the outer edge of the holes equidistant from the edge at a distance equal to the diameter of the hole...e.g. - 1 3/4" hole - 1 3/4" spacing, 2 1/2" hole - 2 1/2" spacing, etc... This will let you get and still maintain strength/integrity of the pane, without guessing at it.>> I am planning on having between 600-700gph return at first but decided on the larger bulkheads in case I want/need more. Does this sound okay so far? <<Problems here I think. Be cautious of the flow calculators...better to talk to folks/query as you've done here. The reality is a 1" bulkhead will perform safer, quieter, and with less aggravation/constant fiddling of the plumbing if you only try to push about 300-350 gph per bulkhead. So...your already maxed out in my opinion. You'll need to go to a larger bulkhead if you want to turn more water.>> The tank is for 2 True Percula clowns, Euphyllia glabrescens, Plerogyra sp., Lobophyllia sp., and maybe a Fungia repanda. <<Ahh...so nice to see you're not going for the usual "reef garden" mix of organisms; you'll be all the more successful for it>> Is the flow above reasonable for these species? <<Yes...be sure to diffuse/spread throughout the tank via multiple outlets.>> If you have any other thoughts or suggestions please do not hesitate to tell me. <<Already have <G> >> I would rather know now if this setup would work than after I set it up. :) Best regards, Andrew <<And to you in kind, EricR>> Re: Drilling Bulkheads - 08/06/05 Dear Eric, <<Andrew>> Thanks a lot for your advice, I'll heed it as WWM usually saves me from my own worst ideas. But I had a few thoughts to run by you. <<Alrighty>> If I switched out the 1" bulkheads for some 1.5" bulkheads would this fix my problem of over pumping? Or, could I make one of the bulkheads a 2" and leave the other as a 1" (the one that tees off to the plenum) and instead of connecting them just run both lines to the sump? <<A pair of 1 1/2" bulkheads should be fine. The 1" bulkheads would work, you would just need to size/regulate your return pump (maybe plumb in a gate-valve on the return side) appropriately. Please have a look through our plumbing FAQs for more on this: http://www.wetwebmedia.com/plumbingmarart.htm>> Also, I'm not drilling the tank myself but from what you said it is possible to do it yourself? <<Yes, with the right tools/application.>> Or would you have a glass company do it? I have never done it before so I don't know if I want to chance it. <<First time for everything <G>. But if you're truly uncomfortable/not handy, it might be best to fine/pay someone else to do it for you.>> I think that's everything. Thanks again, Andrew <<Most welcome, EricR>> Full length overflow weir question 9/29/05 Hi Anthony, James & Crew, The 48x24x24 tank is already built and it has two 2" holes drilled, one in each corner at the top of the rear panel.<Understand, that is why I suggested the item in the original query.> It also has four 1" holes drilled across the back panel evenly across and 6" up from the bottom. These are for closed loop circulation. <Where will the returns be from the sump? (Hoses overhanging the tank?)> This will be a reef and small fish tank with live rock as the main filter, plus remote DSB Plus remote algae refugium. The tank is already built so I need to find the best way to have the overflow/weir (made of glass) built? I understood that an end to end overflow would be best but just how do I go about this? <Why do you feel this would be the best. Two corner overflows will be very efficient in a four foot tank.> I hope you can help me as I feel at a loose end at the moment & am not sure how to make this final part of the tank. <One thing about designing the tank is that all this should have been taken into account before the tank was built. The corner overflows I am referring to below can be cemented in place with aquarium silastic. It would be very expensive to cut weirs in a four foot piece of glass to do what you are referring to.> Keep up the great work. I just wish I had more hours in the day to read up some more. You guys are just great. Thank you. <You're welcome. James (Salty Dog)> Simon. Full length overflow weir question 9/22/05 Hello Crew, I hope you are all well and remain that way. <Not bad so far but I've already been on this earth longer than I'm going to stay.> I spoke to Anthony last time regarding the building of a tank (48x24x24) and I wanted to build an overflow weir at the back of the tank to encompass the two 2" holes cut near the top of the rear glass. I have searched the archives but cannot find the exact dimensions I need to have this weir built. I would like this weir to be end to end and would like to ask a couple of question regarding this, as I have made many mistakes previously and don't wish to do the same again. You guys have helped me so much in the past you will never know! Basically I want to know on an end to end overflow/internal weir (made in glass) how deep should it be and how far out from the back of the rear wall should it extend? The two drain holes to the sump are at the top and each end of the tank and are 2" in diameter. I do hope you can advise me as I need this tank quickly to get some reasonable water flow going. (that's another story) To all you crew. I just do not know what I would do without you. <Simon, Simon, Simon. Why on earth would you want to do that. A full length weir would require a very large pump to create any usable draw at the weirs to suck in debris etc. Take a look at this product, it makes more sense to me. http://www.drsfostersmith.com/product/prod_display.cfm?pcatid=12078&Ntt=overflow&Ntk=All&Ntx=mode+matchallpartial&Np=1&N=2004&Nty=1 You can contact this company as to whether this will work, but I'm pretty sure it will.> James (Salty Dog)> Thank you, Thank you, So much. Sincerely. Simon. External overflows... some poignant input 10/19/05 I have read any and all questions regarding external overflows the type with the j tubes and didn't see any thing about using check valves to prevent water from spilling out on floors. <... how would you do this?> I have a 46 gallon bow tank that isn't drilled. The tank is running two years with no prob. Cant buy a bigger new drilled tank yet due to a baby on the way very soon. I eventually will though but in the mean time I have a external overflow I plan to use along with a ten gallon refugium I made that will go underneath the display tank. The overflow bulkhead is 1 inch. Which is better for a return line? 1/2 inch or 3/4 inch ? <... the size of the discharge on the volute> The pump being used is a Hagen 801 powerhead. I think it puts out about 800 gallons per hour. My current filter is a canister which I plan to eliminate when I get this refugium up and running ,puts out 167 gph. <Where are the spaces between your sentences? What a waste of time> Can a pvc swing type be used on the return line? <Yes, but why?> A swing type I guess couldn't be used on the suction side because it would be mounted vertically and the check valve would be mounted with the arrow facing downwards rendering the valve useless. Can normally closed solenoid valve be used in the return line ? <... for what purpose/s?> These solenoids are open when there is power and close when power is interrupted . <Ahh... I would not rely on this/these... too likely to fail, not re-open, rust...> A spring type I guess wouldn't work cause the water is gravity fed and the isn't enough pressure. <Yes> I really want to set up this refugium now but I'm afraid of finding water on the floor like I read in some of the postings. The reason I mention check valves is to keep the water in place and continue flowing once power is restored without intervention. <I see... but again, I discourage you doing this...> No water on the floor or my a*% is grass. Please help me. Any info on how to somewhat foolproof my system from having water on my floor would be appreciated. Thanks Harry <Perhaps a large pan, dam around the area... maybe even a drain within same? Two overflow boxes are better than one... Bob Fenner> Mangrove and bulkhead questions 11/1/05 Hi, I had two quick questions that I would like to ask your staff. The first one involves red mangroves. I recently purchased a red mangrove pod from http://garf.org, it did not have the roots or stems growing yet. I have had this floating in my sump, with a grow light, and the roots are sprouting very nicely. My question is, at what point do I remove the pod from the Styrofoam that it is floating in, and begin to establish a root system? <Yes> I will eventually be moving this to a 25g tank aside my 125g tank. I wanted to have the tree elevated on pvc pipes so that the roots are exposed and have lots of room to spread out, or something of that nature. <Better to have rooted in a fine substrate...> What methods do you recommend for something of this nature? <Please read here: http://wetwebmedia.com/mangrovetrees.htm and the linked files above> My second question is about my overflows in my 125g. One of my black overflows has a bulkhead built into the body of the overflow. This bulkhead is approximately 5 or so inches off of the sand bed. When I turn off my return, there is a slow trickle of water that continually comes from that overflow. The bulkhead does not make a secure fit with the walls of the overflow. <Not good> I am concerned that the power will go out when I am not around, and this will cause a slow flood in my apartment. <You are right to be concerned here> I have the bulkhead fitted with pvc pieces and a cap, so that no water flow goes through the bulkhead, it just seems to come from around the seal. Do you have any suggestions about how to stop this bulkhead from leaking? <Yes... requires draining the tank, drying the area... removing the bulkhead, smearing a bit of Silicone sealant on the gasket/fitting on both sides (in/out of the tank)... allowing to cure for a day> The tank is up and running with about 120lbs of LR and 3 fish, so draining it all the way down to silicone the bulkhead does not sound appealing. <More appealing than the water on the floor to me> I thank you for all of the help you have given me so far, and undoubtedly the help your site will give me in the future. <A pleasure to share. Bob Fenner> Vertical vs. horizontal bulkhead flow-WOW 11/2/05 Hello all and a pre-question thank you!, <Welcome> Visited a LFS last week, Pacific Reef in Fountain Valley, Ca. Awesome store. Three 200g reef tanks displayed, plumbing and all. One SPS, 2 LPS/soft. <Area has had a history of great stores> The tanks each run with 2 T-4 Velocity return pumps (now called Poseidon's I think) listed at 1250 gph at 4ft of head. They're all 7x2x2, exactly the size I'm planning for myself. This provides approx. 2200 gph, I think. The surprise to me, and my question, is that each tank has only 1 overflow box with 1- 1and 1/2 inch hole. Now, he (owner) had to knock some teeth out of the top of the overflow box to let in the overflow water. (not at all surprised here, they're only 7x7 inches) BUT, the 1 and 1/2 inch hole handles the overflow of 2200gallons. The water level in the overflow box is elevated a bit (about 1-2" ) but the water volume is not rising, it is handled at that level. <Yes... from a drain/fitting at the bottom, vertical... actual gallonage moved not likely more than 1,500 gph> He operates the pumps with 1 inch intake and outflow, but reduces to 1/2 inch with a 6" LocLine at the 2-1" bulkheads on each tank to increase velocity. <Make that 1,000 gph likely> Oh, each T-4 has only one 1" tube up to a 1" bulkhead. 2 total returns in each tank. 2 pumps up to 2 1" holes. All water flows through a sump. Am I correct that a 1 1/2" hole in bottom of overflow box can handle about 2000gph????? <Mmm, no... not likely> I saw it with my own eyes, I think. This is a hole (sorry) lot more than a 1 1/2" hole, id, drilled in the back of a tank, isn't it? THANK YOU Peter <Would suggest, if folks are interested, actually testing the flow rate, timed with buckets of known volume... Bob Fenner> Re: vertical vs. horizontal bulkhead flow-WOW 11/3/05 Hello Mr. Fenner and thank you so much for the reply, <Welcome> A little foggy on this still. Are you saying that only 1000gph is flowing through that 1 1/2" hole? How possible when the 2 pumps are rated at 1250 @4'? <Twists, turns, induced drag... am not saying a specific gallonage BTW, but encouraging you to actually test> Also, visited Tong's LFS today in same area. Great store, too. <Very nice stores, folks> I asked the owner, Tan, "how much flow would a 1 1/2 id hole at the bottom of an overflow box get. He said 2200-2400gph. Aaahh! help! Would you please help me out here? <No need for help... measure it> Tan also said that a 2" hole would drain over 3000gph. He said the same hole drilled in back of tank drains significantly less water. <Yes> Maybe 1/2 as much. He sets up and plumbs many of the tanks sold there. I know I'm missing something here, question is where? Is the reduction through the bulkhead from 1" to 1/2" LocLine the key here? If yes, what about Tan's numbers? thank you <... a bucket of known volume, a time piece with seconds measure...> I read your site religiously and am truly grateful. Thank you for the privilege of corresponding with a person of your expertise. I will never wash these keys again!! <Heeeee! Let's not go overboard. Better to have larger fittings (for flow, noise reduction, safety margin should there be a clog/slow down in the drainage...). Do please get the simple gear, measure the actual flow and report back to us. Cheers, Bob Fenner>
Overflow Configuration - 01/23/06 My tank capacity is around 970L. For return to the sump I have a corner overflow, with two drilled holes. The height of the return pipe has about 4 in. of stick-up from the bottom. When I first fired up the tank, the noise of the water flowing into this chamber was unbelievable. <<I'm sure>> The guy who built the tank filled this chamber with the same plastic balls used in the wet and dry filter. This has made a big difference. <<This is a common method for reducing noise with bottom filled tanks, but many folks have found the use of a standpipe (like the one described here: http://www.dursostandpipes.com/) to be quieter, and also provide additional benefit such as draining less water to the sump in the event of a power outage.>> On the outlet flow to my sump, instead of the flow being fed direct from 1 outlet, I have placed a PVC pipe, with the ends blanked, across the width of the sump, and drilled holes, so the flow is spread across the filter media. Your thoughts would be appreciated. <<Not sure I completely understand your layout/what you mean when you say "across the filter media," but I think this configuration could be unnecessary if not unwanted. Ideally water pulled from your tank would feed in to a "skimmer chamber" in your sump to be picked up and processed by your skimmer (assuming you have one).>> Alan <<Regards, EricR>> Re: Overflow Configuration II - 01/26/06 Please advise I am correct here. I can remove all the 3 different items I have in the first chamber, and place the skimmer there to receive the raw tank water. The water would then flow over the top in-to chamber 2 passing through the Poly Filter and Carbon. And then to the last chamber for return. <<Correct, but understand I'm basing my opinion solely on generalities and the small amount of info you have provided. Other factors to determine your decisions are what type of setup you have, other/supplemental filtration methods, etc..>> I do not know what you mean by a filter sock and where to place this item. <<Essentially, this is a filter bag placed over the end of the overflow line to the sump. A search re on the net/this site will yield more info.>> If I leave the setup as it is where best would it be to place the carbon and Poly Filter. <<Somewhere where water will flow over/through the media.>> Please note in the main tank I have no live rock only crushed coral on the base. Regards Alan <<Looks like you need to do some research/reading. Let me get you started here: http://www.wetwebmedia.com/marine/setup/filtration/marineFiltr.htm and do follow the indices in blue at the top of the page as well. Regards, EricR>> Re: Overflow Configuration III - 01/28/06 Thank you for all the help you have provided regarding this subject. <<My pleasure>> I have one last thing to ask you. <<Ok>> All my water parameters are within spec, except for the following. I have added a ORP controller, and calibrated the probe using 400 ReDox fluid, the probe is in the sump in the same chamber as my return pump. The controller has been running now for two weeks, I am only able to obtain a ORP reading of around 212 max. Please note I have not yet connected the ozonizer. <<When you do...shoot for an ORP of 330-360.>> The tank is low stocked and the water is crystal clear. Even after a partial water change the ORP has remained about the same. My pH is also measured by a monitor and remains constant at around 8.23. The only area with flow in my sump is at the outlet from my overflow. Would it be ok to do the following. First use the white wool which I have at present to trap the incoming dirt, <<Ok...but be sure to replace weekly.>> under the wool I would place poly filter, and under the Poly-filter I can place the carbon. <<Should be fine.>> Also would adding a larger than required skimmer improve my ORP. <<It could, but likely not significantly.>> Also at present I am not using any carbon or Poly-filter. Alan <<Regards, EricR>> Two Pumps on One Bulkhead? - 03/10/06 Hi Crew, <<Hi Tom>> Yet more questions for the pros as I plan a new 130G reef tank. <<Thanks...EricR here...not so much a "pro" as just wanting/willing to assist...offer up my perspective...>> I want to put a bulkhead in the rear panel of the tank, about 6-8" below the waterline, that will feed a circulation loop into a couple of SeaSwirl returns. <<A great idea.>> I need that bulkhead to feed two external pumps, on closed loop, with a combined pull of about 2000GPH. <<Mmm...ok...this 'could' work, though I would prefer to use a separate bulkhead (1") per pump. These "balancing acts" between two pumps can be problematic.>> I know a 1.5" bulkhead in an overflow is rated around 1600GPH with just a gravity feed, <<And not without problems.>> but do you think a 1.5" bulkhead will adequately feed 2000GPH to a couple of pumps pulling on it? <<Should do, yes...different hydro-dynamics at play here. Most any pump can/will "pull" its flow rate through its rated intake size (not to be confused with "sucking,", the pump must still be properly installed below water level so it is "flooded."). Is this making sense?>> In other words, what is the largest pump you know of that comfortably works with a 1.5" intake bulkhead feeding a closed loop? <<Any of them with an intake port up to 1 1/2" in size.>> A couple of local guys tell me it should be OK, but I would sure like to hear your view. <<Honestly, I don't like the idea...but that's only my/one opinion. I would prefer to match a single pump per bulkhead rather than guessing at how two pumps will perform on one bulkhead, whether one will "starve" the other, etc..>> I'm trying to halve the leak potential, and plumbing hanging off the back of the tank, by going with a single bulkhead to feed the pumps. <<Understood, and I'm not saying it won't work...but I do feel it is "false" economy.>> I'd also like to avoid 2" bulkhead and pipe (it's huge!) if I can. I'd like to run 1.5" PVC from the bulkhead to just above the pumps, then "T" to a couple of 1" pipes into these pumps that have 3/4" intake fittings. <<In theory, the 1 1/2" bulkhead should provide enough water to feed two 3/4" pump intakes. Might I suggest that you give this a try and let it run for a day/couple days under close observation to see how it performs...but leave your options open to add a second bulkhead if necessary. Let me know how it works out. Regards, EricR>> Thanks, Tom Two Pumps on One Bulkhead? II - 03/10/06 Eric, the tank builder cut the hole for a 2" bulkhead while I was debating...takes care of that dilemma. <<Mmm...reckon so...>> So the two pumps will still share a single bulkhead feed but at least it will be a very large one. <<Indeed!>> Related question, what's the absolute best way for me to insure a leak proof & relatively permanent seal on that 2" bulkhead? Silicone sealant on the gasket & threads? I don't plan on ever having to remove it, but I do have to place it against a wall. <<Silicone is the way to go, yes. No need to seal the threads, just run a smear/small bead around the perimeter of the hole under the gasket and tighten...let the silicone cure before adding water. The silicone won't "stick" to the bulkhead fitting, facilitating removal should it ever be necessary, but it will "seat" the gasket nicely providing the leak-proof seal you desire.>> Thanks, Tom <<Always a pleasure, EricR>> <Mmm, better to not have centrifugal pumps "pulling against each other, or other low pressure... RMF> Overflows / Dual Standpipes - 07/09/08 My 90 gallon oceanic has the typical holes for a 1 inch overflow and a 3/4 inch return. If I utilize both for overflow, would each Durso standpipe have to be EXACTLY level with the other to ensure that they both work right, or might one be plumbed a little lower/higher than the other? <<Exactly?...no. But the should be very close unless your return pump will not exceed the capacity of one and the other is just used as a failsafe.>> Any issues you see or I should be aware with respect to the actual rigging up of each standpipe? My reasoning for using both as overflows isn't really to increase flow, but to serve as something of a safety design to minimize the hazard of one drain clogging or otherwise failing. <<Ahh...ok.>> Basically, I'd have the flow set at an amount that the 3/4 could handle alone at say max capacity, that way I'd effectively have each pipe able to support the other's failure. Plus, I was intending to have the small hole run to a refugium, the other to the sump. Thoughts? <<Mmm...if your plan is to have one supply the 'fuge and the other supply the sump, I would install them level/equal and use a return pump that will load both at about HALF capacity combined. This way you supply better flow to both while allowing a buffer for safety.>> Thanks. <<Regards, Eric R.>> Overflows vs. Closed Loop 7/16/05 Good day, <And you> I really should be charged for all the questions I have been asking lately.. so please feel free to let me know where I should deposit the money and how much :-) <We never turn down the cash!> At the moment I wish I never heard of "closed loops", because I am really battling with this. I'm setting up a new 150 Gallon reef tank and have really struggled a lot to sort out the water circulation. For my overflows I have 2 x 1.5inch bulkhead drains (inside diameter). From the sump I have a pump that sends about 1500gph into 2 x SCWD for the return. The overflows seem to handle this quite easily, with no problems so far. The problem I have is with the additional circulation. My original plan was to use an "over the top" configuration for a closed loop, where I don't have to use drilled holes. I'm finding the plumbing for the closed loop very difficult to do, the tank braces and "lips" makes life a little difficult with the "over the top" type setup, I'm finding it very hard to find the proper parts, ball valves etc. and I also have some space problems below my tank.. I'm very frustrated at the moment. <Seems so> So now I'm thinking of drilling an additional 2 x 1.5" holes to cater for the intake of the closed loop. At least this will eliminate the need for "over the top intakes". The one thing I would really like your opinion on is the following - The one place I do have a lot of space in is the "return chamber" in my sump. The total sump size is about 65 gallons, with the return chamber on its own taking up almost half of that. So the one option I was considering is - instead of using the 2 additional holes for a closed loop, rather add them to my current overflows and add the second pump to my sump. This way I will have 3000gph going through my sump/overflows with 2 return pumps and no need for the ball valves and other things I've been struggling with so much on the closed loop. I can split the overflow lines so that only part of the 3000gph goes through my refugium area and skimmer and the rest straight into my pump return chamber, so I'm not much worried about sending too much water through my refugium. Do you think the option of using more overflows with 2 strong return pumps instead of a closed loop for 3000gph be a bad idea? <Mmm, no> Should I rather bite the bullet and continue my struggles to get the closed loop going? <Up to you of course> Is 4 x 1.5" holes too much for a 150Gallon tank ? <Mmm, no> Ps. I will connect the second pump to another 2 x SCWD, so the actual flow rate will be a bit less than 3000gph. <Okay> Any advice will really be appreciated. <Perhaps a good idea to "step away" from this project for a while... Come on out to HI next month and go diving with me... all will seem clearer with a bit of a holiday away. Bob Fenner> Many Thanks Chris Stand integrity, Hole cut-outs around and tightening of bulkheads 7/23/05 Hi guys, and thanks for all of the great advice so far. <Hi Randy, Ali here> I am ready to cut the top of my diy tank stand to accommodate the bulkheads from my tank. I have some questions about how much room I'll need around the bulkheads. Here is a picture of the bulkhead nuts sitting on top of the stand http://home.cfl.rr.com/homebrewed/fish/180-039.jpg . The stand top is about 1" of plywood, then there will also be a 3/4" layer of Styrofoam under the tank, so the bulkhead nuts will be stuck way up inside the part I cut out. Can you picture what I'm talking about? <I think so...> I was planning to start with at least 1" of clearance around the bulkhead nuts. <1 or 2" of clearance would be fine, I doubt cutting the top of the stand to create a 2" of clearance would hurt the integrity of the stand. Additionally, it sounds as if you have a frameless (Lee-Mar style) tank, if this is the case then as long as the tank is fully supported on the corners, then the bulkhead cut-outs won't matter as much, go ahead and start cutting :) > But do I need to get some type of tool on the nuts to tighten them down? I don't think I'll be able to hand tighten them very easily since they'll be surrounded by plywood. <No tools necessary, good ol' fashion hand-tightening them would be fine. Even if it's just using the tips of your fingers to tighten them, drink some Gatorade and flex your muscles - YOU CAN DO IT!> Just make sure the I don't want to cut out any more material than required, since I'm concerned about the tank top bowing in the area around the cutout. <As long as the tank is properly braced at the top, bowing shouldn't be a real concern> Thanks!! Randy <No prob, good luck Randy. - Ali> Overflow Q's Hello Mr.. Fenner- <Anthony Calfo up at bat this time, my friend> Thank you for your prompt response. I have an idea and wanted to have your input on it. I have a 75 gal. tank with one overflow box. In the overflow is a 1" drain and a 3/4" return. In order to maximize the drainage from the tank (IYO) would it be ok to make the two holes in the overflow both drain lines going to the sump and have the return lines go up the back of the tank? <a very good idea in my opinion. More drainage is always advantageous when gravity overflowing (simple and safer). A return up the back is fine and makes no difference). Do look at Friday's posted FAQ on a similar topic that I responded to title slips me right know).> Any potential problems with this design and do you think it is advantageous? Thanks so much! Craig <no problems at all... and improvement indeed. Kindly, Anthony> Overflow Design In some of the FAQ's that talk about overflow's, Anthony mentions having holes drilled from the back as opposed to the bottom for water going to the sump. <correct> Was I misreading this ( it was pretty late and there are INFINITE faq's! ) or is there a reason why this would be better? <yes, my friend. Beyond aesthetics (taking up far less space than those awful noisy and inferior overflow towers with holes drilled in the floor)... there is the advantage/option of building an internal Horizontal overflow box that contains the holes drilled in the back wall. This will skim far more concentrated protein-rich surface water than the same holes fed by a vertical/tower overflow or standpipe. This will improve the performance of you skimmer miraculously and lead to much better water quality. There are diagrams of this in my Book of Coral Propagation. I haven't had updated scans made yet (brother-in-law will draft them for me in AutoCAD soon, I suppose). In the meantime I can fax you some scrappy hand-drawn pics to spare you from buying my book :) > As for a pump used for circulation on a closed loop ( I am assuming the closed loop reference is from tank through pump back to tank ), <exactly correct... a fairly effective and necessary evil for some tanks with SPS corals in particular> if pulling water from the overflow box area poses the problem of too many microbubbles, is it better to just have some intakes drilled in the back about halfway down to the bottom? <it works but that isn't my preference... I have no problems with microbubbles on a well designed system: a diffusive skimmer box or partition in the sump breaks incoming bubbles, baffles before sump pump deflect most others, and all remaining can be off gassed in a small upstream refugium (the best placement IMO) before overflowing to the main tank>> Will there be too much suction there at the entry points, possibly pulling in snails, etc (it would be covered of course)?. <yes... quite dangerous. Requires a course mesh/screen that is accessible> In the faq's, I read something about a 1" hole producing about 300 gph in the overflow. <correct... a realistically quiet and safe volume... although at a noisy and precarious rate (suction) they may actually do over 500GPH> If I want to have a pump that can handle about 1000 gph on the return, what can I do? <that would be four 1" holes bub> Most of the pumps I have seen talk of fittings for 1" PVC. Can I make a larger hole in the overflow from the tank, like 2" that eventually sizes down to 1". Will this help or do I lose the benefits of the bigger hole at the 1" fitting. <correct> Or could I have multiple holes, although the overflow box may not be big enough for this. <Ahah! Exactly the problem with those crappy commercial aquariums with internal overflow towers that claim to be "reef ready"! It's one of my common rants here on the daily FAQs. Hence one of the advantages to a horizontal overflow on the back of the tank. It is explained concisely, I think <G>, in the book passage... fairly obvious in the sketch> I hope I haven't filled my questions quota, <not at all... I really wasn't paying attention as I typed anyway <G> as evidenced by misspellings and clumsy skills as a typist> but I want to make sure the next tank I plan to get is done RIGHT, or at least as close a possible. I have spent a fortune on errors! Thank you. Paul T <best regards, Anthony> Overflow question Hello Crew- <cheers, mate> I am writing because I read tonight's daily questions and answers and learned a lot about building my own overflows. I have a 55 gallon tank that I would like to have drilled. My question is if I am drilling the back top of the tank do I have to make a dam or box to cover it? <not necessary... just an enhancement. It concentrates proteins by stretching the overflowing water collected (proteins concentrate in the surface-most layer of water)> Can I just have the tank drilled and the hole covered with screen? <absolutely! You will not even notice or appreciate the difference/benefit of an internal horizontal overflow if your tank load is very light or you can otherwise aggressively control nutrient levels (wicked skimmer, large water changes, careful feeding, etc)> I guess I just want to know if the only reason I would need to build a dam would be to keep fish or coral sucked up into it. Can it be done without safely? <either way is fine... the course screen cones on the bulkheads are good for deflecting macro-organisms> Thanks! Your site rocks and I have Bob's and Anthony's books. I have learned a lot. Josh <thanks kindly. Rock on my brother :) Anthony> Overflow Prefilter Greetings, <<Hi, Don this afternoon>> Always a pleasure to read this web-site. It is great to see that you have some more "Pros" other than Steven helping out. yuk yuk yuk! <<uh, Thanks, I think, Oh, Pro, now I get it;)>> I have a overflow box that has a coarse sponge pre-filter. I typically rinse this about once a week. It always has some decaying food and mulm attached to it. I think that it needs to be cleaned more frequently maybe even daily. For a lot of reasons like travel and procrastination, daily cleaning of this pre-filter won't happen. What are my options? The overflow feeds into the sump where I have a protein skimmer. Should I remove the coarse pre-filter to provide more "raw" water to the protein skimmer? <<Recommended course. See here for more http://www.wetwebmedia.com/marmechf1.htm>> Knowing that food gets caught on the pre-filter....will the protein skimmer collect the food or will the decaying food just get moved to the next coarse pre-filter just before before the return pump? <<Ahh, maintenance never stops eh? You can try a micron bag on the end of the overflow into the sump to catch crud, but it too will require regular (every other day if not every day) maintenance. Maybe best to go without either and try to get to the other filter more often. >> Also, I would like to drill the 40 gal glass tank for a 1" overflow.<<Just an observation as I don't know what your intentions are, but maybe two holes? easier now than breaking it down, again, later>> My understanding for this procedure if you do not want to remove everything from the tank and there is adequate space to drill the hole is: 1. Drain the tank well below the overflow - add filtration and heat to the lowered water 2. Clean the inside surface where the overflow box will be mounted 3. Silicone the overflow box 8"W X 5"H X 3"D in place 4. Drill the hole using the overflow box to catch debris on the inside of the tank 5. Install the bulkhead in the hole ensure that the bulkhead id is at least 1" 6. Attach plumbing to the bulkhead to the sump 7. Ensure that the silicon is dry (6-8 hrs) <<I would wait 24 for any silicon job>> 8. Re-fill the tank and restore heat and filtration in the sump. Where is the best place to get the glass bit and lubricant? <<I used water>> Is the above too risky? I do have a 20 gal tank that would be ready in case of a serious (i.e. crack) situation.<<While the above may work and for others successfully, I would not advise to drill anything but an empty (completely) tank. I got the first hole drilled in a 20H for a refugium and about half way through the second, BOOM, well, lets say I then waited for the glass shop to get a replacement cut for me. I got a bit locally, but there are many web sites selling them. Google search? Also, see if you have a marine society in your area, they may have some you can rent/borrow>> Again, thanks for the help. << Happy glass drilling Don>> Kinzie DIY overflow box Real quick one here. I have 2 1.5" bulkheads on the back of my tank, and about 3" or so from the top of tank. I have added some 90 degree elbows to function as overflows and surface skim. I got to thinking tonight. I have a lot of extra acrylic from my sump I made, and thought...maybe I could make some overflow type boxes to put around the bulkheads. What do you think? can this be done? Main problem I'm having is how to attach around the bulkheads so flow only comes over the top of overflow. any suggestions? << Hi Bryan, Oh YEAH this is a good idea. Make a slotted dam/weir along the back wall deep enough to accommodate the bulkheads, elbows. Quite beneficial. See here for ideas http://www.wetwebmedia.com/plumbingmarart.htm. Note on the diagram that you can extend the bottom of the internal skimmer box and make a shelf for coral, etc to help hide the box. You say 'around the bulkhead'. You want to skim as much surface as possible. A small 4-5" box around each bulkhead is not going to do nearly as much good as one the length of the tank. Gonna make a leap here, the tank is also acrylic? You can try silicon, may not hold acrylic. If not, me thinks the next step is 'gluing' with acrylic solvent.>> Thanks Bryan <<My pleasure, Don>> Re: DIY bulkhead overflow HI guys, Don thanks for the support about my bulkhead overflow idea. <<My pleasure, glad you were able to follow the ramblings of an old man>> I had thought about just placing a box around each bulkhead, but then Don made comment, and I remember Anthony touched on in his book, that an overflow the length of the back of the tank is a lot more efficient. So...I did some measuring today to start making plans. This is what I have so far. I have a glass 75 gallon tank w/ 2 1.5" bulkheads about 3" from the top of tank on each end. I want to make this out of acrylic. The overflow about 44" across to each side, roughly 5.5" tall/high and the top lip of overflow about 3/4" or so from the top of the tank. This is where I need a little help. How wide/ deep should this thing be? <<Obviously, enough to handle the elbows. 4x4 or 5x5 I would think. Unless I am missing something here>>I remember my CPR siphon overflow and even though it hung on the tank the overflow part was probably 1/2" or so wide where the water flow was. So I was thinking between 1/2" and an 1". This is the big question. How to attach to the tank? Right now I'm thinking about adding/connecting 1/4" to 1/2" edges/strips to the back of the overflow that I described above, so that now, I only have to silicone 3 edges to the tank (2 sides and the bottom)...(hope you can follow) instead of a whole big piece the length of the tank. How does this sound? << Sorry Bryan, can't say I have ever read/heard positive thoughts about using silicon to attach acrylic to glass. I would think you would be better off using glass. Or, figure a way to support the acrylic overflow with brackets>> any suggestions/comments? See any problems or change anything? Thanks Bryan <<Sorry I didn't have better news, Don>> P.S Craig, the elbows on my bulkheads worked. I filled the tank like you said and everything leveled out. sump and main. Thanks for your help. <<Ain't he something :)>> Re: DIY bulkhead overflow (part III) Don thanks for quick response about my DIY acrylic overflow for my bulkheads. <<Glad to help>> Let me run a couple more things by you. <Walk please, I'm an old man and can't keep up>> I forgot to add that I 'm not going to use the 90 degree elbows on the bulkheads with my overflow. <<OK>> I thought that this would make it not as wide/big. Have the bulkheads open or bare and let the flow go over the acrylic overflow and down the bulkheads to the sump. <<Ahh, good>> (this way I can make it say 1/2" to 1" wide and won't take up a lot of room or be that noticeable.) Does this sound fine or are there any problems you foresee? <<IMO it is better to over design than under. Last thing I want to do is tear down/redo stuff. Experimentation is good though too. Let me know how this works for you>> I was a little disappointed that people don't have luck with glass to acrylic silicone contacts, sooooo, back to the drawing board. OK I'm at the drawing board, <<Quick Trip!>> what about this? Add or put brackets to the overflow so that its main support is by the brackets on the tank, then use silicone around the edges of the overflow so that flow does not seep in around the sides (only over the top) and that way if in the event of a power outage there is no flooding of water seeping through the sides of overflow down the bulkheads and into the sump. Does this sound like it might work? <<Again, hate to be the devil's advocate, but remember Murphy? Well, when the thing misfires, if it ever does, it is gonna be while you are asleep or at work. At least that is my luck :(>> Oh yea, last thing. I posted this overflow idea on reef central and someone thought I was crazy for wanting to do this b/c I should be getting enough surface skimming from my bulkheads and elbows, what do you think? <<To each his/her own. Different folks, different experiences. Maybe you should try the open bulkheads first and see if that works for you. Make sure to screen for livestock benefit. Add the overflow later if the open bulkheads are not to your liking>>Thanks Bryan <<Forge on, and let me know how it comes out, what you decide. Don>> Re: Skimmer Box / Overflow design Hello WWM Crew! I'm pondering an approach to get water out of my tank and into the sump without using a siphon-based design and without drilling the bottom of my tank. I've attached a design in both PDF and JPEG format and I'm hoping you can give it a sanity check. The goals are to achieve a good flow and to minimize noise. A couple of points I'm wondering about are: - Is the (downward pointing) elbow in the skimmer box necessary, desirable, or irrelevant? (I borrowed it from the Durso design without really knowing why) <It's not necessary, but reduces sucking air sounds at water surface, esp. if the skimmer box has enough capacity to feed bulkhead flow. Box size should be large enough to accommodate flow, plus. The deeper in the box the bulkhead is placed, the less this is needed. They sell bulkheads with screened intakes which could/should replace the filter/screen/light grid idea which will cause problems. Install a drip plate in the sump if you want this.> - Is the tee with vented cap necessary, desirable, or irrelevant? <Absolutely, this is where the venting/air will come from with a submerged bulkhead skimmer box/intake, so the water can drain into the sump.> - Should the tee w/ cap extend above the top of the skimmer box teeth? <It should rise above tank water level/skimmer box teeth by a few inches or water will drain out of the vent.....> - Would fixing an air valve into the cap to allow adjustment of airflow be a good idea? <Nope, you want a 1/4" hole that will allow air to enter and exit at will. The air must pass through this hole to equalize the pressure in the drain.> - Should the outtake, tee, & drain pipe be the same size or should there be a reduction/enlargement somewhere? <These can all be the same size, as long as they are sized for the desired flow rate.> - Is having a pre-filter here a good idea? I like the idea of keeping gross objects out of the sump & drain line with the understanding that the pad or piece of foam will need to be rinsed frequently. <Try a micron bag or drip plate in the sump instead.> - If so, is a simple piece of light diffuser (egg crate) resting on small ledges inside the box a reasonable choice for supporting the filter media? Is this material generally considered to be aquarium-safe? <Yep, as above.> - Assuming a bulkhead sized for a 1.25" opening, how deep would you make the skimmer box and where in relation to the top of the box (waterline?) would you make the centerline of the outtake pipe? <Many make these full tank depth. The depth is related to overall skimmer box size/capacity to feed the bulkhead water without sucking air at water surface or outpacing the box capacity. This is also true of bulkhead depth. The large the box and deeper the bulkhead, the better. Some skimmer boxes run the full length of the tank. I would prefer a deeper box and bulkhead near the bottom. In the event of power outages, the water will stop siphoning at the bottom of the box teeth. You don't supply tank size or flow rate, just oversize box and plumbing to accommodate needed flow rate. Shop siphon type overflows to see what plumbing sizes/capacities they use.> Well, that's it. Any other thoughts or comments you might have are highly welcome. Thanks as always, Tim <Looks good Tim, have fun! Craig> Overflow modification Hello again... <cheers> I have a question about one of the FAQ's I read in regards to the overflow described in Anthony's book. The person wrote that he wanted to set his tank up without the overflow box on the upper back wall, just have the bulkhead holes with screens over them. My question is, won't this keep the water level too low? <Well... it could be too low for aesthetics IMO and it would at that point have none of the benefits of the horizontal overflow described in my book. It would simply be a traditional bulkhead application. Those bulkheads could simply have an elbow with a screen strainer turned upwards to raise the water level (and in fact give control over changing that level by swiveling the elbows higher or lower... some advantage there)> If you have 4 1.5" holes about 3" to 4" from the top to the center of the hole, the water level will never climb much higher than that, right? <correct if screen only are used... but elbows with screens can correct that (raise water level)> If you do fabricate one of these overflows, I assume then that it should only touch the back wall, <capturing the bulkheads yes> hence your reference in my prior email to it being almost 48" in length. <indeed.. thinning the overflow water and improving proteins collected> Then I don't have to worry about the tank bowing and the overflow separating from one of the walls, correct? <correct... the flow of the long horizontal overflow is a tremendous support... prevents bowing> Thank you! <Best regards, Anthony> - Overflow Design - Hello Bob! - Please forgive the intrusion, I do normally post my questions to the "Crew" in general. <Well, it's JasonC here this time... hope you don't mind.> I'm looking for help with designing the overflow/s for my aquarium. I'm in the process of establishing a new reef setup (seam rupture on previous 14 yr. old tank) that will be installed in a wall and viewed from two sides. I awaiting the arrival of a 375 gal. acrylic aquarium from Tenecor (ships next week) which I ordered sans overflows. I did this because my plan was (is) to utilize some type of "external" overflow system. The dimensions of the tank are 96x30x30x3/4, of course the overflows will be installed on the end, or ends. My idea is to drill a series of holes at the top two inches of the tank to function like the teeth on an internal overflow, and attach the overflow box (drilled for bulkheads - 2 x 2") to the outside of the tank. If this sounds feasible to you, what would your recommendation be for the size of the skimmer holes? <It's kind of a sketchy plan... you will need to 'attach' the overflow box just as if it were part of the tank - with acrylic cement, otherwise it's going to fall off... you should consider just having this built onto the tank.> How many and how far apart (without compromising structural integrity)? <I'd go with 1/4-3/8" holes, as many as you want, not too close to any seam or edge.> What's the max flow I could expect through these holes? <Depends on how many you drill, but the number would be pretty high to match your expectations... perhaps 20-30 per end.> How big should the skimmer box be to handle the flow (say - max 2000gph)? <Well... drilling small holes isn't going to get you this high a flow rate unless you drill a lot of them - with standard bulkheads you need two to three 1.5" holes to reach a flow rate that high. Additionally, flowing this much water in and out of the tank is going to be very noisy... I would consider lowering the recycle rate in favor of some strong water movement within the tank via strong powerheads like the Tunze Stream Pumps.> Thickness of the acrylic? <I assume you mean for the overflow box... 1/4" would work - doesn't need to be heavy duty because it won't be holding much water at any given time. And... as I mentioned before, you will have to bond this to the tank with acrylic cement.> Have I missed anything >:-) <How about three large holes with bulkheads and strainers, plumbed directly to your sump?> If you think this is a bad idea my second choice would be to utilize an overflow design like Anthony describes in his coral propagation book. <I'd rather see you do this.> Saying that, what would be the measurements of this design? <The same as the width of your tank.> I would want to keep the dimensions to a minimum for aesthetic purposes. <Again, and I think we've discussed this design before... you should really be working with the people at Tenecor to help you realize this design rather than trying to augment the tank after its arrival. Add a couple of inches the length and this portion will be hidden behind the wall - this way you can have either a standard overflow on each end or perhaps something similar to Anthony's design. Any attempt to attach something to the side of your tank is ill-advised - if you have little or no experience with acrylic adhesives, you could potentially ruin your tank if you are not careful. If you've never worked with acrylic before, it's actually not that easy to make a five-sided box that doesn't leak - and you're talking about a four-sided box that needs to be attached to the tank.> If you have other ideas please feel free to expound. <My thinking here is that you should just keep it simple - drill two 1-1.5" holes on both ends - add bulkheads with strainers, and plumb these to your filtration system.> Any assistance will be greatly appreciated. Respectfully, Eric <Cheers, J -- > Overflowing With Ideas... (Prefab Overflows) I have constructed a tank and drilled the holes in the bottom for a wet/dry filter but cannot find a supplier for the overflow. Do you know of a company that sells the overflow by itself or in a kit with some other plumbing parts? Thanks Jerod <Yes, actually. There is a company called "wetdryfilter.com", and the owner, a friendly hobbyist named Christian, can custom fabricate overflow boxes to your tank's specific parameters. He's honest, and does good work. You can find designs on how to construct your own standpipe unit by searching on the net for the "Durso standpipe", or you can purchase one from the man himself...Good luck! Regards, Scott F> |
|

|
Features: |
|
| Featured Sponsors: |
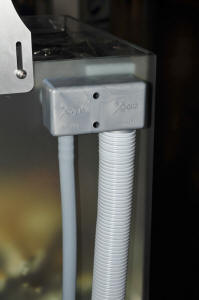
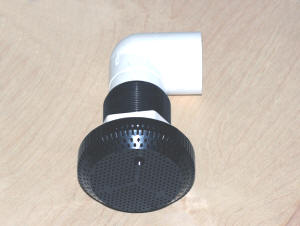
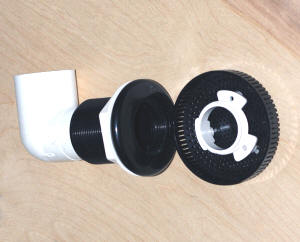
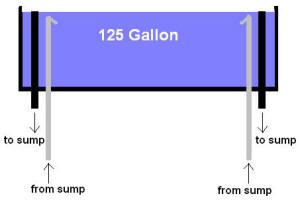